こちらは「openexr」(Pythonライブラリ)のサンプルコードについての記事となっております。
目次
基本情報 … Basic Information
openexrは、High Dynamic Range (HDR) イメージを表現するためのフォーマットである OpenEXR の読み書きに対応するPythonのライブラリです。OpenEXRファイルは、複数のチャンネルを持ち、浮動小数点数で表現されるため、非常に高いビット深度を持つことができます。また、HDRイメージ処理を行う際には、画像の書き出し時に32ビット浮動小数点数のデータを出力できることが非常に重要です。
openexrでは、OpenEXR形式のイメージを読み込んだり、書き出したりすることができます。また、イメージに対して基本的な処理を行うための関数も提供されています。さらに、複数のチャンネルを扱うためのクラスも用意されており、チャンネルごとに異なる処理を実行することができます。これにより、HDRイメージの各チャンネルに対して、個別にトーンマッピングやトーンカーブの調整を行うことができます。
インストール方法(pip)
>>> pip install OpenEXRインストール方法(conda)
>>> conda install -c conda-forge openexr「openexr」をセットアップする方法 … How to Setup openexr
・Python:3.6.13
・numpy:1.19.5
・opencv-python:4.6.0.66
・matplotlib:3.3.4
・OpenEXR:1.3.2
・Anaconda:2022.10
・Visual Studio Code: 1.48.2
手順
>>> pip install "SAMPLE\OpenEXR-1.3.2-cp36-cp36m-win_amd64.whl"
>>> pip install numpy
>>> pip install matplotlib
>>> pip install opencv-python==4.6.0.66
サンプルコード … Sample Code
001 画像の読み込み, 画像の表示, 画像の書き込み, 画像の保存 … Read the Image, Show the Image, Save/Write the Image
1.「openexr」(Pythonライブラリ)で「EXR」ファイルを読み込む
2.「matplotlib」(Pythonライブラリ)で「EXR」画像を表示する
3.「openexr」(Pythonライブラリ)で「EXR」ファイルを書き込む
### Public Library ############################################################
import array
import OpenEXR
import Imath
import numpy as np
import matplotlib.pyplot as plt
###############################################################################
### OpenEXR Read image
img = OpenEXR.InputFile("SAMPLE/monkey.exr")
### HALF: float16
### FLOAT: float32
### UINT: uint32
print(img) ### InputFile represented
print(img.header())
### {
### 'Camera': b'Camera',
### 'Date': b'2022/01/01 00:00:00',
### 'File': b'C:\\sample.blend',
### 'Frame': b'001',
### 'RenderTime': b'00:00.01',
### 'Scene': b'Scene',
### 'Time': b'00:00:00:01',
### 'channels': {
### 'A': FLOAT (1, 1),
### 'B': FLOAT (1, 1),
### 'G': FLOAT (1, 1),
### 'R': FLOAT (1, 1)},
### 'compression': ZIP_COMPRESSION,
### 'cycles.View Layer.render_time': b'00:00.01',
### 'cycles.View Layer.samples': b'128',
### 'cycles.View Layer.synchronization_time': b'00:00.01',
### 'cycles.View Layer.total_time': b'00:00.01',
### 'dataWindow': (0, 0) - (1079, 1079),
### 'displayWindow': (0, 0) - (1079, 1079),
### 'lineOrder': INCREASING_Y,
### 'pixelAspectRatio': 1.0,
### 'screenWindowCenter': (0.0, 0.0),
### 'screenWindowWidth': 1.0
### }
### OpenEXR Header Information
dw = img.header()['dataWindow']
size = (dw.max.x - dw.min.x + 1, dw.max.y - dw.min.y + 1)
### OpenEXR Image Information by Channel
pt = Imath.PixelType(Imath.PixelType.FLOAT)
img_R, img_G, img_B, img_A = img.channels('RGBA', pt)
### img_R = img.channel('R', pt)
### img_G = img.channel('G', pt)
### img_B = img.channel('B', pt)
### img_A = img.channel('B', pt)
### Array Information by Channel
arr_R = array.array('f', img_R)
arr_G = array.array('f', img_G)
arr_B = array.array('f', img_B)
arr_A = array.array('f', img_A)
### Numpy Array Information by Channel
ndarr_R = np.array(arr_R, dtype="float32")
ndarr_G = np.array(arr_G, dtype="float32")
ndarr_B = np.array(arr_B, dtype="float32")
ndarr_A = np.array(arr_A, dtype="float32")
### Numpy Array Information by Channels
ndarr_RGBA = np.array([[r, g, b, a] for r, g, b, a in zip(ndarr_R, ndarr_G, ndarr_B, ndarr_A)], dtype="float32")
ndarr_RGBA = ndarr_RGBA.reshape(size[1], size[0], 4)
print(type(ndarr_RGBA)) ### <class 'numpy.ndarray'>
print(ndarr_RGBA.dtype) ### float32
print(ndarr_RGBA.size) ### 4665600
print(ndarr_RGBA.shape) ### (1080, 1080, 4)
print(arr_R[0]) ### 0.9512653946876526
print(arr_G[0]) ### 0.9512653946876526
print(arr_B[0]) ### 0.9512653946876526
print(arr_A[0]) ### 1.0
print(ndarr_R[0]) ### 0.9512654
print(ndarr_G[0]) ### 0.9512654
print(ndarr_B[0]) ### 0.9512654
print(ndarr_A[0]) ### 1.0
print(ndarr_RGBA[0,0]) ### [0.9512654 0.9512654 0.9512654 1. ]
###############################################################################
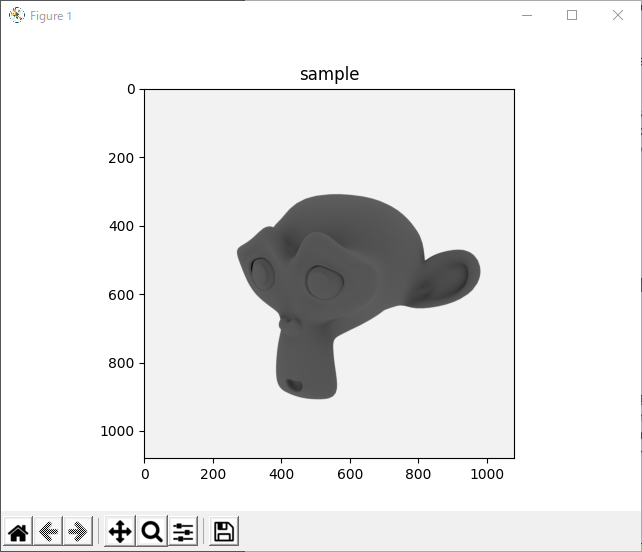
### Matplotlib Show Image
plt.imshow(ndarr_RGBA)
plt.title('sample')
plt.show()
###############################################################################
### OpenEXR Save Image
outputImg = OpenEXR.OutputFile("SAMPLE/openexr.exr", img.header())
#outputImg.writePixels({'R': arr_R.tostring(), 'G': arr_G.tostring(), 'B': arr_B.tostring(), 'A': arr_A.tostring()})
outputImg.writePixels({'R': ndarr_R.tostring(), 'G': ndarr_G.tostring(), 'B': ndarr_B.tostring(), 'A': ndarr_A.tostring()})
outputImg.close()
###############################################################################Pythonを使用してOpenEXRファイルを読み込み、Matplotlibを使用して画像を表示し、OpenEXRファイルを保存する方法を学びました。
まず、OpenEXRファイルを読み込みます。その後、画像のピクセル情報を配列に格納し、NumPy配列に変換します。最後に、Matplotlibを使用して画像を表示します。
また、OpenEXRファイルを保存することもできます。出力する画像のピクセル情報を含む配列を作成し、OutputFileオブジェクトを使用してOpenEXRファイルに書き込みます。
画像の表示
002 画像の読み込み, 画像の表示 … Read and Show the Image
import OpenEXR
import Imath
import numpy as np
import matplotlib.pyplot as plt

def main():

    # 変数の定義
    input_path = "SAMPLE/monkey.exr"

    # 画像の読み込み
    exr_file = OpenEXR.InputFile(input_path)
    dw = exr_file.header()['dataWindow']
    size = (dw.max.x - dw.min.x + 1, dw.max.y - dw.min.y + 1)

    FLOAT = Imath.PixelType(Imath.PixelType.FLOAT)
    redstr = exr_file.channel('R', FLOAT)
    greenstr = exr_file.channel('G', FLOAT)
    bluestr = exr_file.channel('B', FLOAT)

    red = np.frombuffer(redstr, dtype=np.float32)
    green = np.frombuffer(greenstr, dtype=np.float32)
    blue = np.frombuffer(bluestr, dtype=np.float32)

    image = np.zeros((size[1], size[0], 3), dtype=np.float32)
    image[:, :, 0] = red.reshape(size[1], size[0])
    image[:, :, 1] = green.reshape(size[1], size[0])
    image[:, :, 2] = blue.reshape(size[1], size[0])

    # 画像が読み込めなかった場合の例外処理
    if image is None:
        print('Failed to load image')
        return

    # 画像の調整
    image = np.power(image, 1.0/2.2) # ガンマ補正

    # 画像の表示
    plt.imshow(image)
    plt.show()

if __name__ == '__main__':
main()このPythonプログラムは、OpenEXRファイル形式から画像を読み込み、matplotlibを使用して表示するものです。プログラムでは、Imathおよびnumpyライブラリを使用して画像を処理し、ガンマ補正を適用してから表示しています。
プログラムの概要:
- 必要なライブラリをインポートする。
- 読み込む画像のパスを指定する。
- 画像をOpenEXRファイルとして読み込む。
- 読み込んだ画像をnumpy配列に変換する。
- 画像を調整するために、ガンマ補正を適用する。
- 画像をmatplotlibを使用して表示する。
003 画像の読み込み, 画像の書き出し, 画像の保存 … Read and Save the Image
import OpenEXR
import Imath
import numpy as np

def main():

    # 変数の定義
    input_path = "SAMPLE/monkey.exr"
    output_path = "SAMPLE/monkeyCopy.exr"

    # 画像の読み込み
    image_file = OpenEXR.InputFile(input_path)
    header = image_file.header()
    dw = header['dataWindow']
    size = (dw.max.x - dw.min.x + 1, dw.max.y - dw.min.y + 1)

    # RGBチャンネルの読み込み
    FLOAT = Imath.PixelType(Imath.PixelType.FLOAT)
    redstr = image_file.channel('R', FLOAT)
    greenstr = image_file.channel('G', FLOAT)
    bluestr = image_file.channel('B', FLOAT)

    r = np.fromstring(redstr, dtype=np.float32)
    g = np.fromstring(greenstr, dtype=np.float32)
    b = np.fromstring(bluestr, dtype=np.float32)
    r.shape = g.shape = b.shape = (size[1], size[0])

    # 画像の書き出し, 画像の保存
    output_file = OpenEXR.OutputFile(output_path, header)
    output_file.writePixels({'R': r.tobytes(), 'G': g.tobytes(), 'B': b.tobytes()})
    output_file.close()
    print(f"Saved image to {output_path}")

if __name__ == '__main__':
main()上記のPythonプログラムは、OpenEXRライブラリを使用して、EXR形式の画像ファイルを読み込み、コピーするためのプログラムです。
プログラムは、変数の定義、画像の読み込み、RGBチャンネルの読み込み、画像の書き出しの4つのステップに分かれています。
まず、変数input_pathとoutput_pathを定義します。input_pathは読み込むファイルのパスであり、output_pathは書き出すファイルのパスです。
次に、OpenEXRライブラリを使用して、input_pathで指定されたファイルを読み込み、画像サイズを取得します。取得したサイズを使用して、RGBチャンネルのデータを読み込みます。
RGBチャンネルのデータを読み込んだら、NumPy配列に変換します。次に、出力ファイルを作成し、NumPy配列をバイト列に変換して書き出します。最後に、出力ファイルをクローズします。
004 データの生成 … Create the Image
import OpenEXR
import Imath
import numpy as np
import cv2

def show_save_image(image, window_name, file_name):

    # 画像の表示
    cv2.imshow(window_name, image)
    cv2.waitKey(0)
    cv2.destroyAllWindows()

    # 画像の書き出し, 画像の保存
    header = OpenEXR.Header(image.shape[1], image.shape[0])
    header['channels'] = {'R': Imath.Channel(Imath.PixelType(Imath.PixelType.FLOAT)),
                        'G': Imath.Channel(Imath.PixelType(Imath.PixelType.FLOAT)),
                        'B': Imath.Channel(Imath.PixelType(Imath.PixelType.FLOAT))}
    output = OpenEXR.OutputFile(file_name, header)
    output.writePixels({'R': image[:,:,2].astype(np.float32).tostring(),
                        'G': image[:,:,1].astype(np.float32).tostring(),
                        'B': image[:,:,0].astype(np.float32).tostring()})

def main():
    # 変数の定義
    output_path_white = "SAMPLE/whiteImage.exr"
    output_path_black = "SAMPLE/blackImage.exr"
    output_path_blue = "SAMPLE/blueImage.exr"
    output_path_green = "SAMPLE/greenImage.exr"
    output_path_red = "SAMPLE/redImage.exr"

    # 画像となるデータを生成する
    image = np.zeros((400, 400, 3), np.float32)

    image[:, :] = [1.0, 1.0, 1.0]
    show_save_image(image, 'White Image', output_path_white)

    image[:, :] = [0.0, 0.0, 0.0]
    show_save_image(image, 'Black Image', output_path_black)

    image[:, :] = [1.0, 0.0, 0.0]
    show_save_image(image, 'Blue Image', output_path_blue)

    image[:, :] = [0.0, 1.0, 0.0]
    show_save_image(image, 'Green Image', output_path_green)

    image[:, :] = [0.0, 0.0, 1.0]
    show_save_image(image, 'Red Image', output_path_red)

if __name__ == '__main__':
main()このプログラムは、OpenEXRを使用して、白、黒、赤、緑、青の画像を生成し、それらを書き出す方法を示しています。プログラムは、show_save_image()関数で画像を表示して保存します。この関数は、画像をOpenEXR形式で保存するために使用されます。
このプログラムでは、main()関数が呼び出されます。この関数は、5つの異なる画像を生成し、それらをそれぞれ異なるファイルに保存します。このプログラムの実行には、NumPy、OpenEXR、Imath、cv2の4つのライブラリが必要です。
005 データの生成 … Create the Image
import OpenEXR
import Imath
import numpy as np
import matplotlib.pyplot as plt

def show_save_image(image, window_name, file_name):

    # 画像の表示
    plt.imshow(image)
    plt.title(window_name)
    plt.axis('off')
    plt.show()

    # 画像の書き出し, 画像の保存
    header = OpenEXR.Header(image.shape[1], image.shape[0])
    header['channels'] = {'R': Imath.Channel(Imath.PixelType(Imath.PixelType.FLOAT)),
                        'G': Imath.Channel(Imath.PixelType(Imath.PixelType.FLOAT)),
                        'B': Imath.Channel(Imath.PixelType(Imath.PixelType.FLOAT))}
    output = OpenEXR.OutputFile(file_name, header)
    output.writePixels({'R': image[:,:,2].astype(np.float32).tostring(),
                        'G': image[:,:,1].astype(np.float32).tostring(),
                        'B': image[:,:,0].astype(np.float32).tostring()})

def main():
    # 変数の定義
    output_path_white = "SAMPLE/whiteImage.exr"
    output_path_black = "SAMPLE/blackImage.exr"
    output_path_blue = "SAMPLE/blueImage.exr"
    output_path_green = "SAMPLE/greenImage.exr"
    output_path_red = "SAMPLE/redImage.exr"

    # 画像となるデータを生成する
    image = np.zeros((400, 400, 3), np.float32)

    image[:, :] = [1.0, 1.0, 1.0]
    show_save_image(image, 'White Image', output_path_white)

    image[:, :] = [0.0, 0.0, 0.0]
    show_save_image(image, 'Black Image', output_path_black)

    image[:, :] = [1.0, 0.0, 0.0]
    show_save_image(image, 'Blue Image', output_path_blue)

    image[:, :] = [0.0, 1.0, 0.0]
    show_save_image(image, 'Green Image', output_path_green)

    image[:, :] = [0.0, 0.0, 1.0]
    show_save_image(image, 'Red Image', output_path_red)

if __name__ == '__main__':
main()このプログラムは、OpenEXRとImathを使用して、白、黒、赤、緑、青の画像を作成し、それらをEXR形式で保存するものです。
このプログラムでは、show_save_image()関数が定義されています。この関数は、画像をmatplotlibを使用して表示し、OpenEXRを使用してEXR形式で保存します。
メイン関数では、変数を定義し、それぞれの色の画像を作成して保存しています。画像はnumpyを使用して作成されています。
参考リンク … Reference Link