こちらは「tkinter」(Pythonライブラリ)のサンプルコードについての記事となっております。
目次
- 基本情報 … Basic Information
- サンプルコード … Sample Code
- 001 GUIウィンドウの構成, GUIウィンドウの表示 … Structure the GUI Window, Show the GUI Window
- 002 GUIウィンドウ上にボタンの追加 … Add Buttons to the GUI Window
- 003 GUIウィンドウ上にボタンの追加 … Add Buttons to the GUI Window
- 004 GUIウィンドウ上にボタンの追加 … Add Buttons to the GUI Window
- 005 GUIウィンドウ上にボタンの追加 … Add Buttons to the GUI Window
- 006 GUIウィンドウ上にボタンの追加 … Add Buttons to the GUI Window
- 007 GUIウィンドウ上にボタンの追加 … Add Buttons to the GUI Window
- 008 GUIウィンドウ上にボタンの追加 … Add Buttons to the GUI Window
- 009 GUIウィンドウ上にチェックボックス/チェックボタンの追加 … Add Check Boxes / Check Buttons to the GUI Window
- 010 GUIウィンドウ上に入力フォーム/テキストボックスの追加 … Add Text Boxes to the GUI Window
- 011 GUIウィンドウ上にラベルの追加 … Add Labels to the GUI Window
- 012 GUIウィンドウ上のラジオボタンの追加 … Add Radio Buttons to the GUI Window
- 013 GUIウィンドウ上の参照ボタンの追加/GUIウィンドウ上でパスを参照する(File) … Add Reference Buttons to the GUI Window
- 013 GUIウィンドウ上の参照ボタンの追加/GUIウィンドウ上でパスを参照する(Folder/Directory) … Add Reference Buttons to the GUI Window
- 参考リンク … Reference Link
基本情報 … Basic Information
「tkinter」は、Pythonの標準ライブラリの1つで、グラフィカルユーザーインターフェース(GUI)を作成するためのツールキットです。Tkinterは、Tcl/Tkというライブラリに基づいており、Tcl/TkのGUIをPythonで利用できるようになっています。
Tkinterを使うと、ウィンドウやボタン、ラベル、テキストボックスなどのGUIコンポーネントを作成できます。また、これらのコンポーネントのイベント処理やレイアウトの設定などをプログラムで指定することができます。
サンプルコード … Sample Code
001 GUIウィンドウの構成, GUIウィンドウの表示 … Structure the GUI Window, Show the GUI Window
from tkinter import *

root = Tk()                     # Tkinter Window
root.title("sample_v1.py")      # Window Title
root.geometry("400x300")        # Window Size - Width / Height
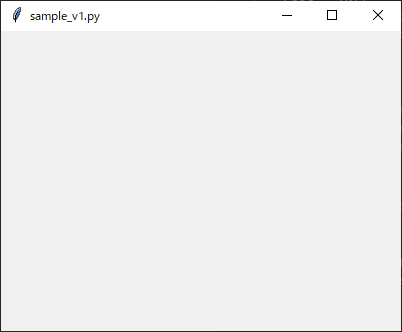
root.mainloop() # Window DisplayこのPythonプログラムは、Tkinterを使用して簡単なGUIウィンドウを作成する方法を示しています。プログラムは、Tkinterをインポートして、ウィンドウを作成し、タイトルとサイズを設定し、最後にウィンドウを表示します。
このプログラムは、400×300ピクセルのサイズの「sample_v1.py」というタイトルのウィンドウを作成します。
GUIウィンドウの表示
002 GUIウィンドウ上にボタンの追加 … Add Buttons to the GUI Window
from tkinter import *

root = Tk()                                 # Tkinter Window
root.title("sample_v2.py")                  # Window Title
root.geometry("400x300")                    # Window Size - Width / Height

tk_button_1 = Button(root, text="button 1") # Button Initilization
tk_button_2 = Button(root, text="button 2") # Button Initilization
tk_button_3 = Button(root, text="button 3") # Button Initilization

tk_button_1.pack()                          # Button Configuration
tk_button_2.pack()                          # Button Configuration
tk_button_3.pack()                          # Button Configuration
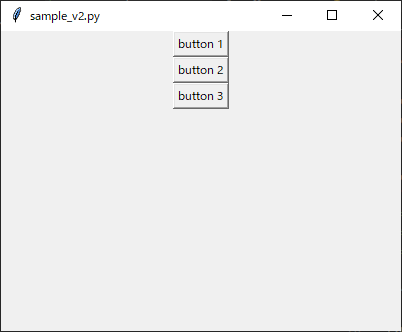
root.mainloop() # Window Display上記のPythonプログラムは、Tkinterを使用してGUIを作成する方法を示しています。このプログラムには、3つのボタンが含まれており、それぞれに “button 1″、”button 2″、”button 3″というテキストが表示されます。
GUIウィンドウの表示
003 GUIウィンドウ上にボタンの追加 … Add Buttons to the GUI Window
from tkinter import *

root = Tk()                                 # Tkinter Window
root.title("sample_v3.py")                  # Window Title
root.geometry("400x300")                    # Window Size - Width / Height

tk_button_1 = Button(root, text="button 1") # Button Initilization
tk_button_2 = Button(root, text="button 2") # Button Initilization
tk_button_3 = Button(root, text="button 3") # Button Initilization
tk_button_4 = Button(root, text="button 4") # Button Initilization

tk_button_1.pack(side=TOP)                  # Button Configuration - Top
tk_button_2.pack(side=LEFT)                 # Button Configuration - Left
tk_button_3.pack(side=RIGHT)                # Button Configuration - Right
tk_button_4.pack(side=BOTTOM)               # Button Configuration - Bottom
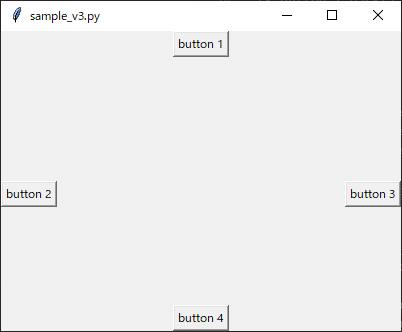
root.mainloop() # Window Display上記のPythonコードは、Tkinterを使用して簡単なGUIアプリケーションを作成する方法を示しています。
まず、Tk()関数を使用してウィンドウを作成します。次に、title()関数を使用してウィンドウのタイトルを設定し、geometry()関数を使用してウィンドウのサイズを設定します。
その後、Button()を使用して4つのボタンを作成します。それぞれのボタンにはテキストが含まれています。pack()関数を使用して、それぞれのボタンをウィンドウの異なる位置に配置します。
最後に、mainloop()関数を使用してウィンドウを表示します。ウィンドウを閉じるまで、プログラムは処理を続けます。
GUIウィンドウの表示
004 GUIウィンドウ上にボタンの追加 … Add Buttons to the GUI Window
from tkinter import *

root = Tk()                                 # Tkinter Window
root.title("sample_v4.py")                  # Window Title
root.geometry("400x300")                    # Window Size - Width / Height

tk_button_1 = Button(root, text="button 1") # Button Initilization
tk_button_2 = Button(root, text="button 2") # Button Initilization
tk_button_3 = Button(root, text="button 3") # Button Initilization

tk_button_1.pack(fill=X)                    # Button Configuration - Fill by X Direction
tk_button_2.pack(fill=X)                    # Button Configuration - Fill by X Direction
tk_button_3.pack(fill=X)                    # Button Configuration - Fill by X Direction
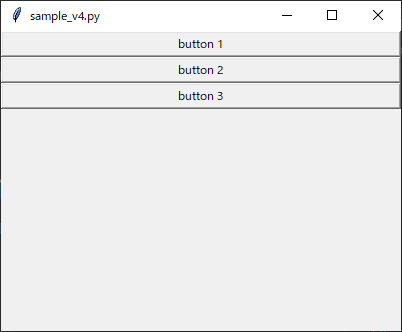
root.mainloop() # Window Display上記のPythonプログラムは、Tkinterを使用してGUIウィンドウを作成し、3つのボタンを配置する方法を示しています。プログラムの概要は次のとおりです。
- Tkinterウィンドウを作成し、タイトルとサイズを設定する。
- ボタンを初期化し、ウィンドウに配置する。
mainloop()メソッドを呼び出して、ウィンドウを表示する。
このプログラムを実行すると、3つのボタンが垂直に並べられたGUIウィンドウが表示されます。
GUIウィンドウの表示
005 GUIウィンドウ上にボタンの追加 … Add Buttons to the GUI Window
from tkinter import *

root = Tk()                                 # Tkinter Window
root.title("sample_v5.py")                  # Window Title
root.geometry("400x300")                    # Window Size - Width / Height

tk_button_1 = Button(root, text="button 1") # Button Initilization
tk_button_2 = Button(root, text="button 2") # Button Initilization
tk_button_3 = Button(root, text="button 3") # Button Initilization
tk_button_4 = Button(root, text="button 4") # Button Initilization

tk_button_1.pack(anchor=N)                  # Button Configuration - North
tk_button_2.pack(anchor=W)                  # Button Configuration - West
tk_button_3.pack(anchor=E)                  # Button Configuration - East
tk_button_4.pack(anchor=S)                  # Button Configuration - South
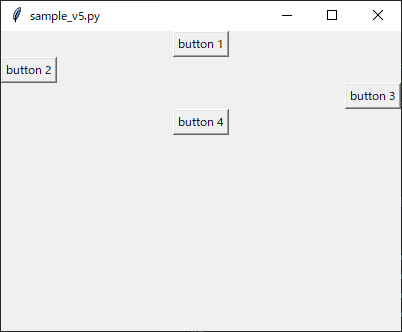
root.mainloop() # Window DisplayこのPythonプログラムは、Tkinterを使用してGUIウィンドウを作成し、4つのボタンを配置しています。それぞれのボタンは、ウィンドウの北、西、東、南に配置されています。このコードを実行すると、GUIウィンドウが表示され、ボタンが表示されます。
GUIウィンドウの表示
006 GUIウィンドウ上にボタンの追加 … Add Buttons to the GUI Window
from tkinter import *

root = Tk()                                             # Tkinter Window
root.title("sample_v6.py")                              # Window Title
root.geometry("400x300")                                # Window Size - Width / Height

tk_button_1 = Button(root, text="button 1", width=10)   # Button Initilization - Width
tk_button_2 = Button(root, text="button 2", width=10)   # Button Initilization - Width
tk_button_3 = Button(root, text="button 3", width=10)   # Button Initilization - Width
tk_button_4 = Button(root, text="button 4", width=10)   # Button Initilization - Width
tk_button_5 = Button(root, text="button 5", width=10)   # Button Initilization - Width
tk_button_6 = Button(root, text="button 6", width=10)   # Button Initilization - Width
tk_button_7 = Button(root, text="button 7", width=10)   # Button Initilization - Width
tk_button_8 = Button(root, text="button 8", width=10)   # Button Initilization - Width
tk_button_9 = Button(root, text="button 9", width=10)   # Button Initilization - Width
tk_button_10 = Button(root, text="button 10", width=10) # Button Initilization - Width
tk_button_11 = Button(root, text="button 11", width=10) # Button Initilization - Width
tk_button_12 = Button(root, text="button 12", width=10) # Button Initilization - Width

tk_button_1.grid(row=0, column=0, padx=5, pady=2)       # Button Configuration - Row / Column / Padding X / Padding Y
tk_button_2.grid(row=0, column=1, padx=5, pady=2)       # Button Configuration - Row / Column / Padding X / Padding Y
tk_button_3.grid(row=0, column=2, padx=5, pady=2)       # Button Configuration - Row / Column / Padding X / Padding Y
tk_button_4.grid(row=0, column=3, padx=5, pady=2)       # Button Configuration - Row / Column / Padding X / Padding Y
tk_button_5.grid(row=1, column=0, padx=5, pady=2)       # Button Configuration - Row / Column / Padding X / Padding Y
tk_button_6.grid(row=1, column=1, padx=5, pady=2)       # Button Configuration - Row / Column / Padding X / Padding Y
tk_button_7.grid(row=1, column=2, padx=5, pady=2)       # Button Configuration - Row / Column / Padding X / Padding Y
tk_button_8.grid(row=1, column=3, padx=5, pady=2)       # Button Configuration - Row / Column / Padding X / Padding Y
tk_button_9.grid(row=2, column=0, padx=5, pady=2)       # Button Configuration - Row / Column / Padding X / Padding Y
tk_button_10.grid(row=2, column=1, padx=5, pady=2)      # Button Configuration - Row / Column / Padding X / Padding Y
tk_button_11.grid(row=2, column=2, padx=5, pady=2)      # Button Configuration - Row / Column / Padding X / Padding Y
tk_button_12.grid(row=2, column=3, padx=5, pady=2)      # Button Configuration - Row / Column / Padding X / Padding Y
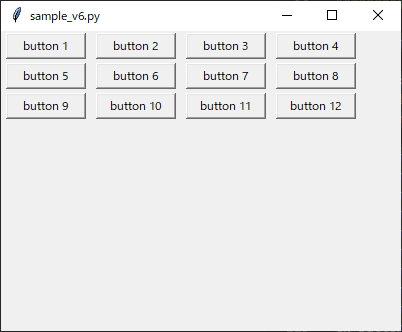
root.mainloop() # Window Display上記のプログラムでは、TkinterのButtonクラスを使用して12個のボタンを作成しています。gridメソッドを使用して、それぞれのボタンを適切な場所に配置しています。
最後に、mainloopメソッドを呼び出すことで、ウィンドウを表示します。
GUIウィンドウの表示
007 GUIウィンドウ上にボタンの追加 … Add Buttons to the GUI Window
from tkinter import *

root = Tk()                                             # Tkinter Window
root.title("sample_v7.py")                              # Window Title
root.geometry("400x300")                                # Window Size - Width / Height

tk_button_1 = Button(root, text="button 1")             # Button Initilization
tk_button_2 = Button(root, text="button 2")             # Button Initilization
tk_button_3 = Button(root, text="button 3")             # Button Initilization
tk_button_4 = Button(root, text="button 4")             # Button Initilization

tk_button_1.place(x=50,  y=50,  width=50, height=50)    # Button Configuration - X / Y / Width / Padding / Height
tk_button_2.place(x=150, y=50,  width=50, height=50)    # Button Configuration - X / Y / Width / Padding / Height
tk_button_3.place(x=50,  y=150, width=50, height=50)    # Button Configuration - X / Y / Width / Padding / Height
tk_button_4.place(x=150, y=150, width=50, height=50)    # Button Configuration - X / Y / Width / Padding / Height
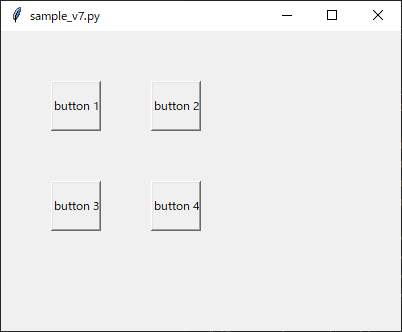
root.mainloop() # Window Display上記のPythonプログラムは、Tkinterを使用して4つのボタンを含むウィンドウを作成する方法を示しています。
プログラムを実行すると、Tkinterウィンドウが開き、4つのボタンが表示されます。各ボタンには、”button 1″、”button 2″、”button 3″、”button 4″というテキストがあります。ボタンは、それぞれ50×50のサイズで配置されます。ボタンの位置は、place()メソッドを使用して指定されます。
GUIウィンドウの表示
008 GUIウィンドウ上にボタンの追加 … Add Buttons to the GUI Window
from tkinter import *

root = Tk()                                                         # Tkinter Window
root.title("sample_v8.py")                                          # Window Title
root.geometry("400x300")                                            # Window Size - Width / Height

tk_button_1 = Button(root, text="button 1")                         # Button Initilization
tk_button_2 = Button(root, text="button 2")                         # Button Initilization
tk_button_3 = Button(root, text="button 3")                         # Button Initilization
tk_button_4 = Button(root, text="button 4")                         # Button Initilization

tk_button_1.place(relx=0.0, rely=0.0, relwidth=0.3, relheight=0.3)  # Button Configuration - X / Y / Width / Height (0.0~1.0)
tk_button_2.place(relx=0.5, rely=0.0, relwidth=0.3, relheight=0.3)  # Button Configuration - X / Y / Width / Height (0.0~1.0)
tk_button_3.place(relx=0.0, rely=0.5, relwidth=0.3, relheight=0.3)  # Button Configuration - X / Y / Width / Height (0.0~1.0)
tk_button_4.place(relx=0.5, rely=0.5, relwidth=0.3, relheight=0.3)  # Button Configuration - X / Y / Width / Height (0.0~1.0)
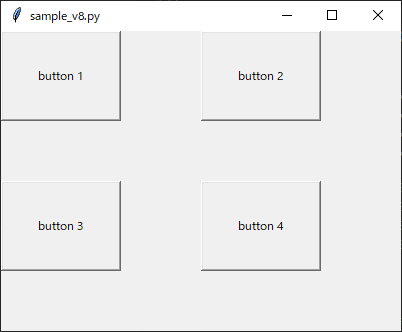
root.mainloop() # Window Display上記のPythonプログラムは、Tkinterを使用して4つのボタンを含むウィンドウを作成する方法を示しています。
このコードを実行すると、4つのボタンがウィンドウ上に表示されます。ボタンの配置を変更するには、placeメソッドの引数を調整してください。
GUIウィンドウの表示
009 GUIウィンドウ上にチェックボックス/チェックボタンの追加 … Add Check Boxes / Check Buttons to the GUI Window
from tkinter import *

root = Tk()                                                     # Tkinter Window
root.title("sample_v9.py")                                      # Window Title
root.geometry("400x300")                                        # Window Size - Width / Height

tk_check_button_1 = Checkbutton(root, text="check button 1")    # Check Button Initilization
tk_check_button_2 = Checkbutton(root, text="check button 2")    # Check Button Initilization
tk_check_button_3 = Checkbutton(root, text="check button 3")    # Check Button Initilization

tk_check_button_1.pack()                                        # Check Button Configuration
tk_check_button_2.pack()                                        # Check Button Configuration
tk_check_button_3.pack()                                        # Check Button Configuration
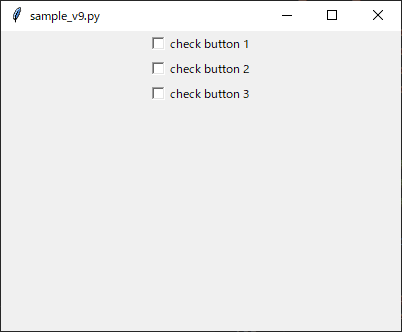
root.mainloop() # Window Displayこのプログラムは、PythonのGUIライブラリであるTkinterを使用して、ウィンドウに4つのボタンを配置する方法を示しています。
root = Tk()により、ウィンドウオブジェクトを作成し、root.title()により、ウィンドウのタイトルを設定します。root.geometry()により、ウィンドウのサイズを設定します。
4つのボタンを作成するには、Button()を使用します。text引数により、ボタンに表示されるテキストを設定します。place()メソッドにより、ボタンを配置します。relx、rely、relwidth、relheightの4つの引数を指定し、ウィンドウ内での相対的な位置とサイズを指定します。
最後に、root.mainloop()を使用して、ウィンドウを表示します。
GUIウィンドウの表示
010 GUIウィンドウ上に入力フォーム/テキストボックスの追加 … Add Text Boxes to the GUI Window
from tkinter import *

root = Tk()                        # Tkinter Window
root.title("sample_v10.py")         # Window Title
root.geometry("400x300")           # Window Size - Width / Height

tk_check_button_1 = Entry(root)    # Text Box Initilization
tk_check_button_2 = Entry(root)    # Text Box Initilization
tk_check_button_3 = Entry(root)    # Text Box Initilization

tk_check_button_1.pack()           # Text Box Configuration
tk_check_button_2.pack()           # Text Box Configuration
tk_check_button_3.pack()           # Text Box Configuration
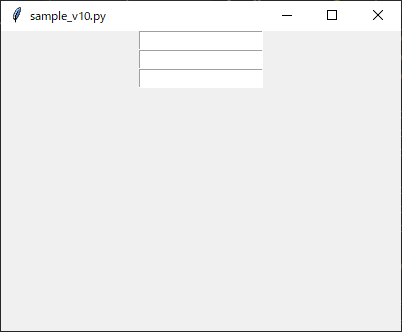
root.mainloop() # Window DisplayこのPythonプログラムは、Tkinterを使用してGUIウィンドウを作成し、3つのテキストボックスを表示するものです。
このプログラムを実行すると、横400ピクセル、縦300ピクセルのサイズのウィンドウが表示され、3つのテキストボックスが表示されます。これらのテキストボックスは、ユーザーがテキストを入力できるようになっています。
GUIウィンドウの表示
011 GUIウィンドウ上にラベルの追加 … Add Labels to the GUI Window
from tkinter import *

root = Tk()                                 # Tkinter Window
root.title("sample_v11.py")                 # Window Title
root.geometry("400x300")                    # Window Size - Width / Height

tk_label_1 = Label(root, text="label 1")    # Label Initilization
tk_label_2 = Label(root, text="label 2")    # Label Initilization
tk_label_3 = Label(root, text="label 3")    # Label Initilization

tk_label_1.pack()                           # Label Configuration
tk_label_2.pack()                           # Label Configuration
tk_label_3.pack()                           # Label Configuration
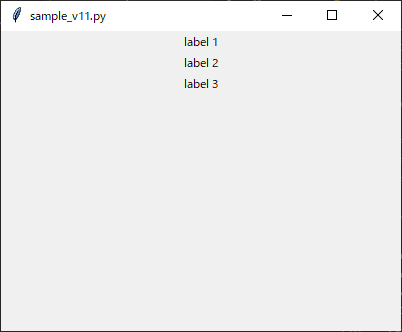
root.mainloop() # Window Display上記のPythonプログラムは、Tkinterを使用してGUIアプリケーションを作成する方法を示しています。TkinterはPythonの標準GUIライブラリであり、ウィンドウやボタン、ラベルなどのGUI要素を簡単に作成できます。
このプログラムでは、3つのラベルを作成し、それぞれにテキストを設定しています。次に、それらのラベルをパックして、ウィンドウに表示しています。
GUIウィンドウの表示
012 GUIウィンドウ上のラジオボタンの追加 … Add Radio Buttons to the GUI Window
from tkinter import *

root = Tk()                                                     # Tkinter Window
root.title("sample_v12.py")                                     # Window Title
root.geometry("400x300")                                        # Window Size - Width / Height

tk_radio_button_1 = Radiobutton(root, text="radio button 1")    # Radio Button Initilization
tk_radio_button_2 = Radiobutton(root, text="radio button 2")    # Radio Button Initilization
tk_radio_button_3 = Radiobutton(root, text="radio button 3")    # Radio Button Initilization

tk_radio_button_1.pack()                                        # Radio Button Configuration
tk_radio_button_2.pack()                                        # Radio Button Configuration
tk_radio_button_3.pack()                                        # Radio Button Configuration
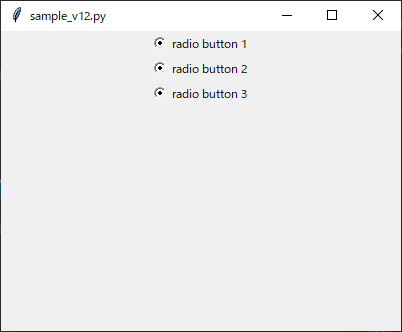
root.mainloop() # Window Displayこのプログラムでは、Tkinterウィンドウが作成され、ウィンドウに3つのラジオボタンが追加されます。ラジオボタンは、ユーザーが選択できるオプションのリストを表示するために使用されます。ボタンがクリックされると、選択されたオプションがアプリケーションによって処理されます。
GUIウィンドウの表示
013 GUIウィンドウ上の参照ボタンの追加/GUIウィンドウ上でパスを参照する(File) … Add Reference Buttons to the GUI Window
### GUI Structure #############################################################
#
#   root [400px*300px]
#       - frame 1 [1.0(400px)*30px]
#               - frame 1-1 [300px*(30px)]
#                       - Entry [1.0(300px)*(30px)]
#               - frame 1-2 [100px*(30px)]
#                       - Button [1.0(100px)*(30px)]
#
### Standard Library ##########################################################

import os,sys
from functools import partial
from tkinter import *
from tkinter import filedialog

### Function ##################################################################

def reference_box_file(entry):
    fTyp = [("", "*")]
    iFile = os.path.abspath(os.path.dirname(__file__))
    iFilePath = filedialog.askopenfilename(filetype = fTyp, initialdir = iFile)
    entry.set(iFilePath)

### Main Code #################################################################

if __name__ == "__main__":

    root = Tk()                                                                                     # Tkinter Window
    root.title("sample_v13.py")                                                                     # Window Title
    root.geometry("400x300")                                                                        # Window Size - Width / Height

    tk_frame_1 = Frame(root,height=30)                                                              # Window Frame 1 Initialization
    tk_frame_1.pack(fill=X)                                                                         # Window Frame 1 Configuration

    tk_frame_1_1 = Frame(tk_frame_1)                                                                # Window Frame 1-1 Initialization
    tk_frame_1_1.place(width=300)                                                                   # Window Frame 1-1 Configuration

    tk_frame_1_2 = Frame(tk_frame_1)                                                                # Window Frame 1-2 Initialization
    tk_frame_1_2.place(x=300,width=100)                                                             # Window Frame 1-2 Configuration

    entry_var = StringVar()                                                                         # Text Variable
    tk_entry_1 = Entry(tk_frame_1_1, textvariable=entry_var)                                        # Entry Initialization
    tk_entry_1.pack(fill=X)                                                                         # Entry Configuration

    tk_button_1 = Button(tk_frame_1_2, text="参照", command=partial(reference_box_file, entry_var)) # Button Initialization
    tk_button_1.pack(fill=X)                                                                        # Button Configuration
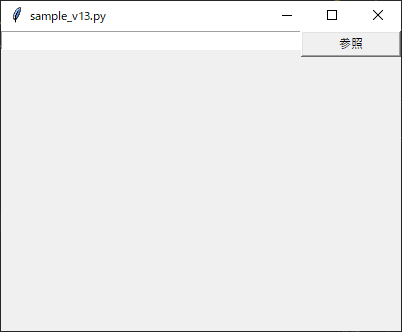
root.mainloop() # Window Displayこのプログラムでは、Tkinterライブラリを使用して、ボタンをクリックしてファイルを参照できるGUIアプリケーションを作成しています。Tkinterを使用することで、Pythonで簡単にGUIアプリケーションを作成できます。
この例では、エントリーウィジェットとボタンウィジェットが含まれています。エントリーウィジェットは、ユーザーがテキストを入力できるウィジェットであり、ボタンウィジェットは、ユーザーがボタンをクリックしてアクションをトリガーできるウィジェットです。
GUIウィンドウの表示
013 GUIウィンドウ上の参照ボタンの追加/GUIウィンドウ上でパスを参照する(Folder/Directory) … Add Reference Buttons to the GUI Window
### GUI Structure #############################################################
#
#   root [400px*300px]
#       - frame 1 [1.0(400px)*30px]
#               - frame 1-1 [300px*(30px)]
#                       - Entry [1.0(300px)*(30px)]
#               - frame 1-2 [100px*(30px)]
#                       - Button [1.0(100px)*(30px)]
#
### Standard Library ##########################################################

import os,sys
from functools import partial
from tkinter import *
from tkinter import filedialog

### Function ##################################################################

def reference_box_folder(entry):
    iDir = os.path.abspath(os.path.dirname(__file__))
    iDirPath = filedialog.askdirectory(initialdir = iDir)
    entry.set(iDirPath)

### Main Code #################################################################

if __name__ == "__main__":

    root = Tk()                                                                                     # Tkinter Window
    root.title("sample_v14.py")                                                                     # Window Title
    root.geometry("400x300")                                                                        # Window Size - Width / Height

    tk_frame_1 = Frame(root,height=30)                                                              # Window Frame 1 Initialization
    tk_frame_1.pack(fill=X)                                                                         # Window Frame 1 Configuration

    tk_frame_1_1 = Frame(tk_frame_1)                                                                # Window Frame 1-1 Initialization
    tk_frame_1_1.place(width=300)                                                                   # Window Frame 1-1 Configuration

    tk_frame_1_2 = Frame(tk_frame_1)                                                                # Window Frame 1-2 Initialization
    tk_frame_1_2.place(x=300,width=100)                                                             # Window Frame 1-2 Configuration

    entry_var = StringVar()                                                                         # Text Variable
    tk_entry_1 = Entry(tk_frame_1_1, textvariable=entry_var)                                        # Entry Initialization
    tk_entry_1.pack(fill=X)                                                                         # Entry Configuration

    tk_button_1 = Button(tk_frame_1_2, text="参照", command=partial(reference_box_folder, entry_var)) # Button Initialization
    tk_button_1.pack(fill=X)                                                                        # Button Configuration

root.mainloop() # Window Displayこのプログラムでは、Tkinterライブラリを使用して、ボタンをクリックしてフォルダ/ディレクトリを参照できるGUIアプリケーションを作成しています。Tkinterを使用することで、Pythonで簡単にGUIアプリケーションを作成できます。
この例では、エントリーウィジェットとボタンウィジェットが含まれています。エントリーウィジェットは、ユーザーがテキストを入力できるウィジェットであり、ボタンウィジェットは、ユーザーがボタンをクリックしてアクションをトリガーできるウィジェットです。
GUIウィンドウの表示

参考リンク … Reference Link