こちらは「Auto-Rig Pro」(Blenderアドオン)を使用する方法についての記事となっております。
目次
- 基本情報 … Basic Information
- 「Auto-Rig Pro」をセットアップする方法 … How to Setup Auto-Rig Pro
- 「Auto-Rig Pro」でモデルをリギングする方法 … How to Rig the 3D Model with Auto-Rig Pro
- 「Auto-Rig Pro」でリグコントローラーをFK/IKを切り替えする方法 … How to Switch FK and IK Setting for the Rig Controller (Auto-Rig Pro)
- 「Blender」に「Mixamo」モーション/アニメーションデータをインポートする方法 … How to Import the 「Mixamo」Motion or Animation on Blender
- 「Auto-Rig Pro」でモーション/アニメーションをリターゲティングする方法 … How to Retarget the Motion or Animation with Auto-Rig Pro (ソース:Mixamoリグ、Mixamoモーション/FBXモーション → ターゲット:Auto-Rig Proリグ)
基本情報 … Basic Information
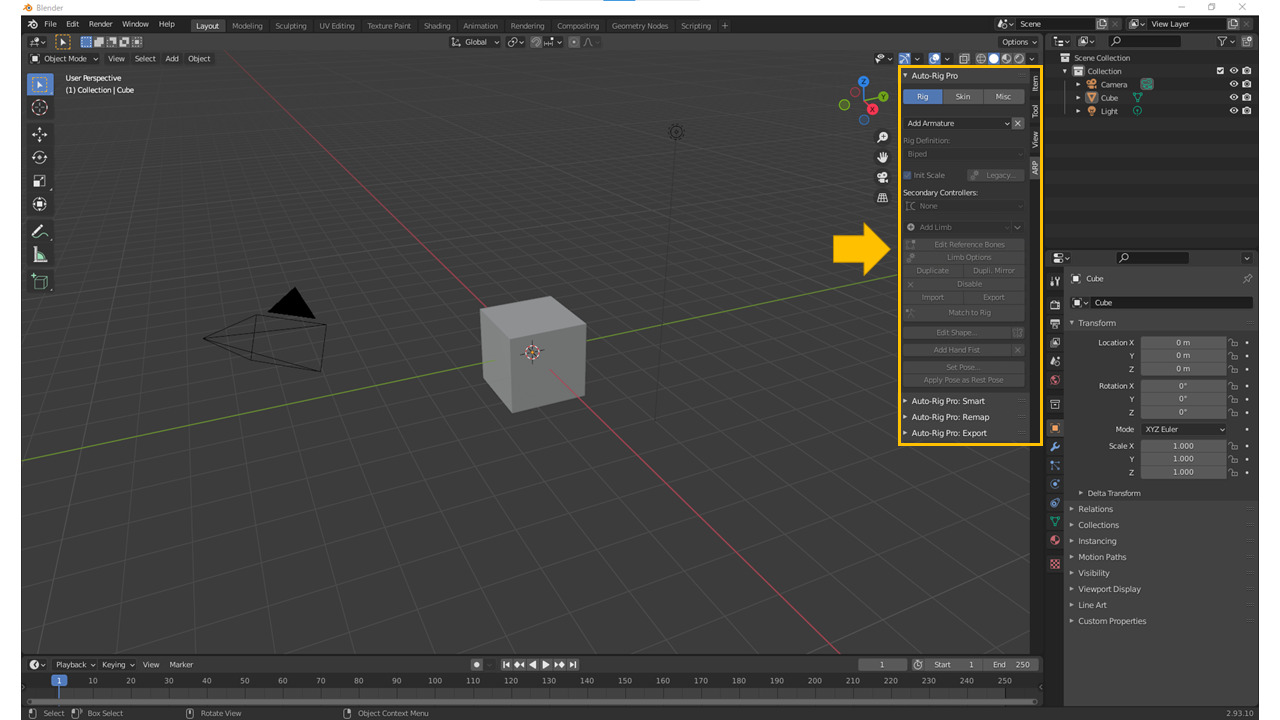
設定内アドオン名称
Animation:Auto-Rig Pro
追加GUI
・「Tool」タブ >> 「Rig Main Properties」
・「ARP」タブ
「Auto-Rig Pro」をセットアップする方法 … How to Setup Auto-Rig Pro
検証環境
・Blender:2.93.10
・Auto-Rig Pro:3.66.18
手順
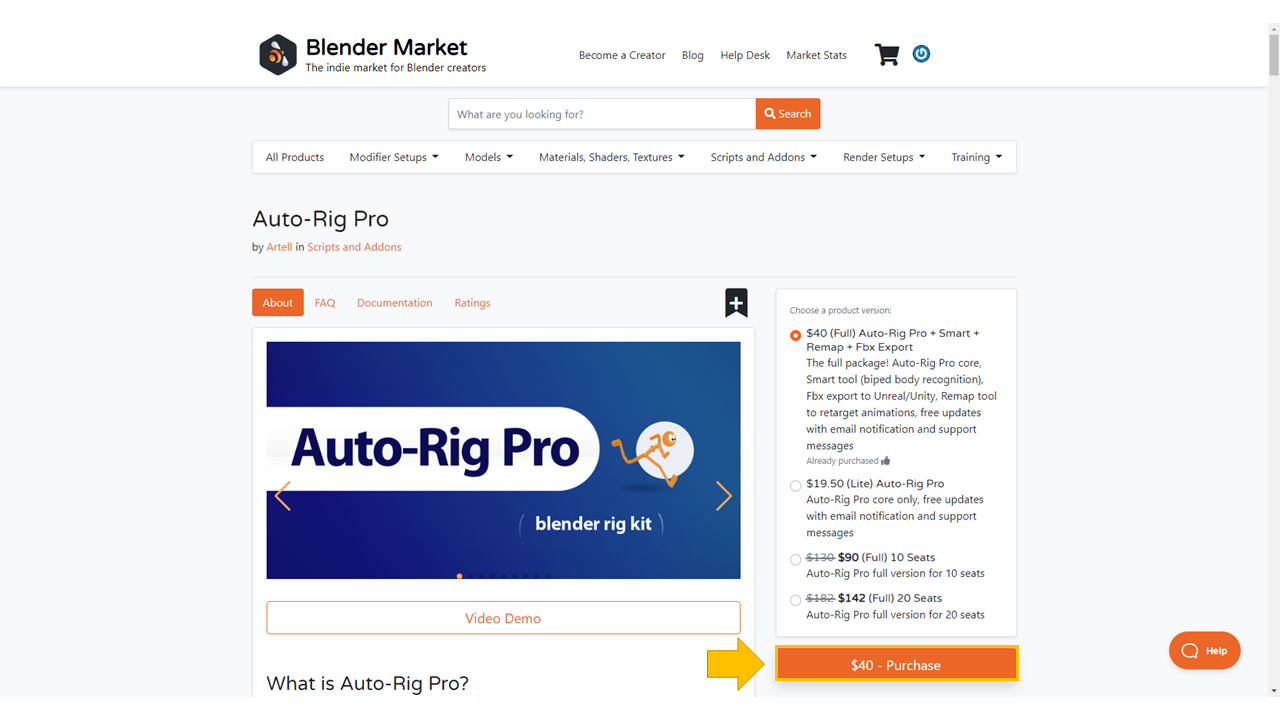
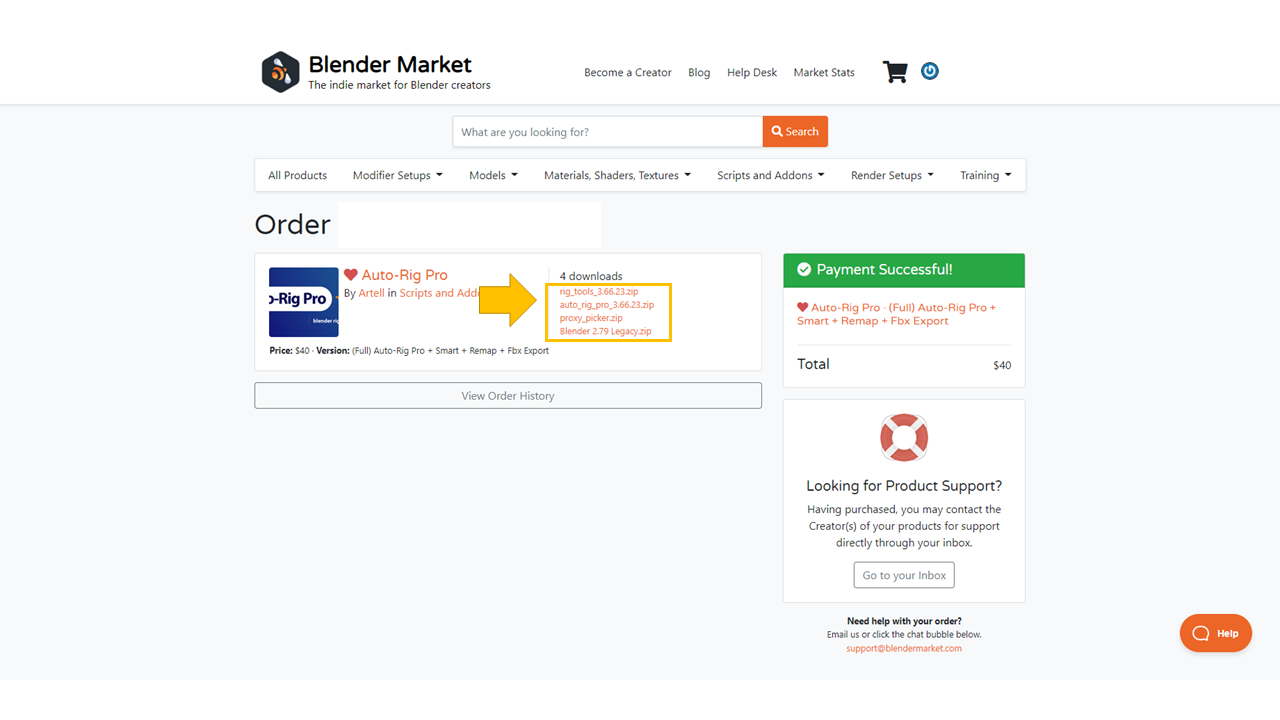
・「Auto-Rig Pro」アドオンを購入できるサイト(blendermarket.com)を開く

・「Auto-Rig Pro」アドオンを購入する(こちらの画面に関しては、既にアドオンを購入済みのアカウントを使用しているため、「Already purchased」となっている)
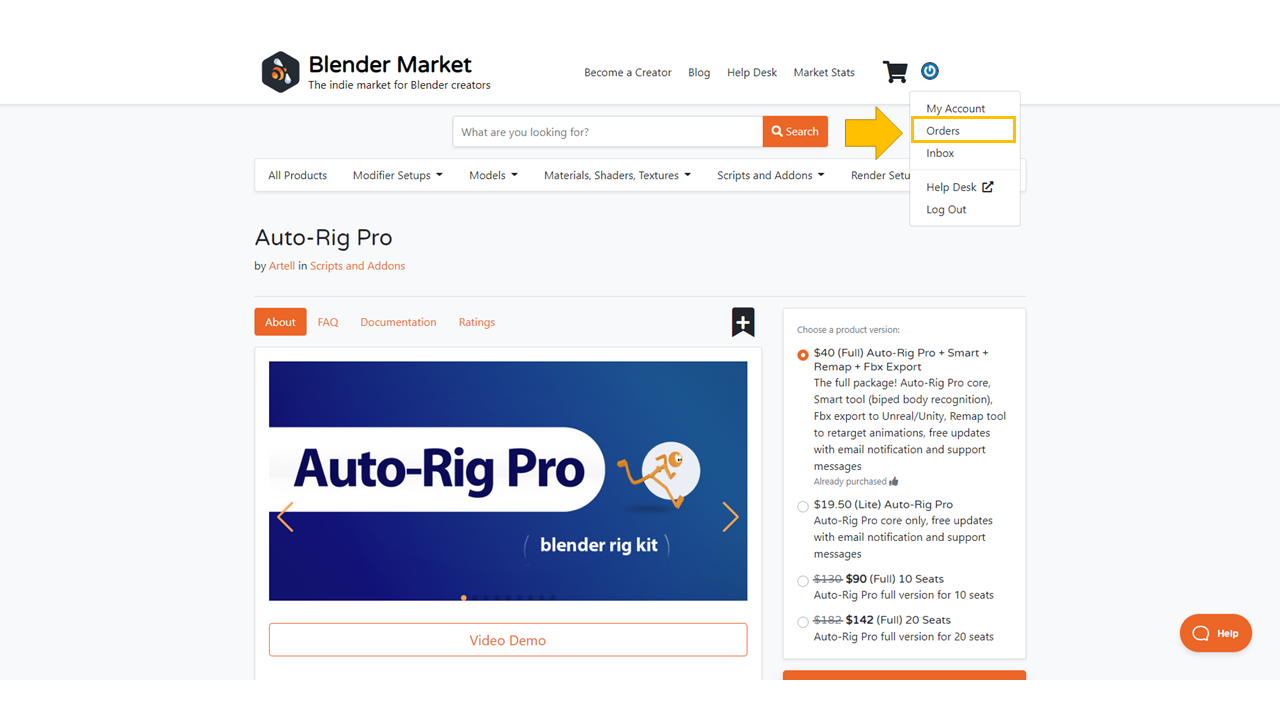
・「Auto-Rig Pro」アドオンを注文履歴ページで確認する
「アカウント名」>>「Orders」
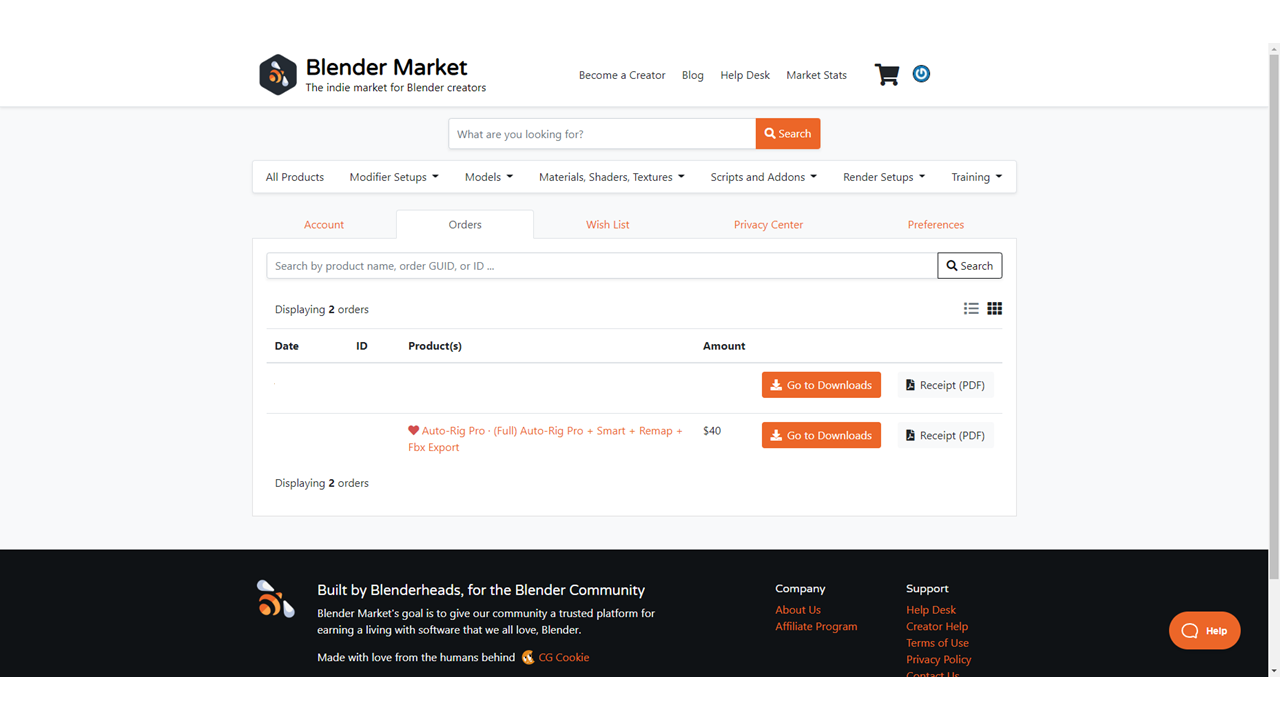
・「Auto-Rig Pro」アドオンのダウンロードリンクのページを開く
「Go to Downloads」ボタン:Click

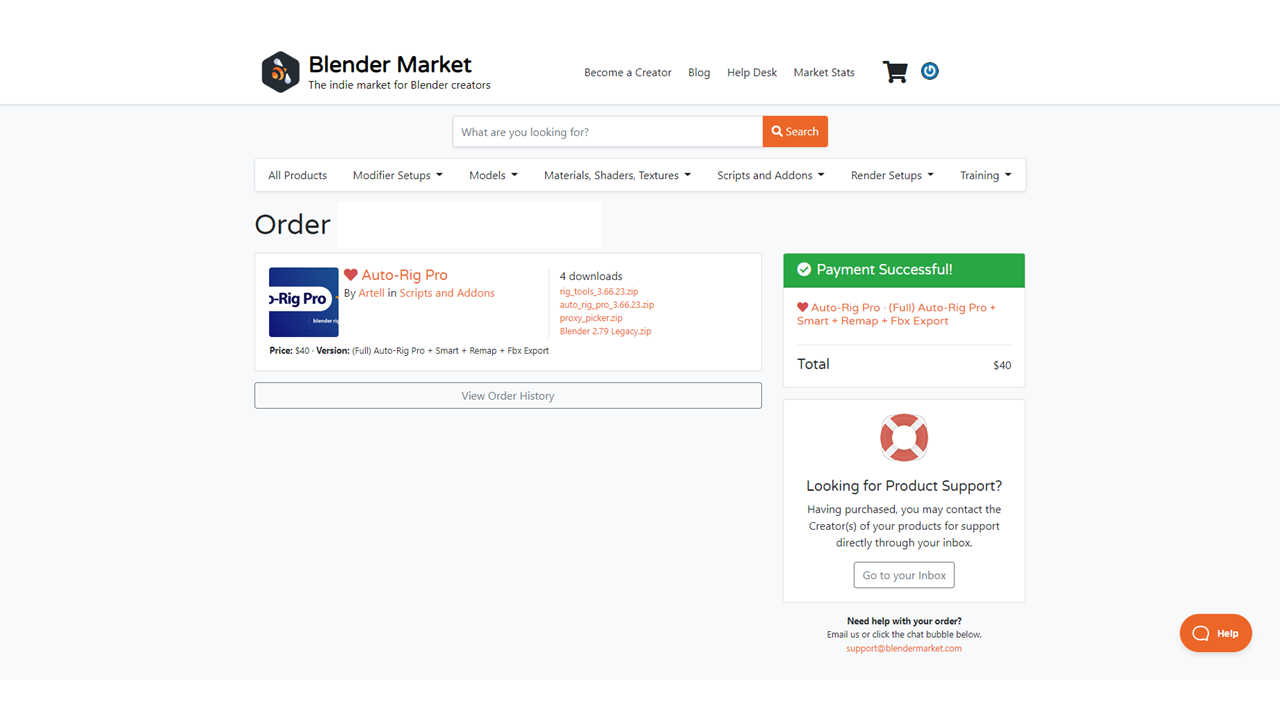
・「Auto-Rig Pro」アドオンをダウンロードする
「ダウンロードリンク」:Click
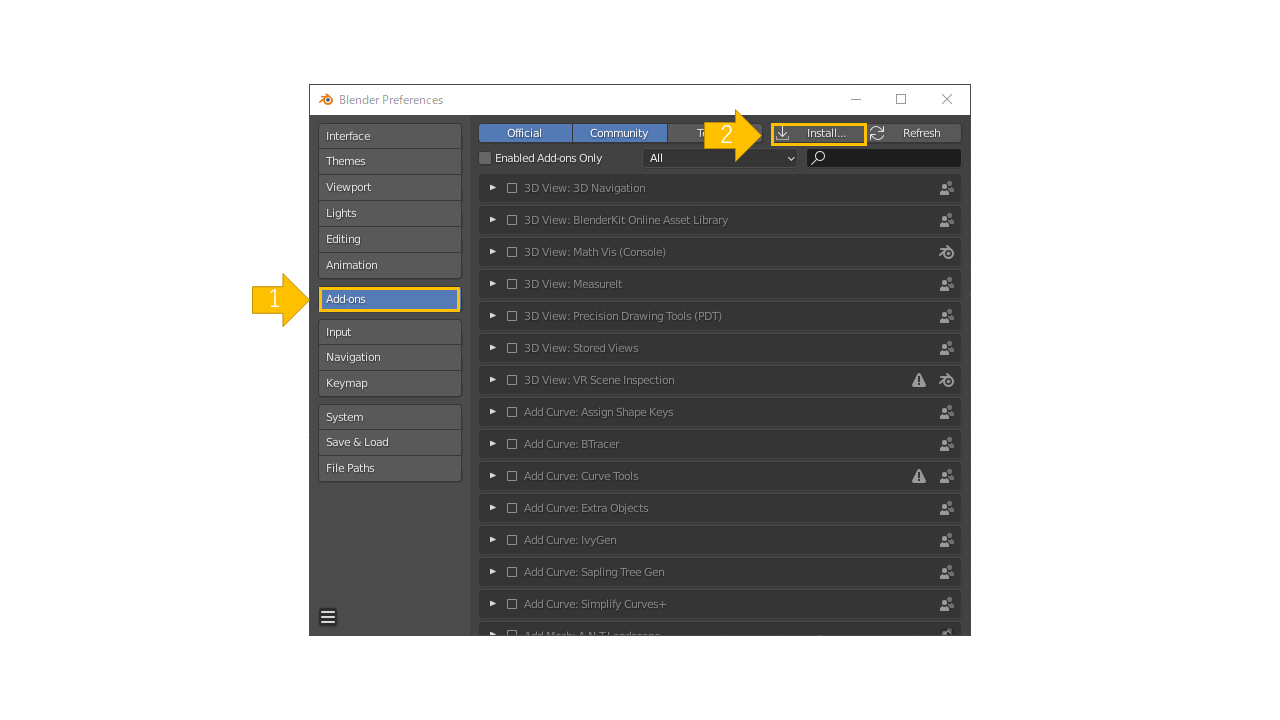
・「Auto-Rig Pro」アドオンを有効化する
「Edit」タブ>>「Preferences」:Click
「Add-ons」:Click
「Install…」:Click
「Auto-Rig Pro」アドオンのダウンロードデータ:Click >>「Install Addon」:Click
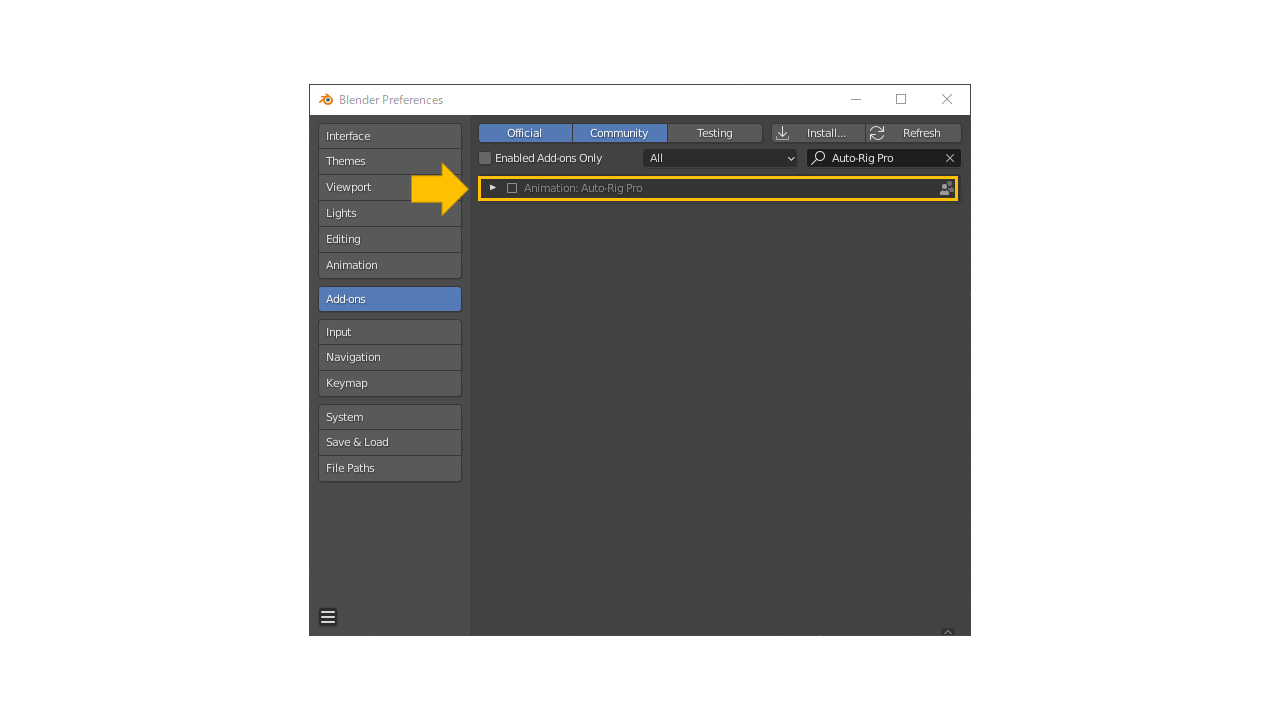
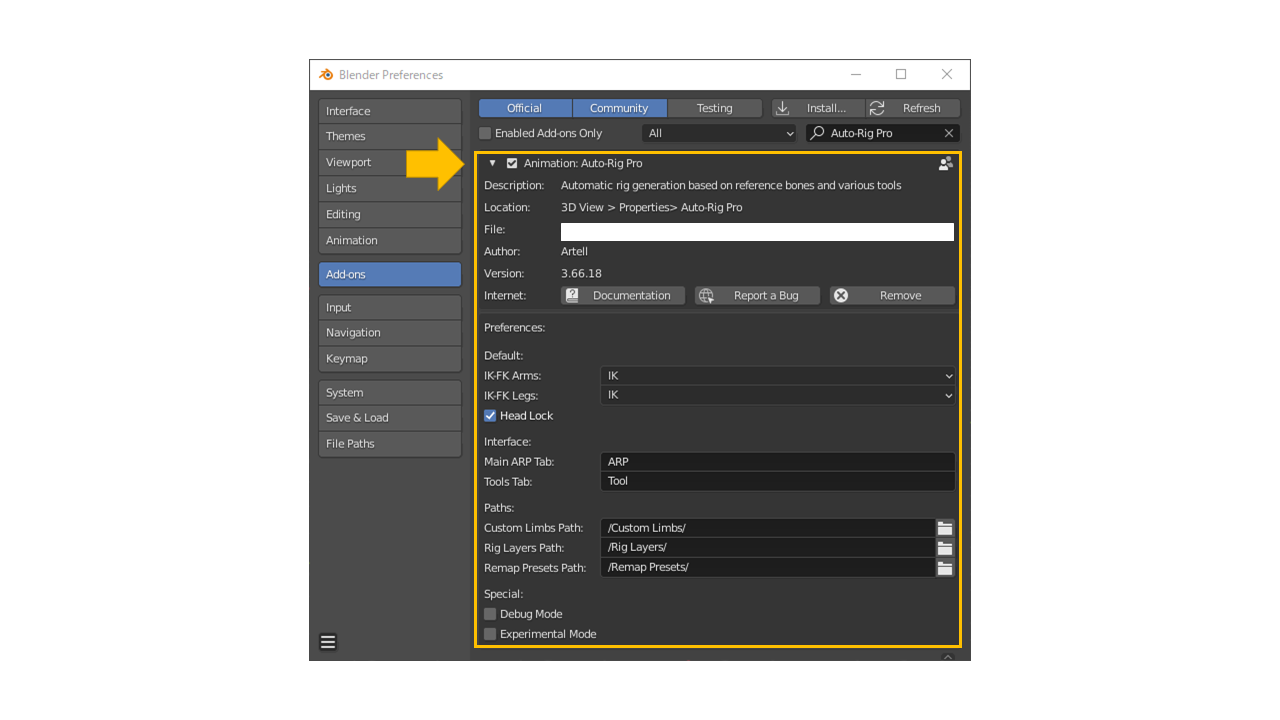
「Animation: Auto-Rig Pro」:Check


・終わり
「Auto-Rig Pro」でモデルをリギングする方法 … How to Rig the 3D Model with Auto-Rig Pro
検証環境
・Blender:2.92.0
前提
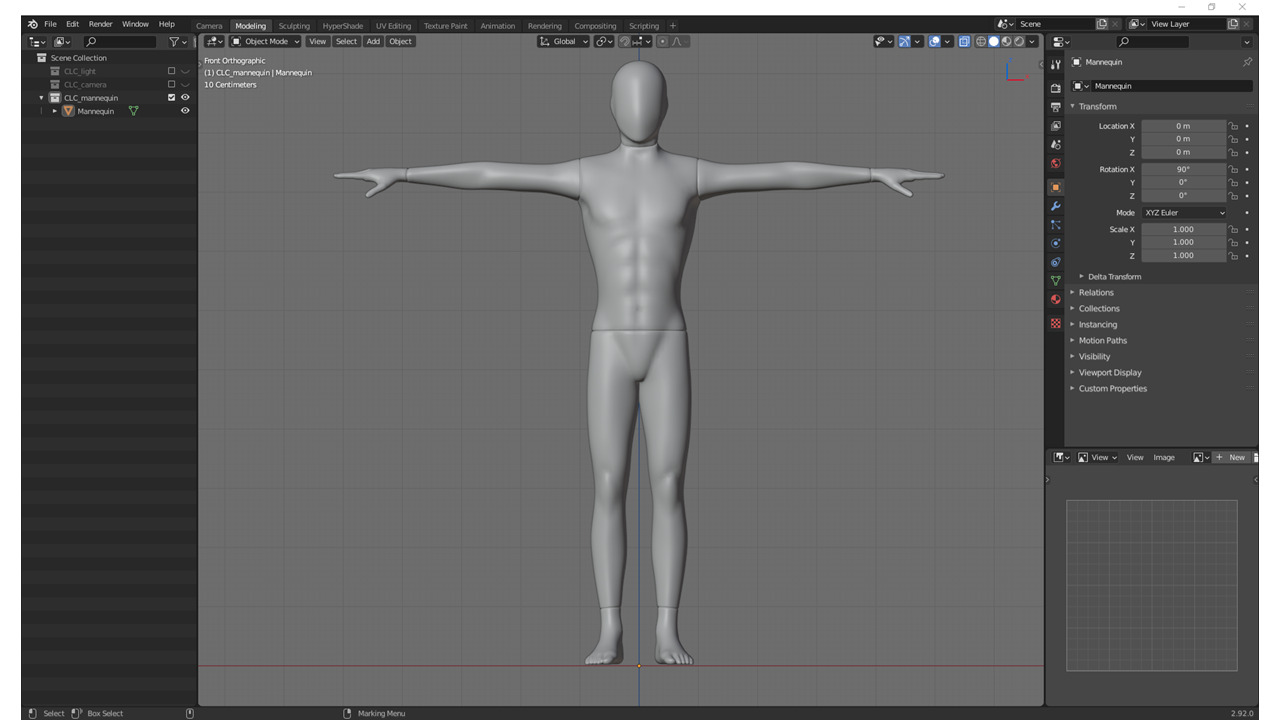
・リギングを行いたいモデルを用意する
・「Auto-Rig Pro」プラグインを有効化する
手順
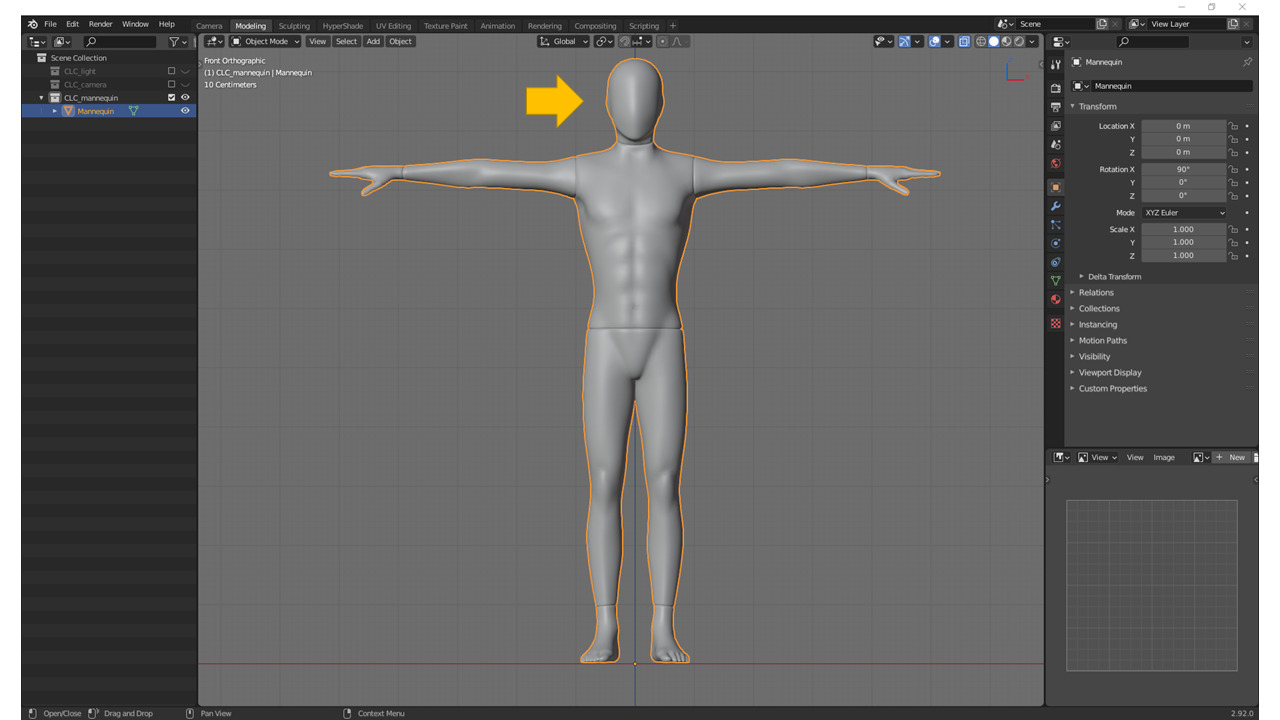
・リギングを行いたいモデルを選択する
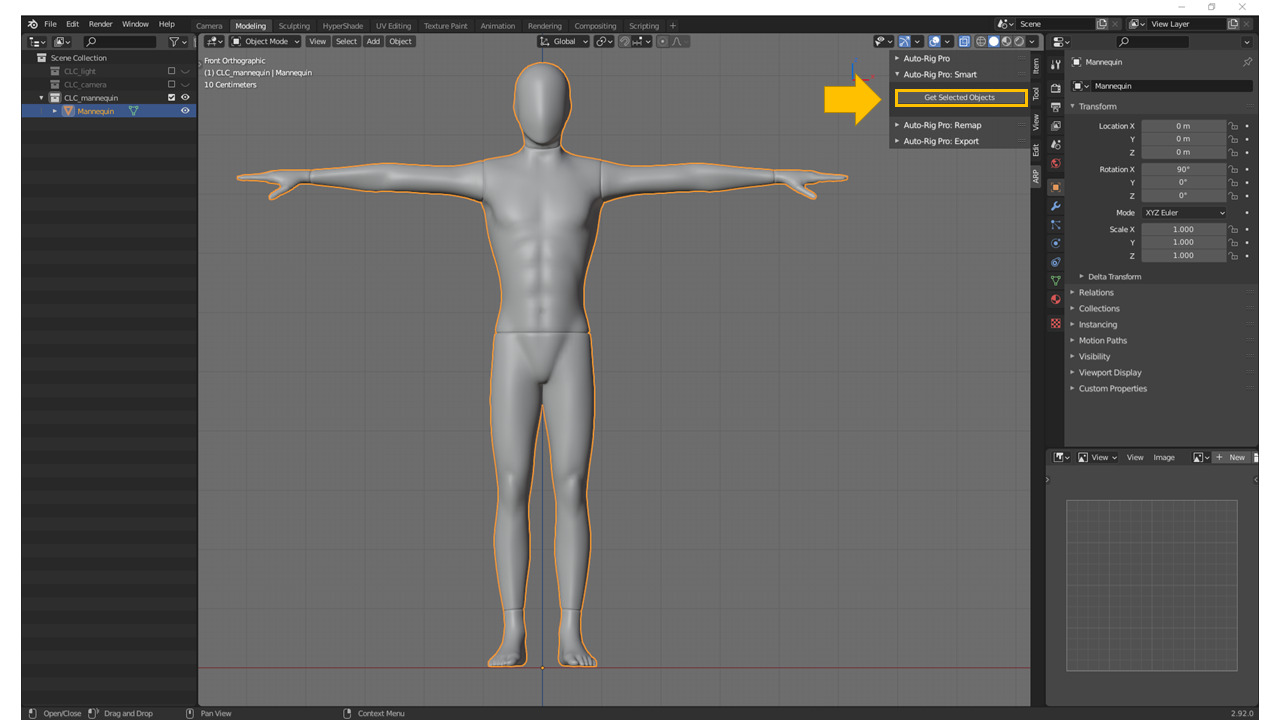
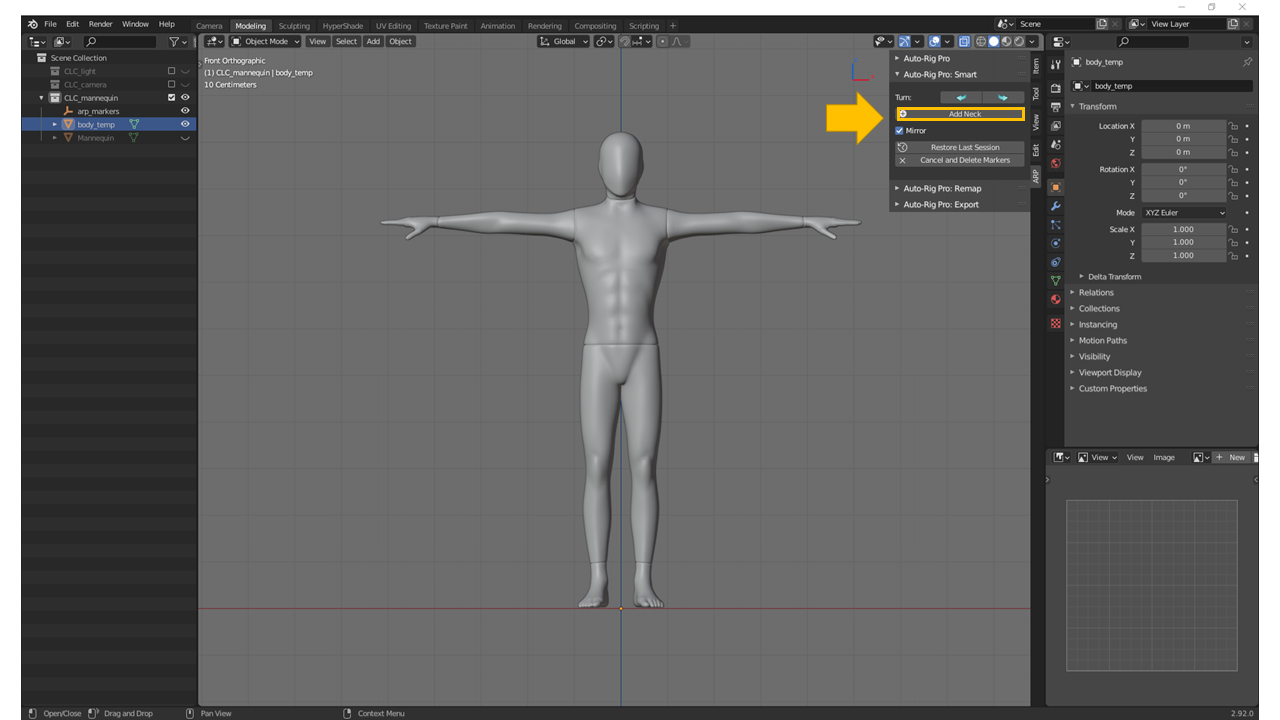
・リギングの参考点として特徴部位を選択する
「ARP」タブ >>「Auto-Rig Pro: Smart」>> 「Get Selected Objects」ボタン:Click
「Smart」ウィンドウ >>「OK」ボタン:Click

・首(Neck)の場所を選択する
「ARP」タブ >>「Auto-Rig Pro: Smart」>> 「Add Neck」ボタン:Click
「3D Viewport」>> 首の場所:Click
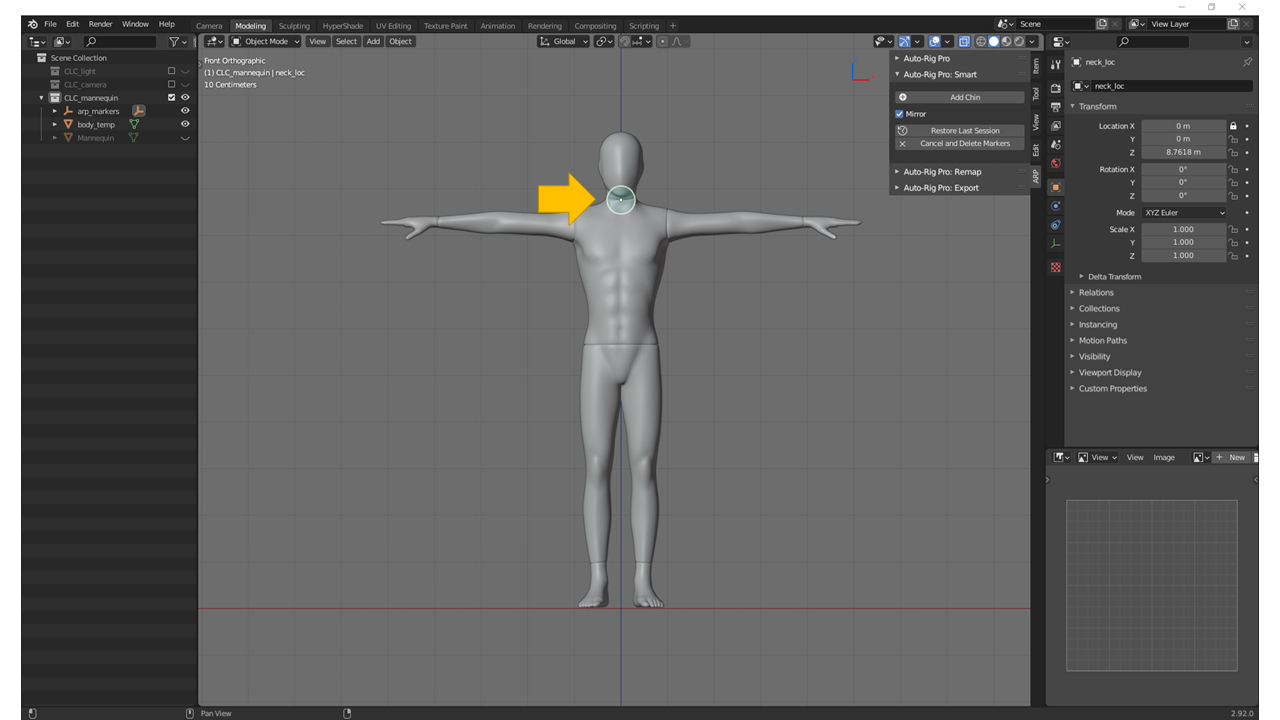
・顎(Chin)の場所を選択する
「ARP」タブ >>「Auto-Rig Pro: Smart」>> 「Add Chin」ボタン:Click
「3D Viewport」>> 顎の場所:Click
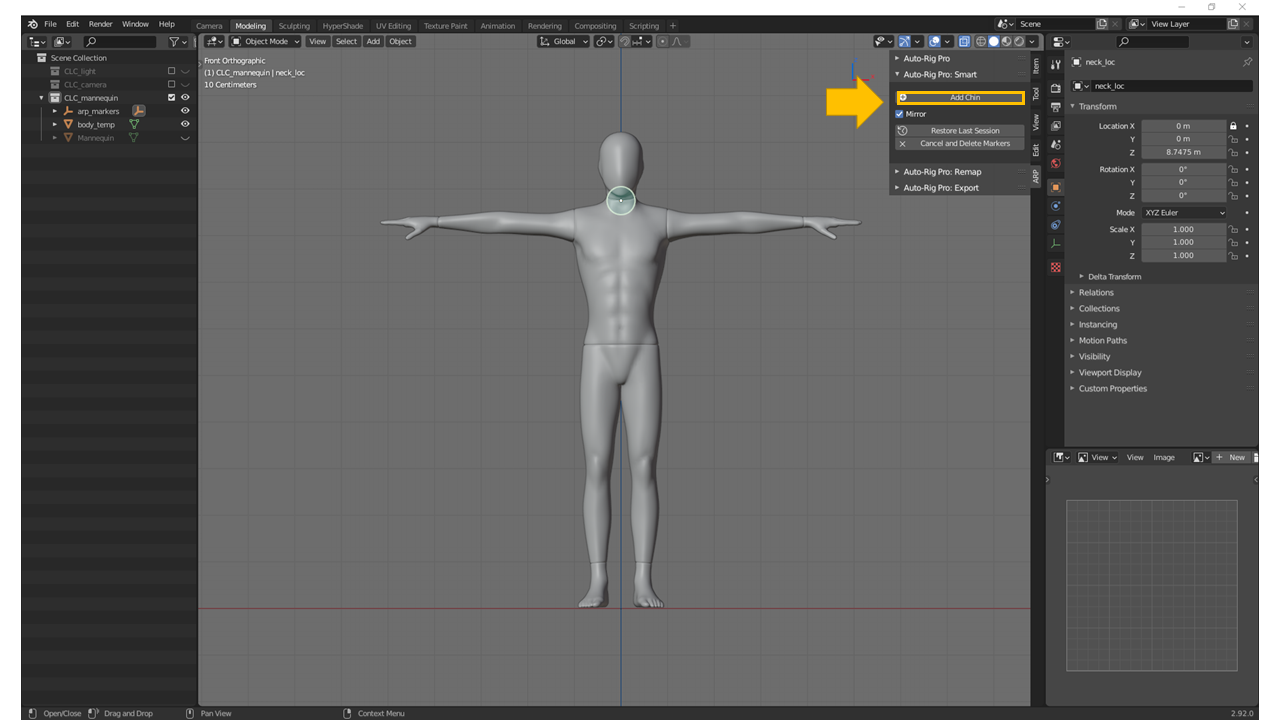
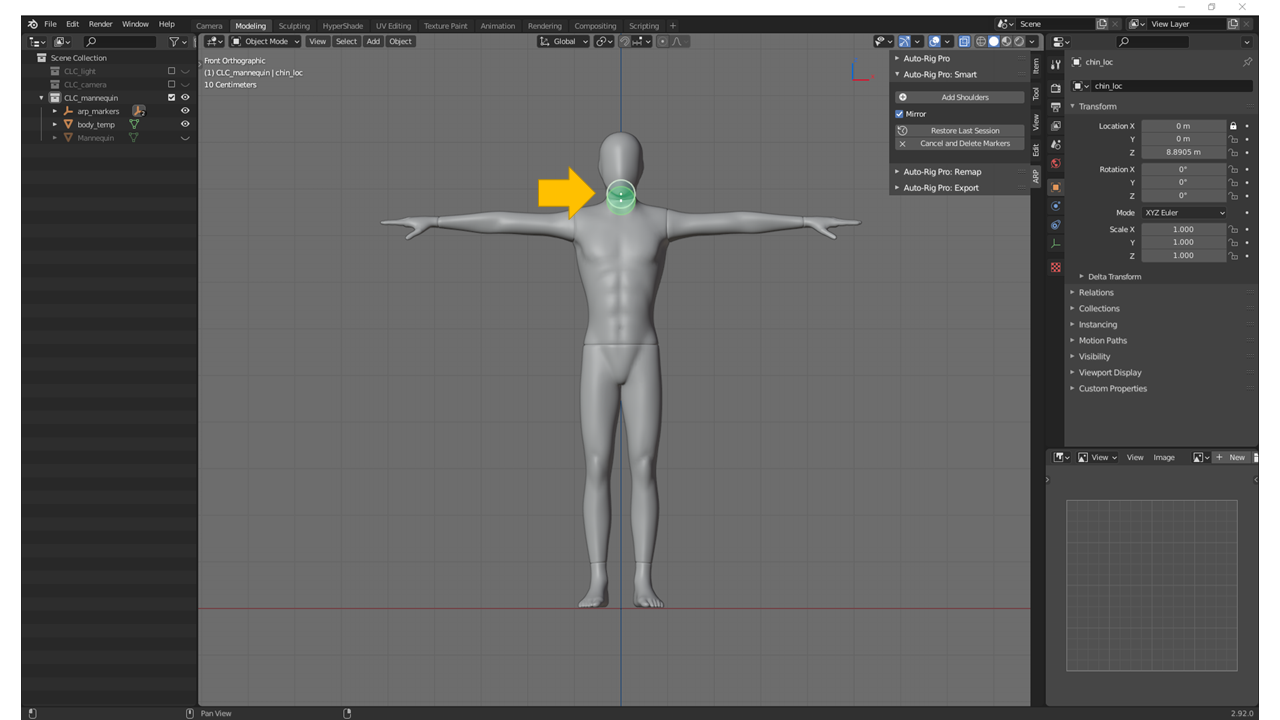
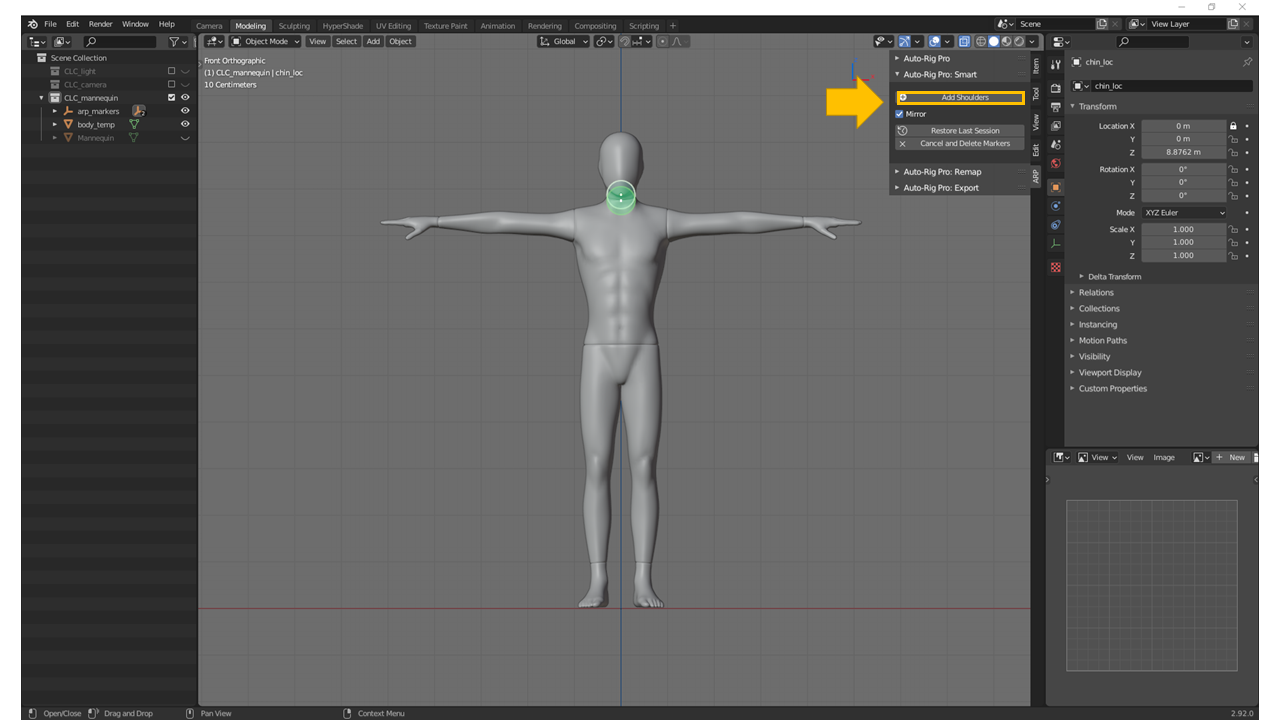
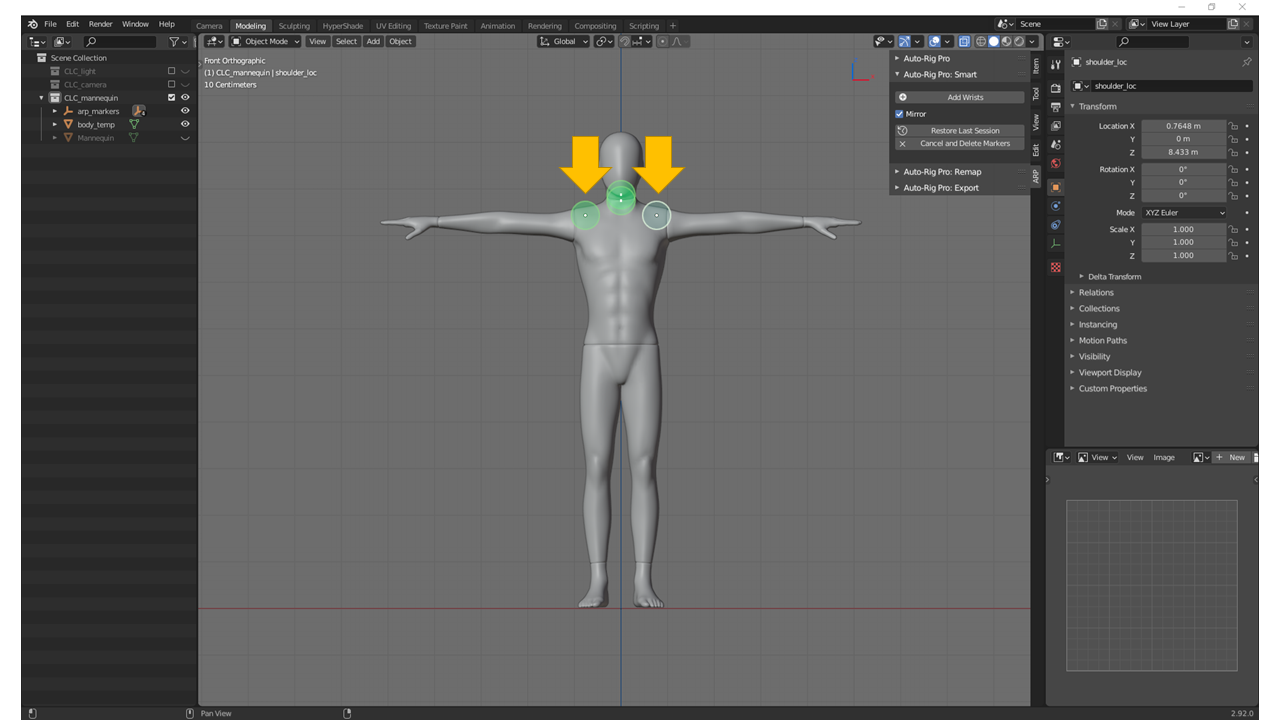
・肩(Shoulder)の場所を選択する
「ARP」タブ >>「Auto-Rig Pro: Smart」>> 「Add Shoulders」ボタン:Click
「3D Viewport」>> 肩の場所:Click
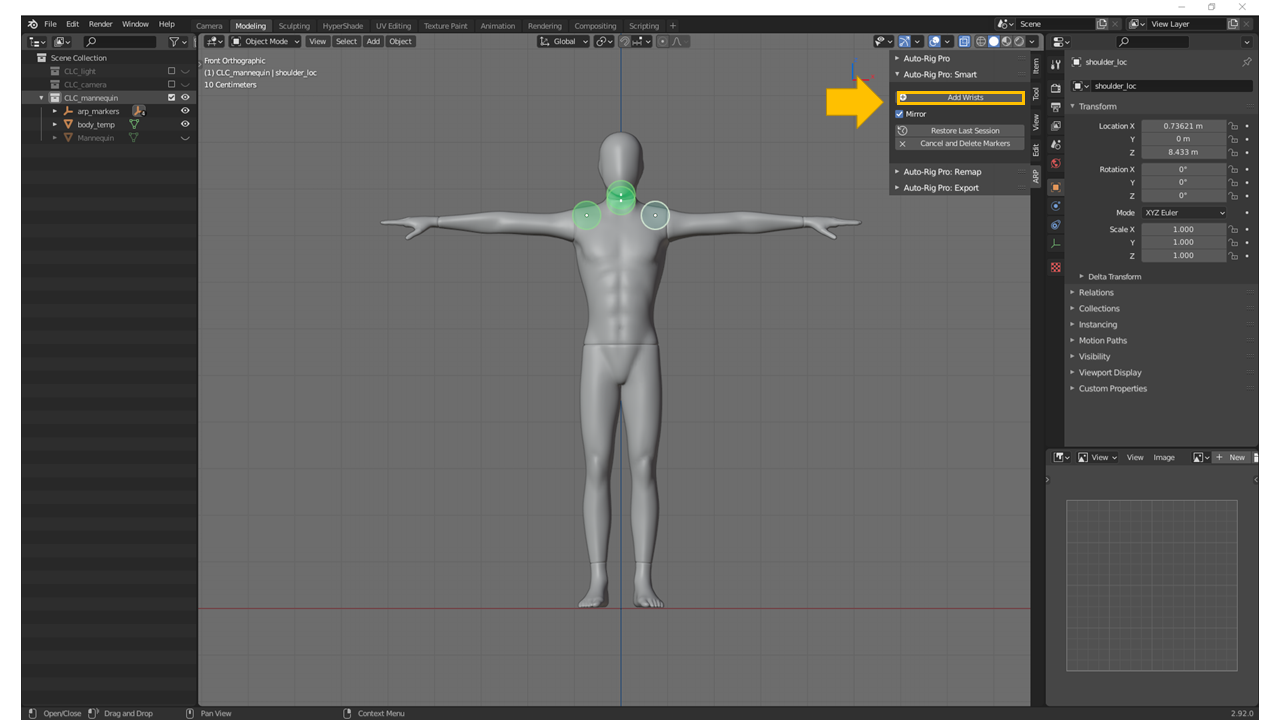
・手首(Wrist)の場所を選択する
「ARP」タブ >>「Auto-Rig Pro: Smart」>> 「Add Wrists」ボタン:Click
「3D Viewport」>> 手首の場所:Click
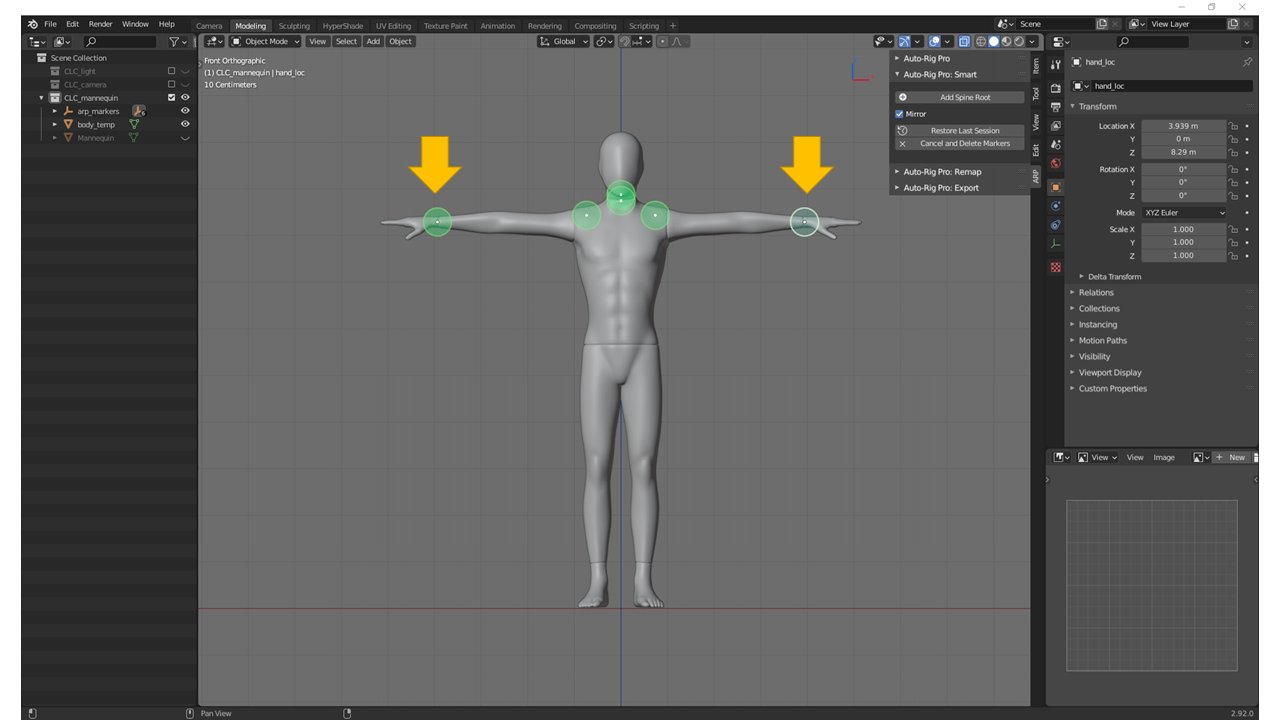
・脊椎の根本(Spine Root)の場所を選択する
「ARP」タブ >>「Auto-Rig Pro: Smart」>> 「Add Spine Root」ボタン:Click
「3D Viewport」>> 脊椎の根本の場所:Click


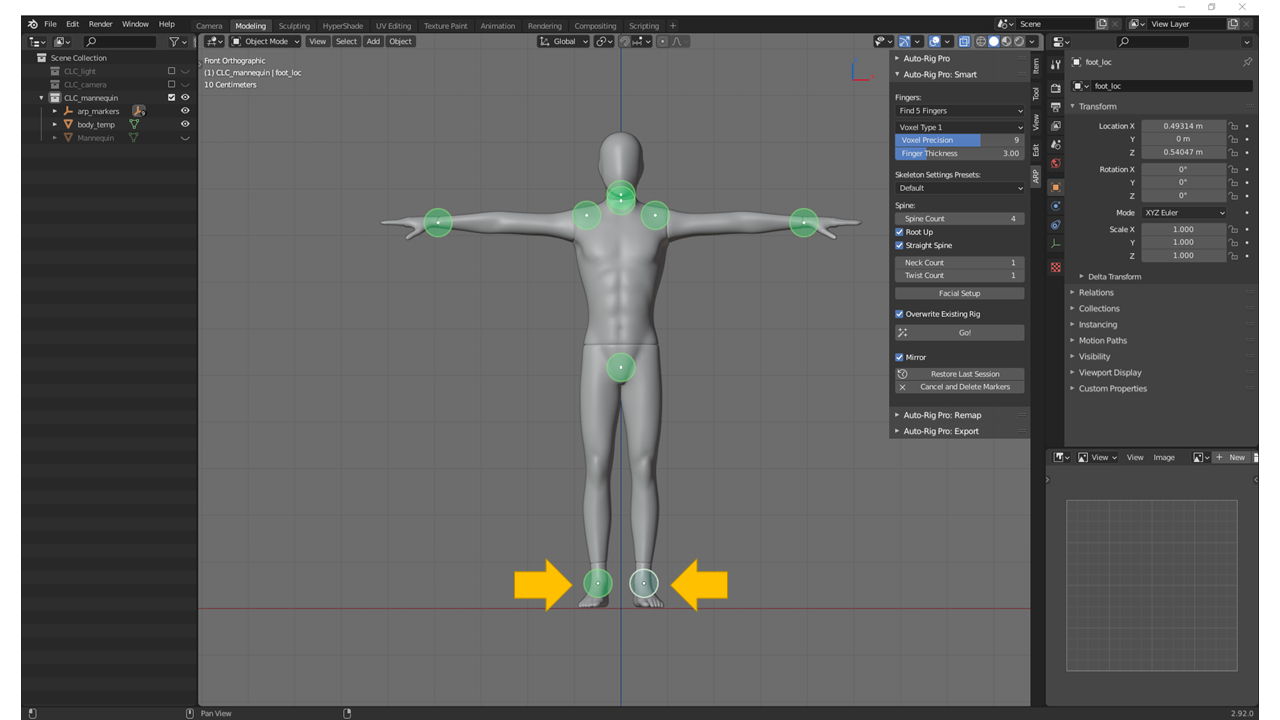
・足首(ankle)の場所を選択する
「ARP」タブ >>「Auto-Rig Pro: Smart」>> 「Add Ankles」ボタン:Click
「3D Viewport」>> 足首の場所:Click

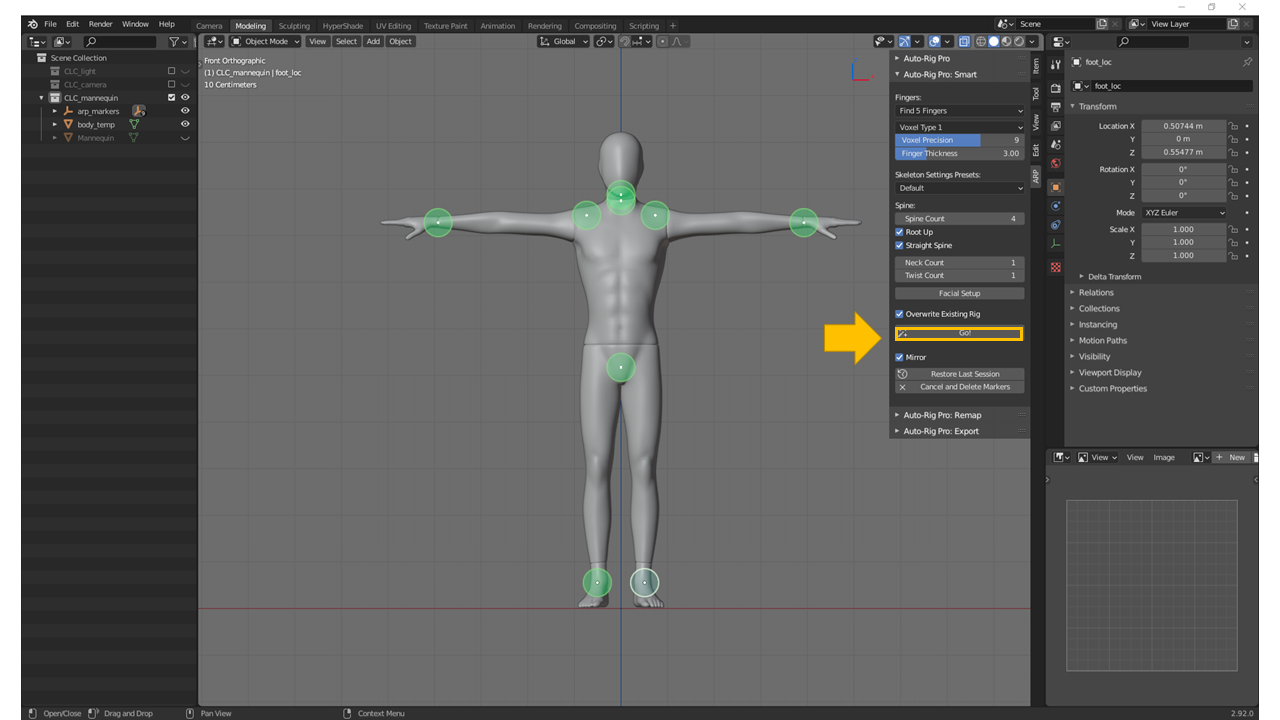
・ボーンを自動生成する
「ARP」タブ >>「Auto-Rig Pro: Smart」>> 「Go!」ボタン:Click
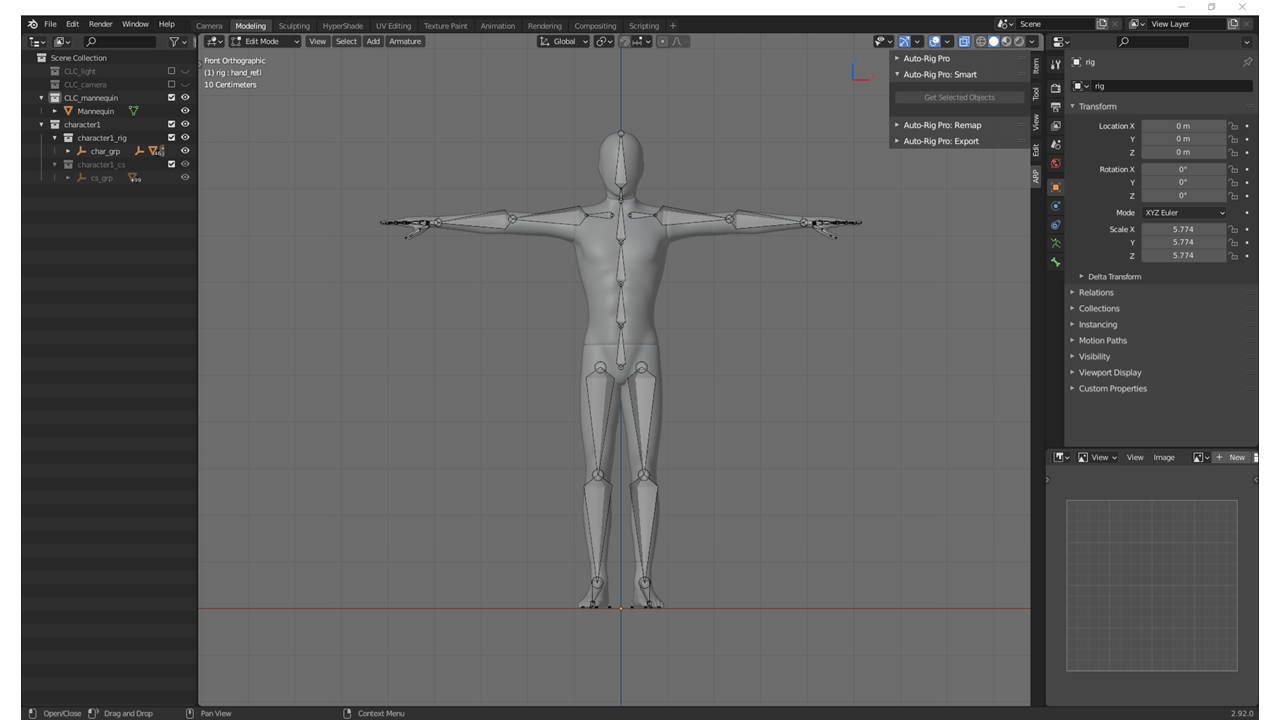
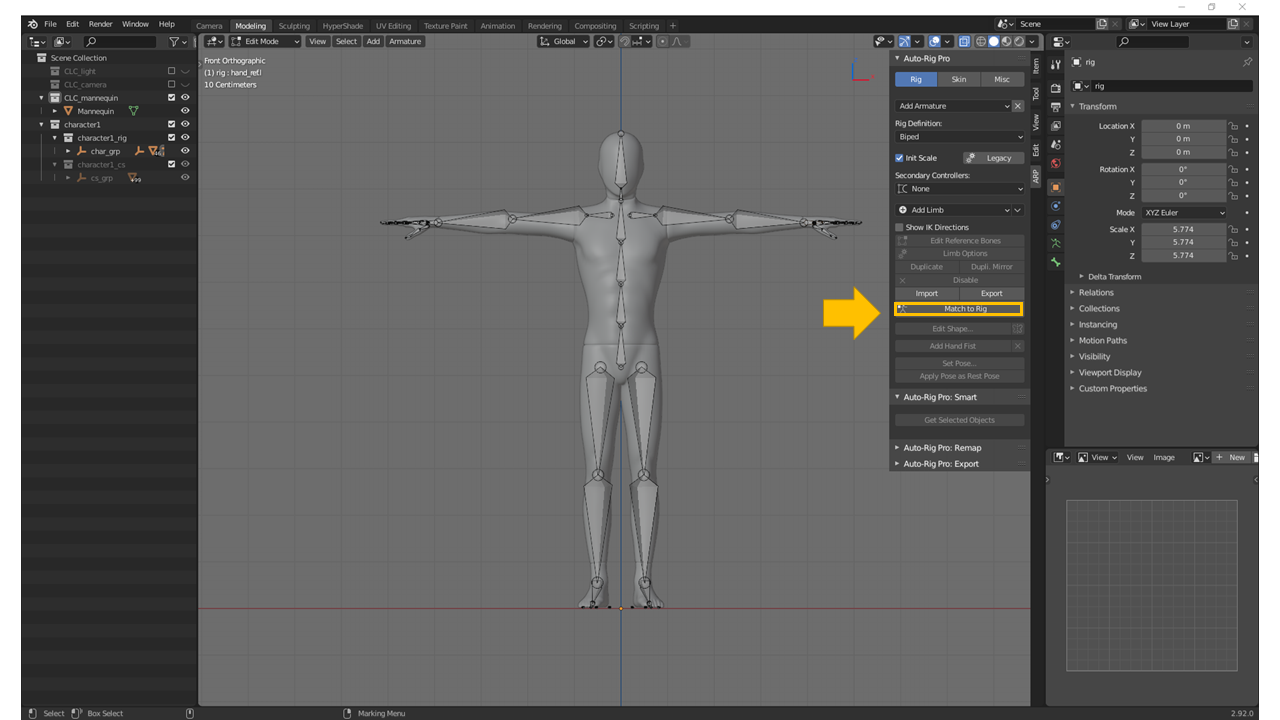
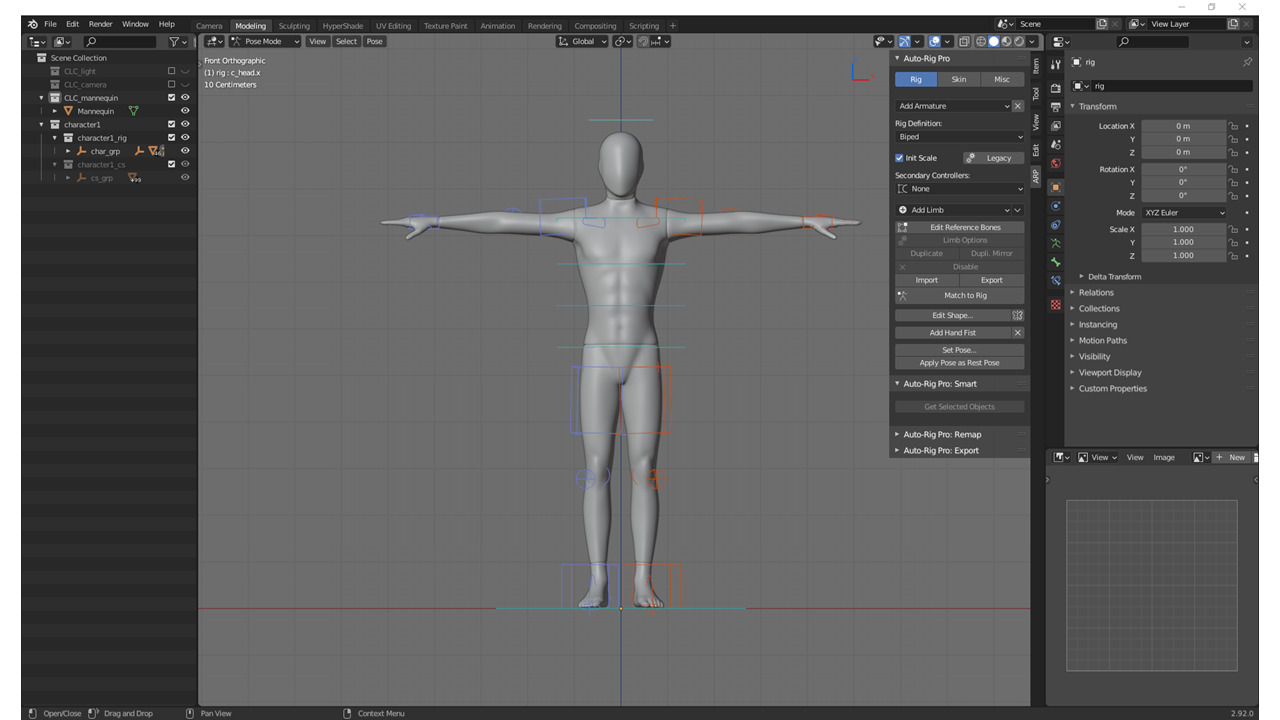
・リグのコントローラーを自動生成する
「ARP」タブ >>「Auto-Rig Pro」>> 「Rig」>>「Match to Rig」ボタン:Click
・モデルを選択する
・リグを続けて選択する
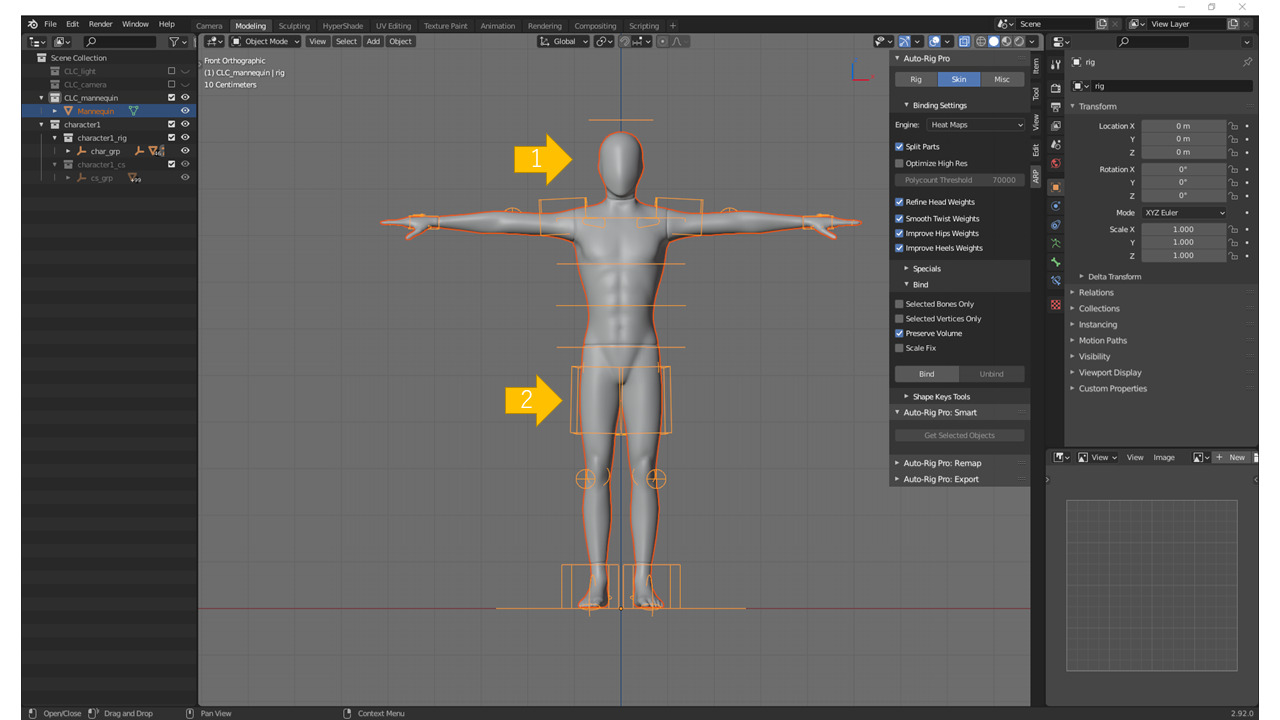
・モデルとリグをバインドする
「ARP」タブ >>「Auto-Rig Pro」>> 「Skin」>>「Bind」ボタン:Click

・終わり
「Auto-Rig Pro」でリグコントローラーをFK/IKを切り替えする方法 … How to Switch FK and IK Setting for the Rig Controller (Auto-Rig Pro)
WIP
「Blender」に「Mixamo」モーション/アニメーションデータをインポートする方法 … How to Import the 「Mixamo」Motion or Animation on Blender
WIP
「Auto-Rig Pro」でモーション/アニメーションをリターゲティングする方法 … How to Retarget the Motion or Animation with Auto-Rig Pro (ソース:Mixamoリグ、Mixamoモーション/FBXモーション → ターゲット:Auto-Rig Proリグ)
検証環境
・Blender:2.92.0
前提
・モーションリターゲティングを行いたいリグ付きモデルを用意する
・「Auto-Rig Pro」プラグインを有効化する
・モーション/アニメーションデータを用意する
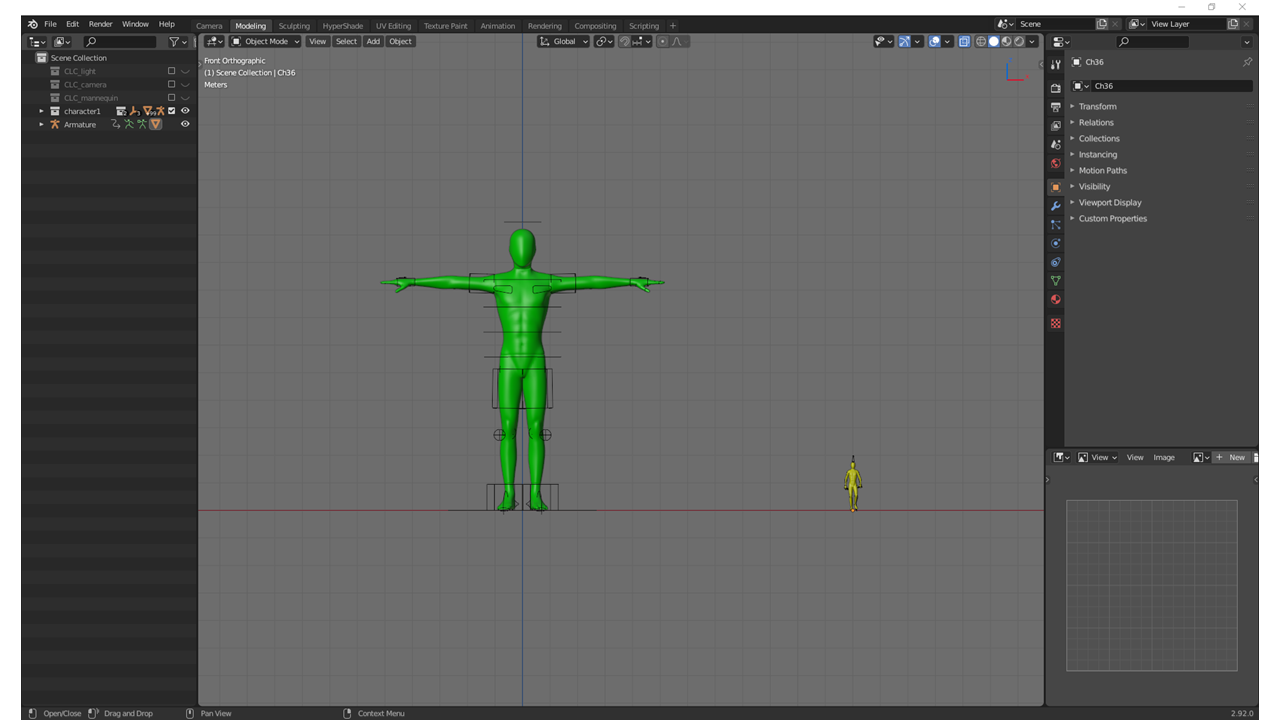
黄色:ソース、緑:ターゲット(ソースのモーションをターゲットのリグ付きモデルへリターゲティングする)
手順
・ソースモデルのリグを選択する
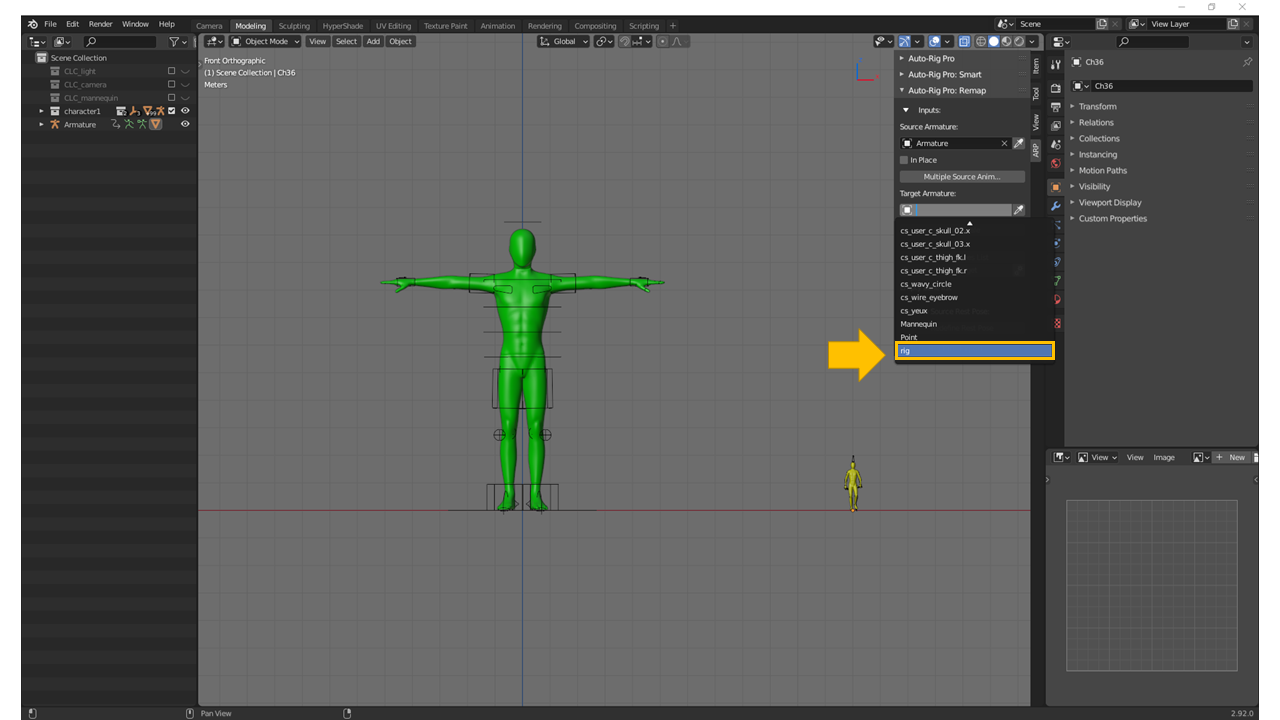
「ARP」タブ >>「Auto-Rig Pro: Remap」>> 「Inputs」>>>「Source Armature」:ソースモデルのリグ

・ターゲットモデルのリグを選択する
「ARP」タブ >>「Auto-Rig Pro: Remap」>> 「Inputs」>>>「Target Armature」:ターゲットモデルのリグ
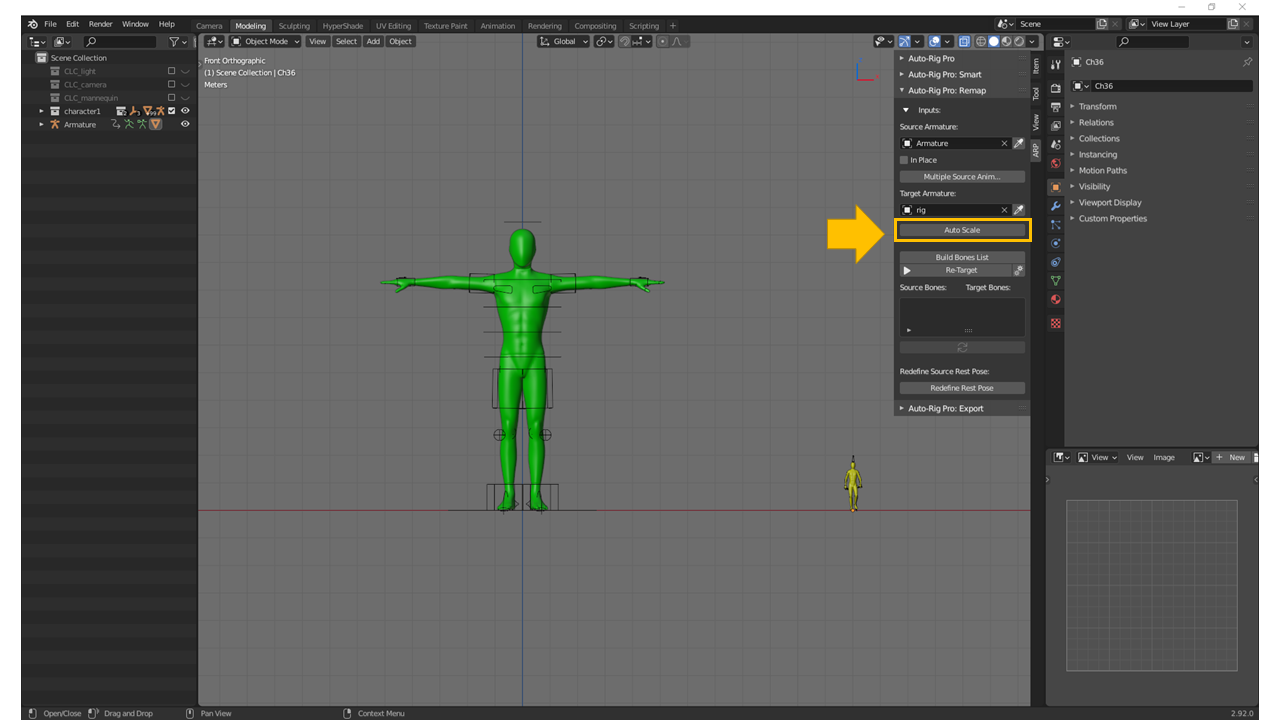
・ソースモデルをリサイズする
「ARP」タブ >>「Auto-Rig Pro: Remap」>> 「Inputs」>>>「Auto Scale」ボタン:Click
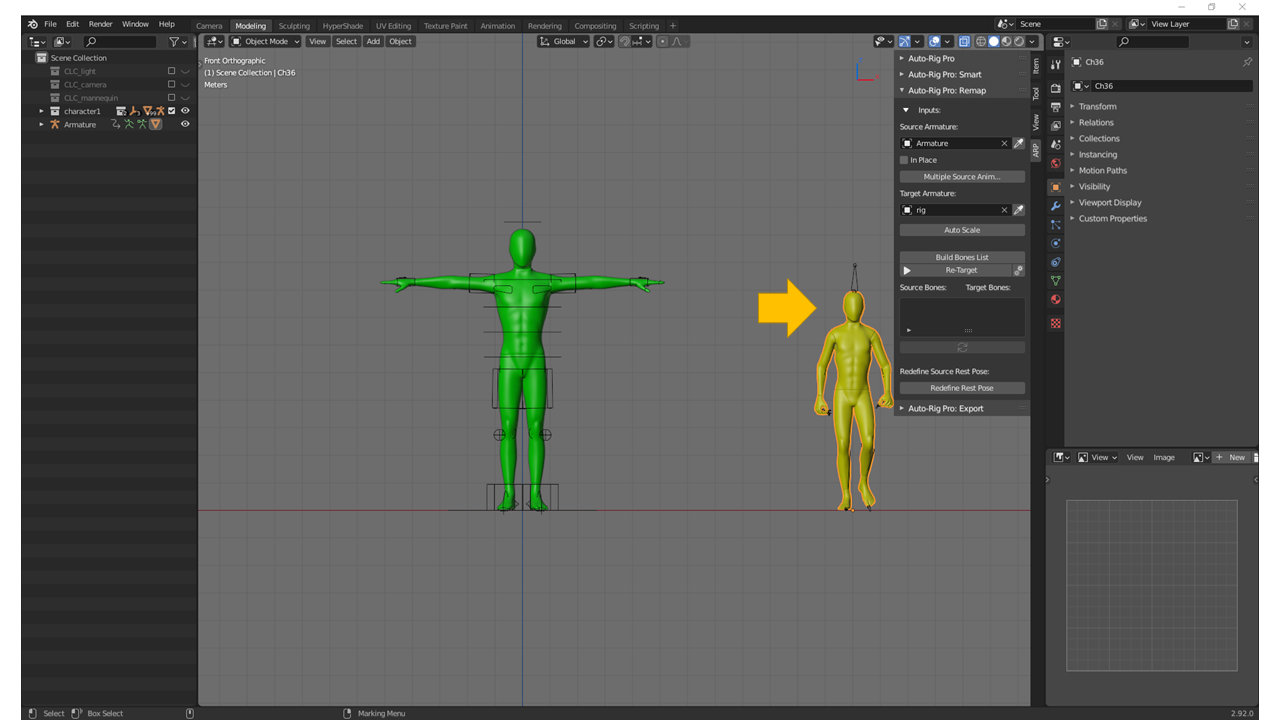
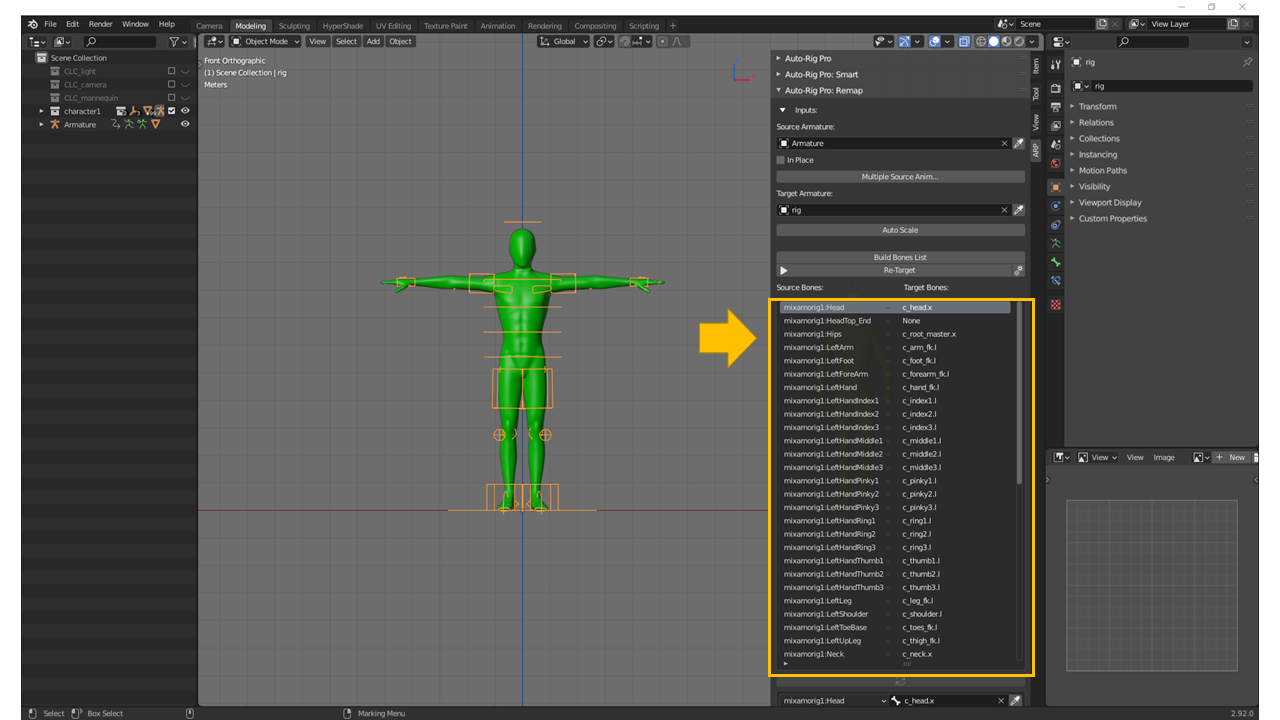
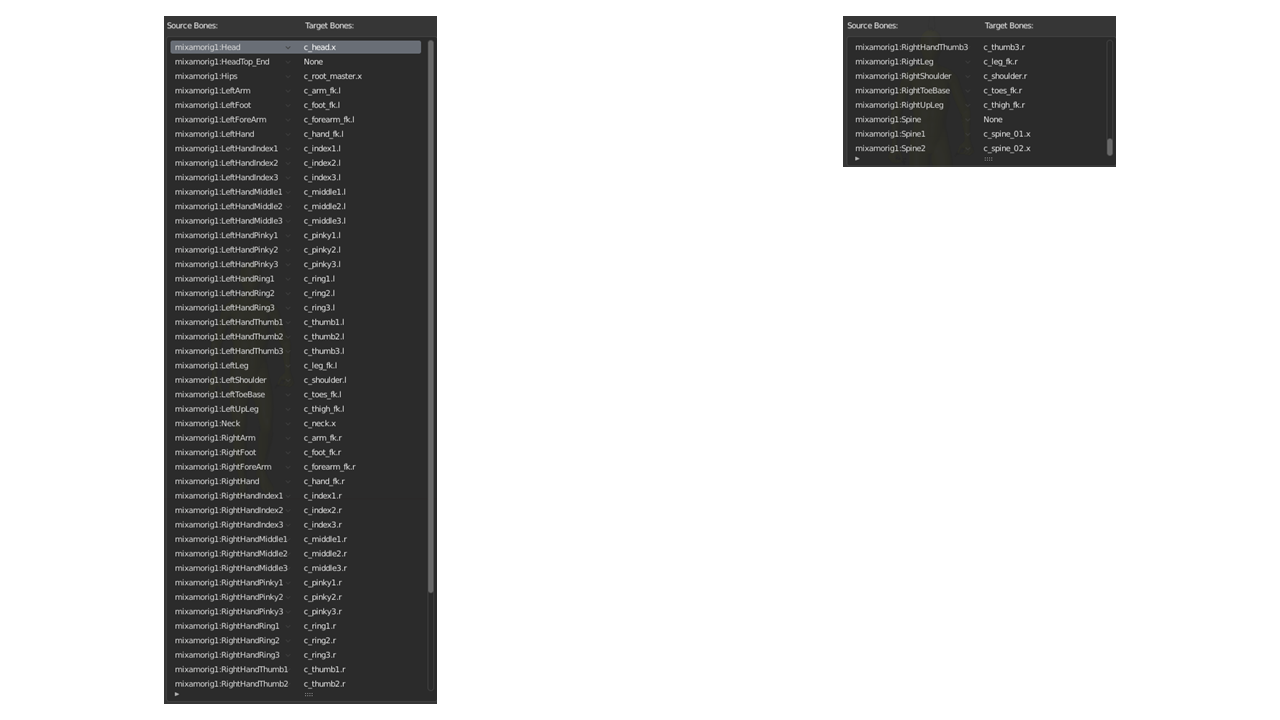
・ソースモデルとターゲットモデルのボーンの相関を自動で入力する
「ARP」タブ >>「Auto-Rig Pro: Remap」>> 「Inputs」>>>「Build Bones List」ボタン:Click
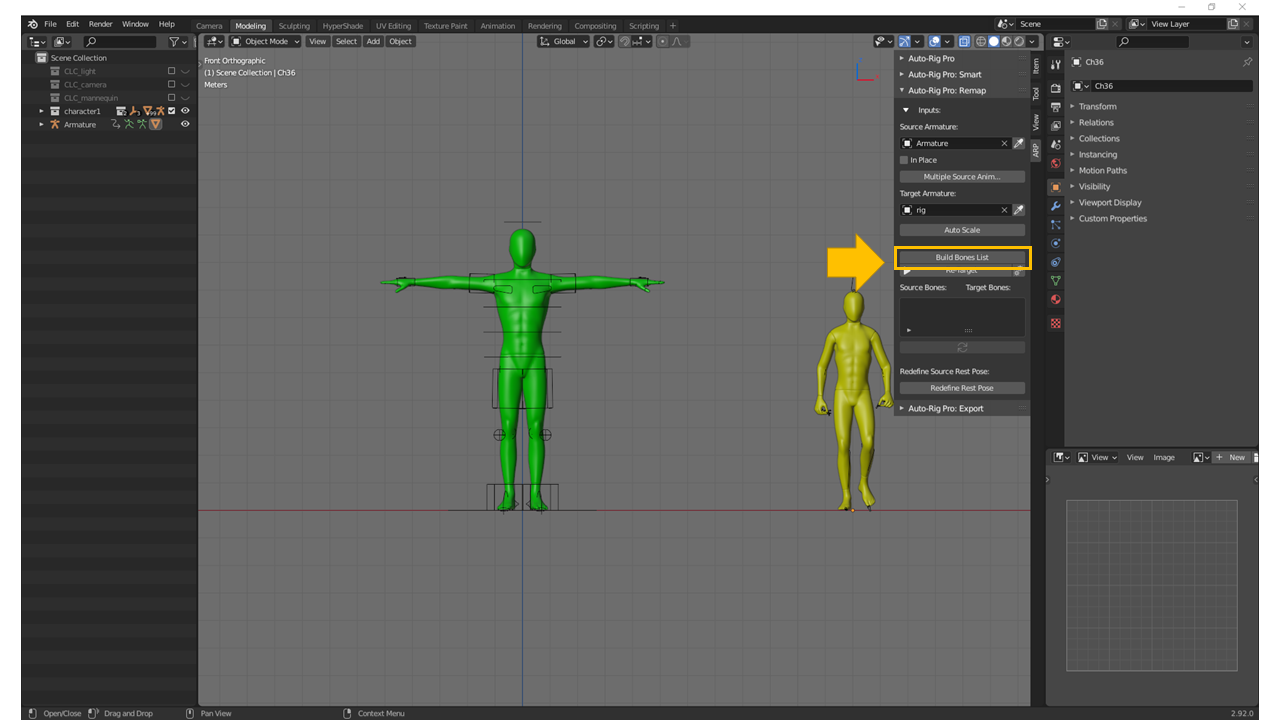

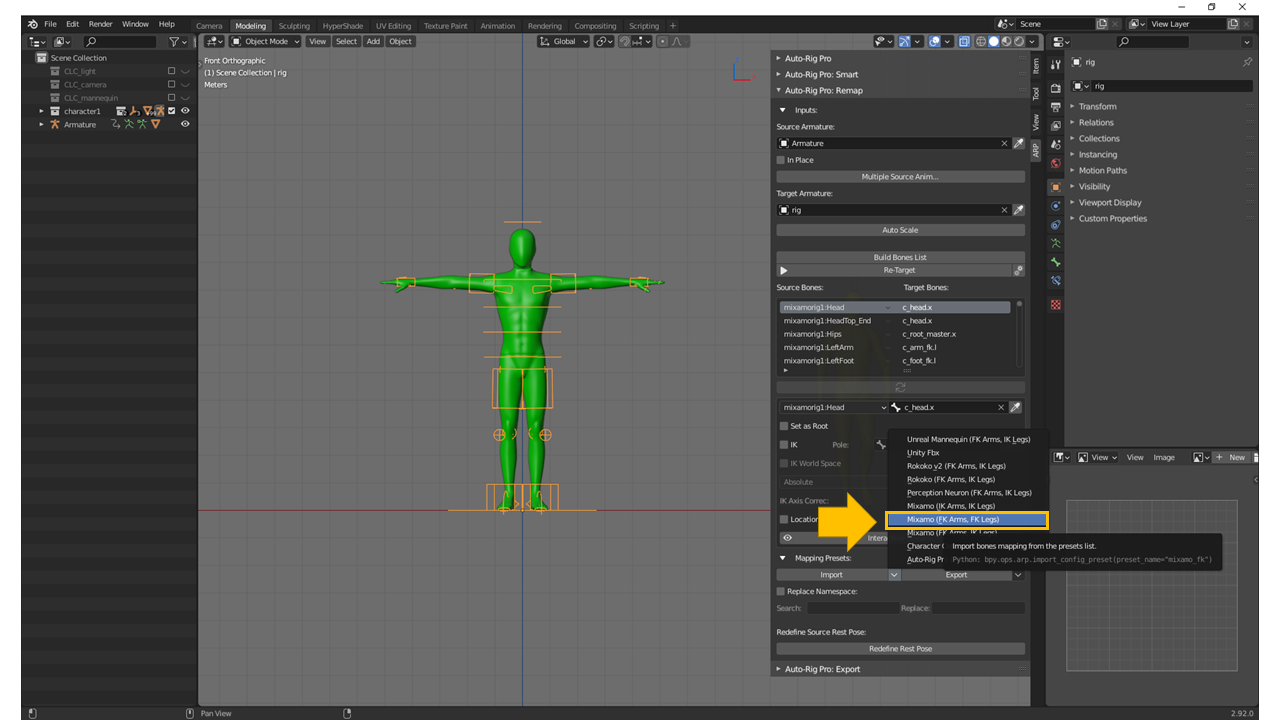
*「Auto-Rig Pro」にはボーンの相関のプリセットが用意してあり、今回のケースはそちらに該当する
「ARP」タブ >>「Auto-Rig Pro: Remap」>> 「Mapping Presets」>>>「Import」横ドロップダウンメニュー >> 該当するプリセット:Click
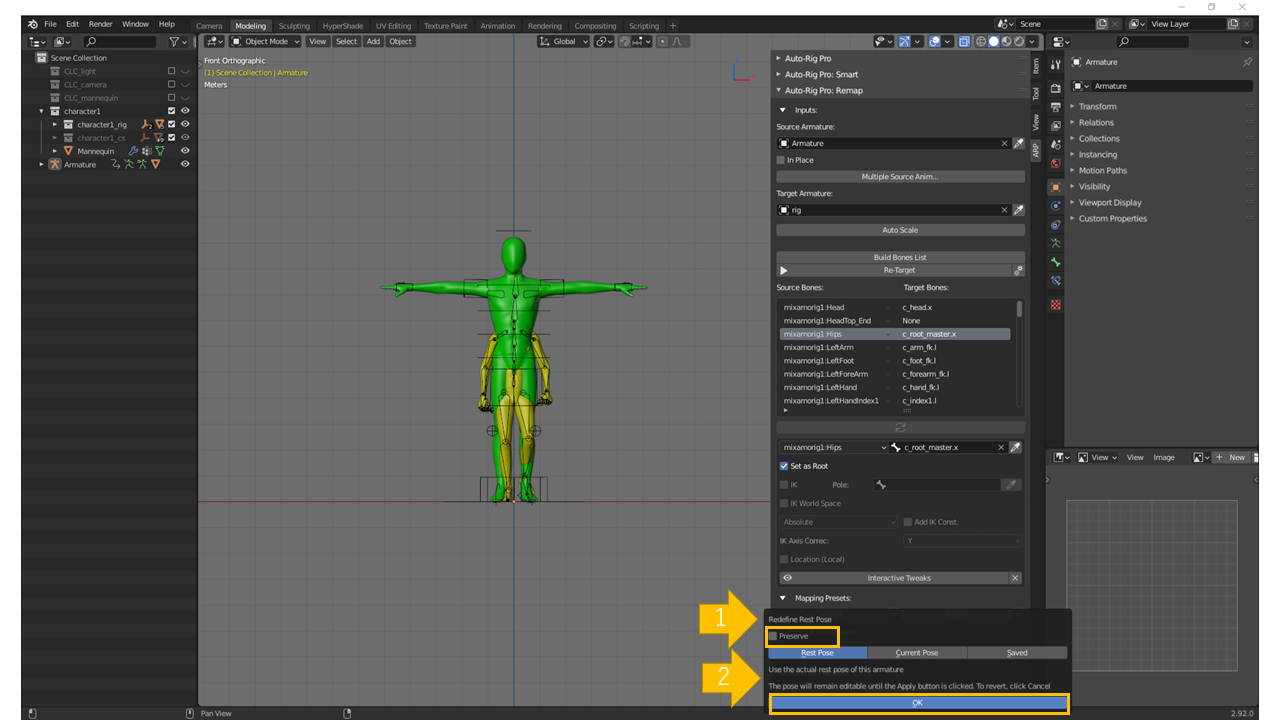
・ソースモデルのレストポーズをターゲットモデルのレストポーズと統一する
「ARP」タブ >>「Auto-Rig Pro: Remap」>> 「Mapping Presets」>>>「Redefine Source Rest Pose」>>>「Redefine Rest Pose」:Click
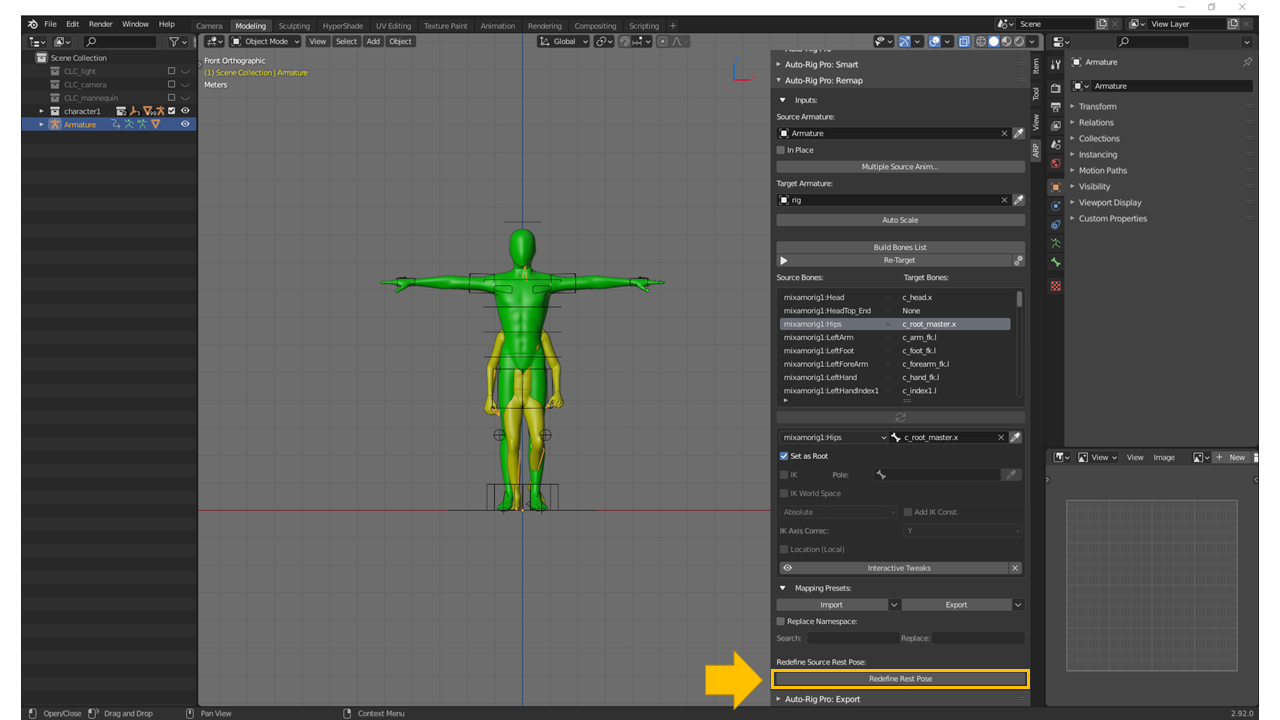
「Preserve」:Uncheck
「Redefine Rest Pose」ウィンドウ >>>「OK」ボタン:Click
ソースモデルのリグの変換したいボーンを選択する
「ARP」タブ >>「Auto-Rig Pro: Remap」>> 「Redefine Source Rest Pose」>>>「Copy Selected Bones Rotation」:Click
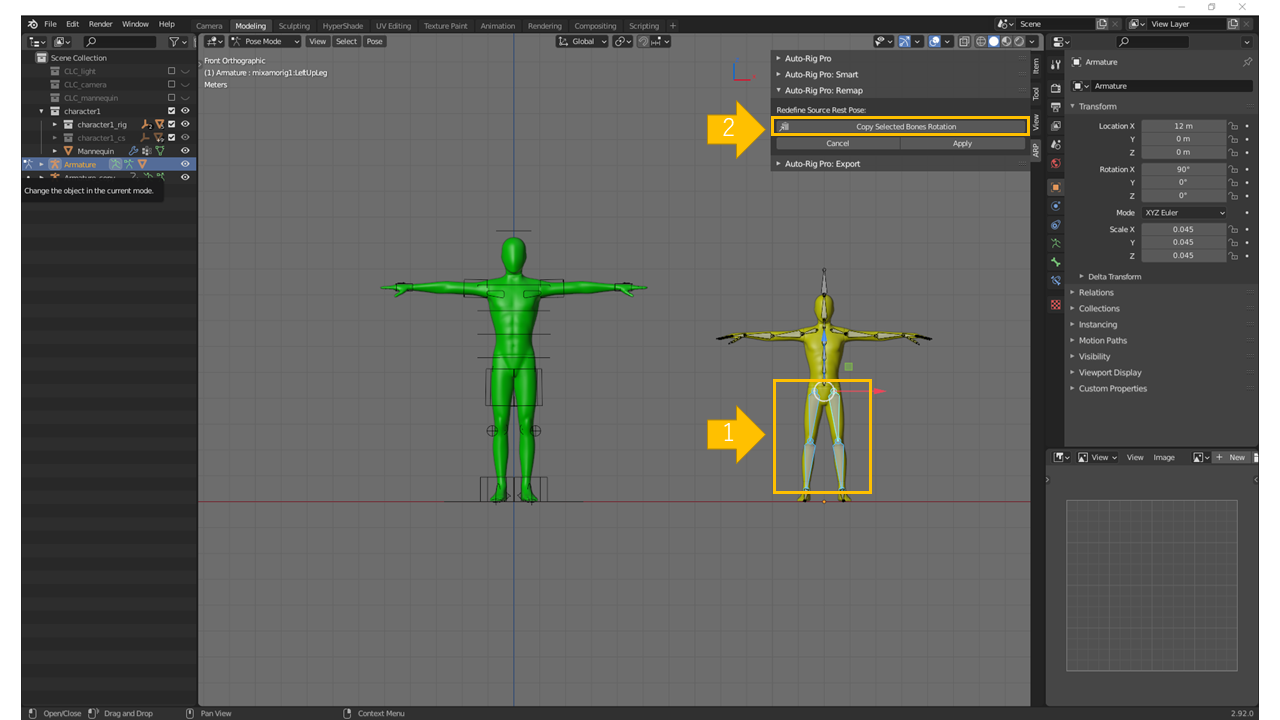
ソースモデルのリグの変換したいボーンが変換した事を確認する(この変換は一時的なものであり、「Apply」する事で実際に変換が行われる)
「ARP」タブ >>「Auto-Rig Pro: Remap」>> 「Redefine Source Rest Pose」>>>「Apply」:Click

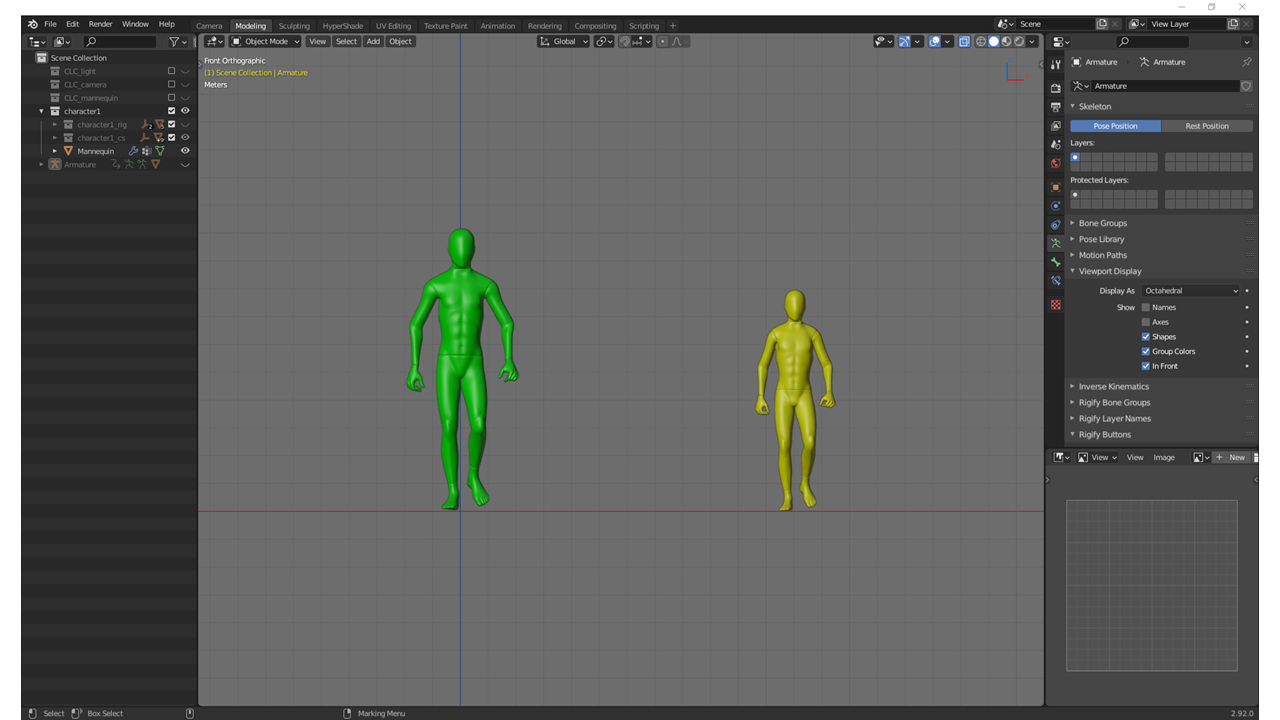
適用後、ソースモデルのリグのレストポーズを確認する

・ソースモデルのモーションをターゲットモデルへリターゲティングする
「ARP」タブ >>「Auto-Rig Pro: Remap」>> 「Re-Target」ボタン:Click(ソースモデルとターゲットモデルがポーズポジションである事を確認する)
*準備メモ:
リグ
スケール合わせ
レストポーズ合わせ
ボーン
相関を明示する
ルートを明示する
「KeyFrame Interpolation」:「Bezier」
「Re-Target」ウィンドウ >>「OK」ボタン:Click


・終わり
