こちらは「Rigify」(Blenderアドオン)を使用する方法についての記事となっております。
目次
- 基本情報 … Basic information
- 「Rigify」でモデルをリギングする方法(コントローラ付き)… How to Rig the 3D Model with Rigify / How to make Rigged 3D Model with Controller by using Rigify
- 「Rigify」でモデルをリギングする方法 … How to Rig the 3D Model with Rigify
- 「Rigify」でリグコントローラーをFK/IKを切り替えする方法 … How to Switch FK and IK Setting for the Rig Controller (Rigify)
基本情報 … Basic information
設定内アドオン名称
Rigging:Rigify
追加GUI
・「3D Viewport」>>「Add」>>「Armature」
「Armature」>>「Human (Meta-Rig)」

「Armature」>>「Animals」>>「Bird (Meta-Rig)」
「Armature」>>「Animals」>>「Cat (Meta-Rig)」
「Armature」>>「Animals」>>「Horse (Meta-Rig)」
「Armature」>>「Animals」>>「Shark (Meta-Rig)」
「Armature」>>「Animals」>>「Wolf (Meta-Rig)」

「Armature」>>「Basic」>>「Basic Human (Meta-Rig)」
「Armature」>>「Basic」>>「Basic Quadruped (Meta-Rig)」

・「Pose Mode」>>「Item」タブ >>「Rig Main Properties」
「Rigify」でモデルをリギングする方法(コントローラ付き)… How to Rig the 3D Model with Rigify / How to make Rigged 3D Model with Controller by using Rigify
検証環境
・Blender:2.92.0
前提
・リギングを行いたいモデルを用意する
・「Rigify」プラグインを有効化する

手順
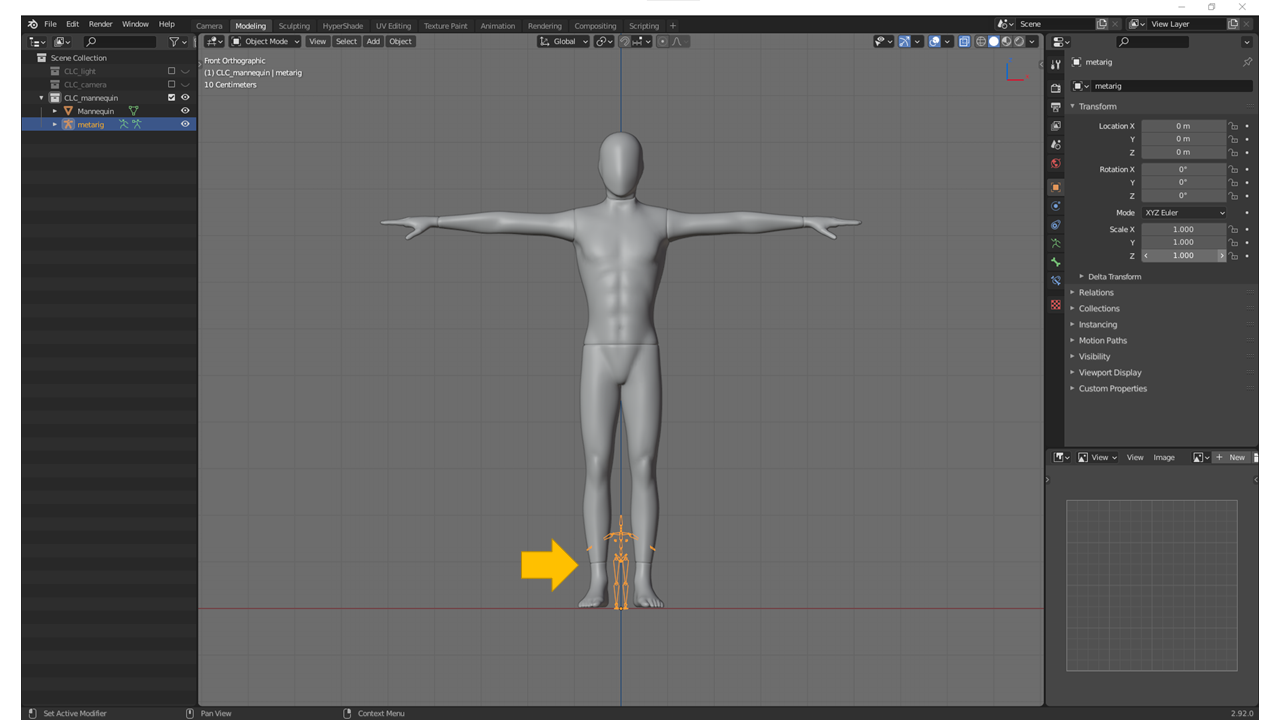
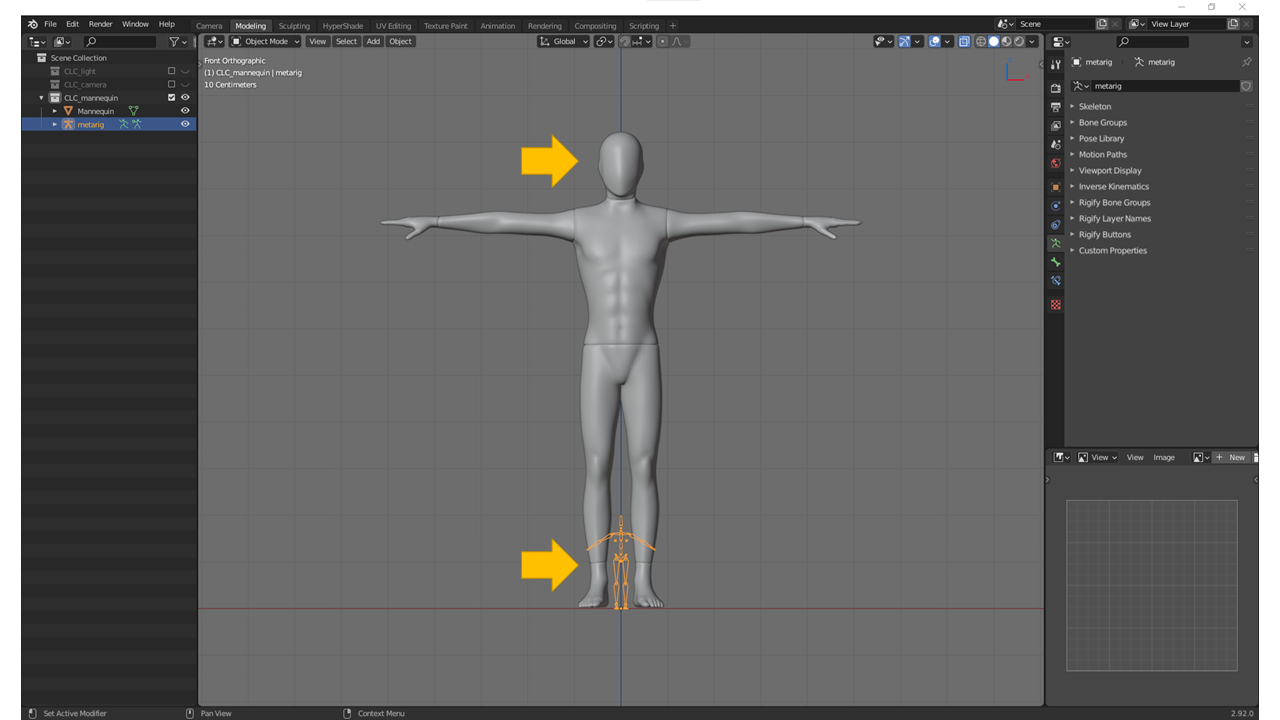
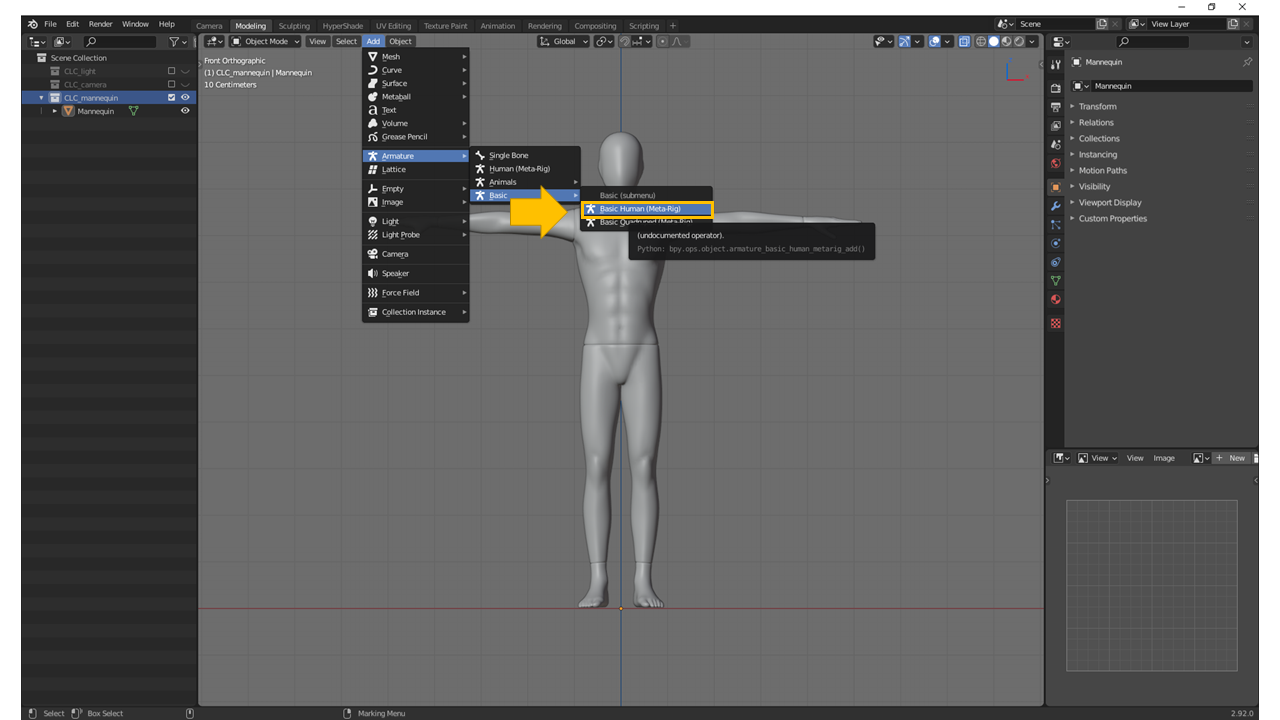
・Meta-Rig(Rigifyリグ)を追加する
「3D Viewport」>>「Object mode」>>「Add」>>「Armature」>>「Basic」>>「Basic Human (Meta-Rig)」

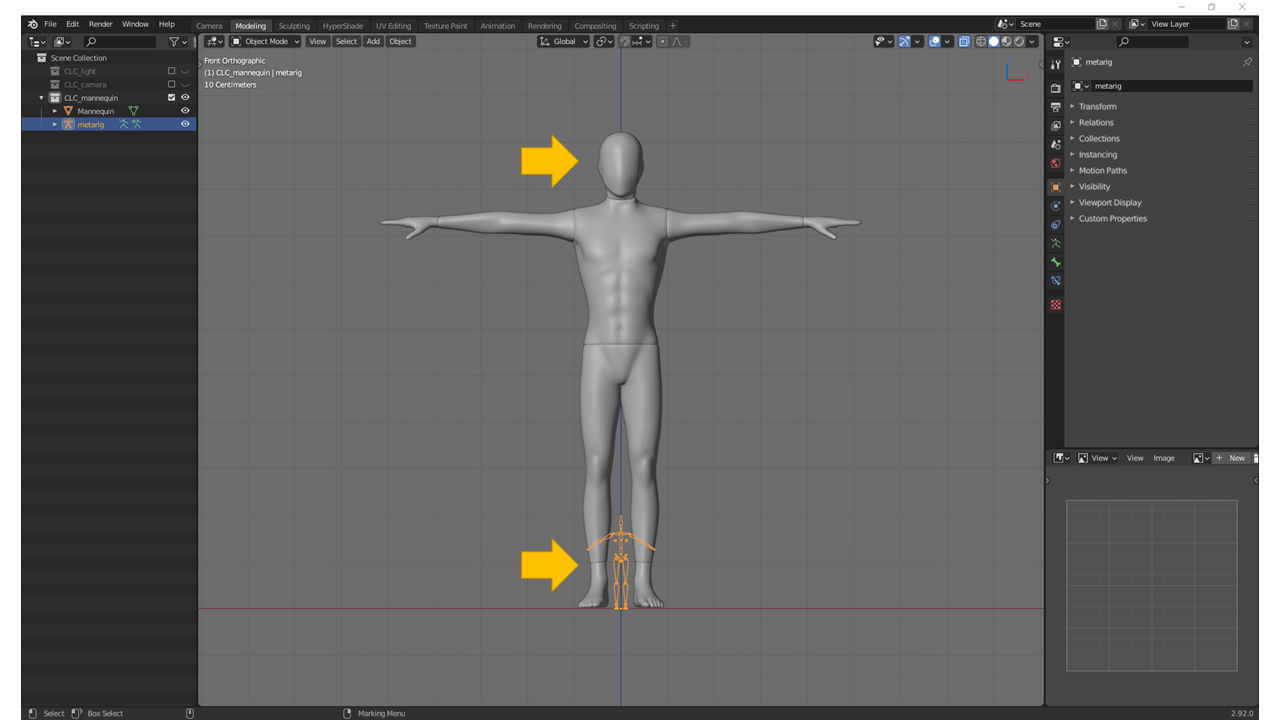
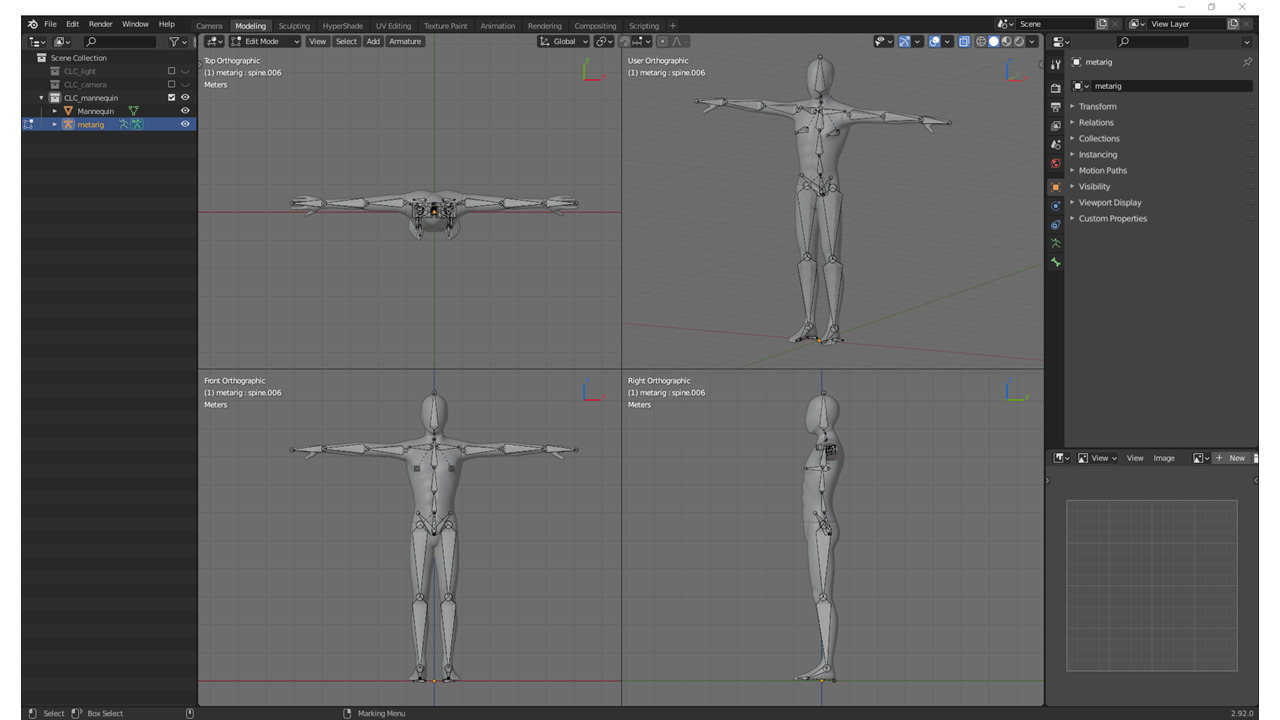
・「Object Mode」/「Edit mode」の状態で、Meta-Rig(Rigifyリグ)をモデルに合わせて調整する
*作業メモ:
・スケールを適用する
「Object」>>「Apply」>>「All Transforms」

*作業メモ:
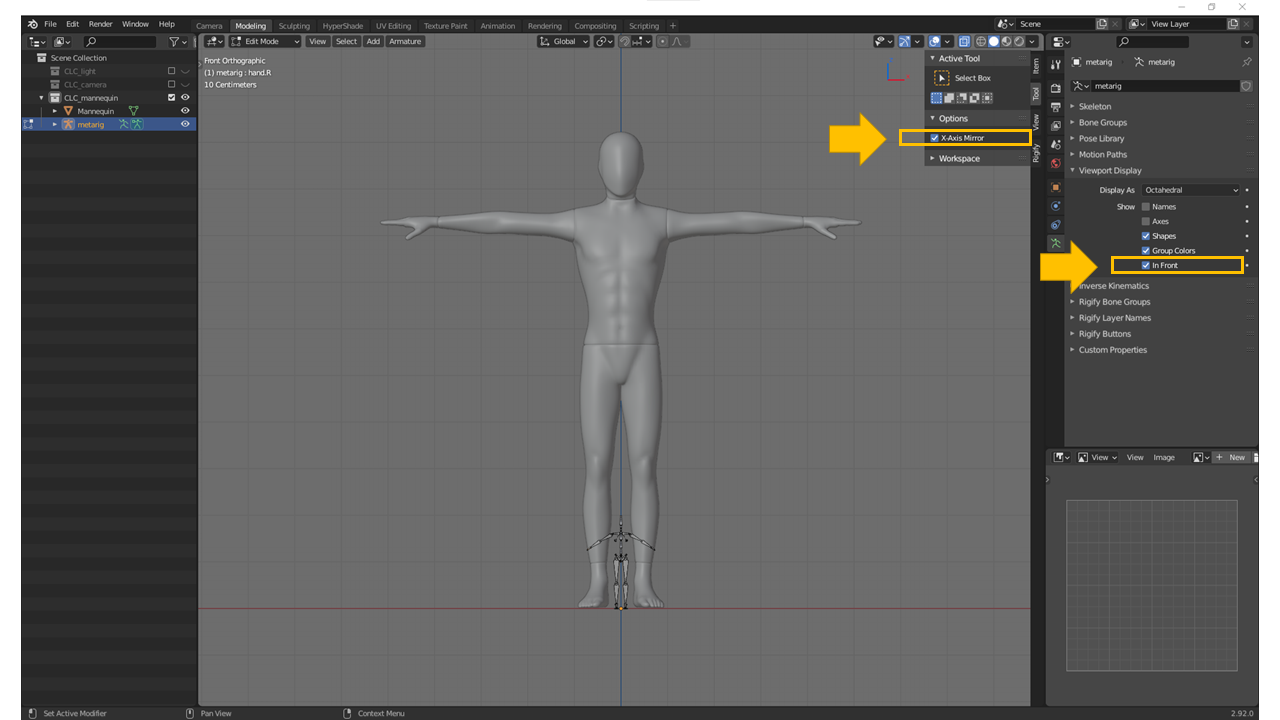
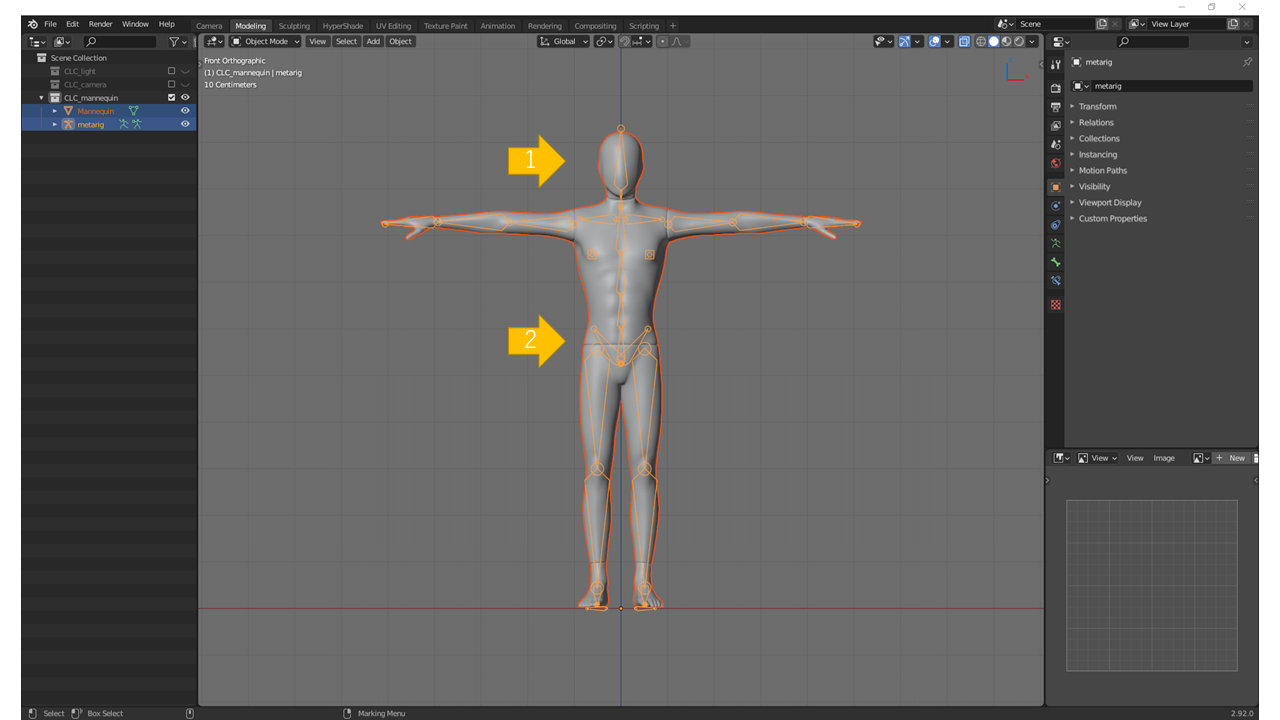
・リグを最前面表示に変更する
「metarig」>>「Object Data Properties」>>「Viewport Display」>>「Show」>>「In Front」:Check
・Xミラー
「3D Viewport」>>「Edit mode」>>「Tool」タブ >>「Pose Options」>>「X-Axis Mirror」:Check
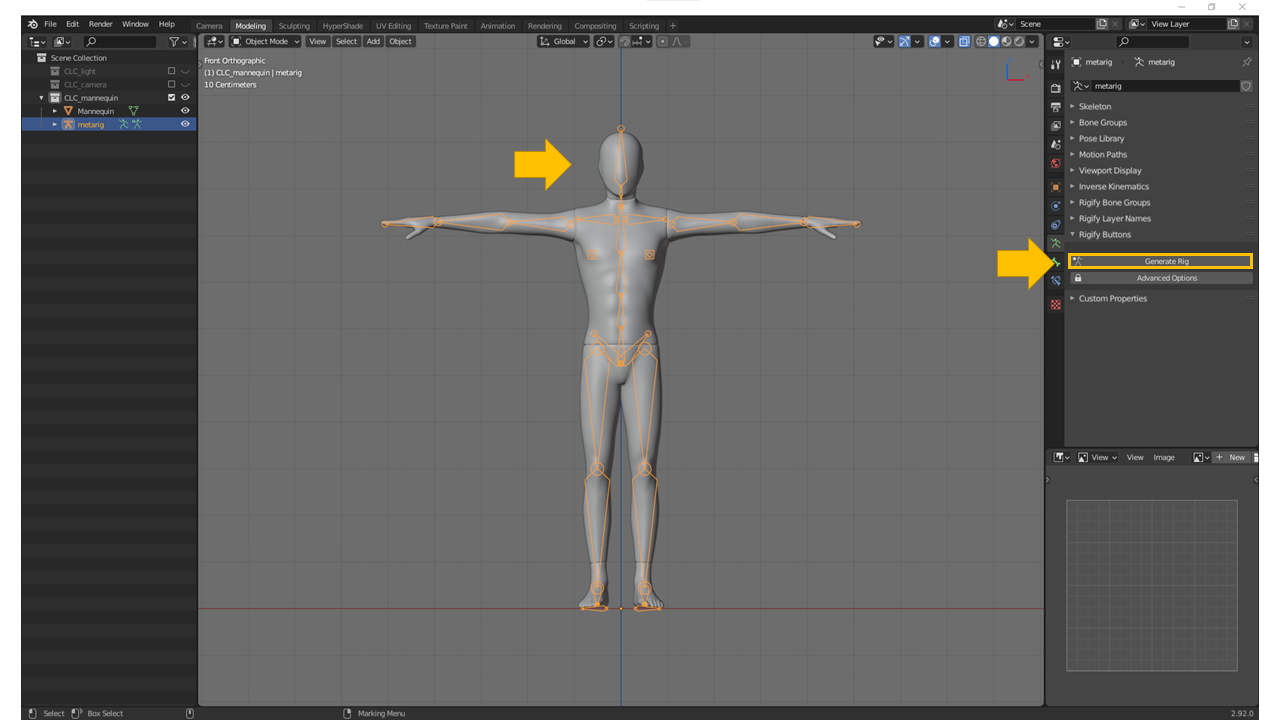
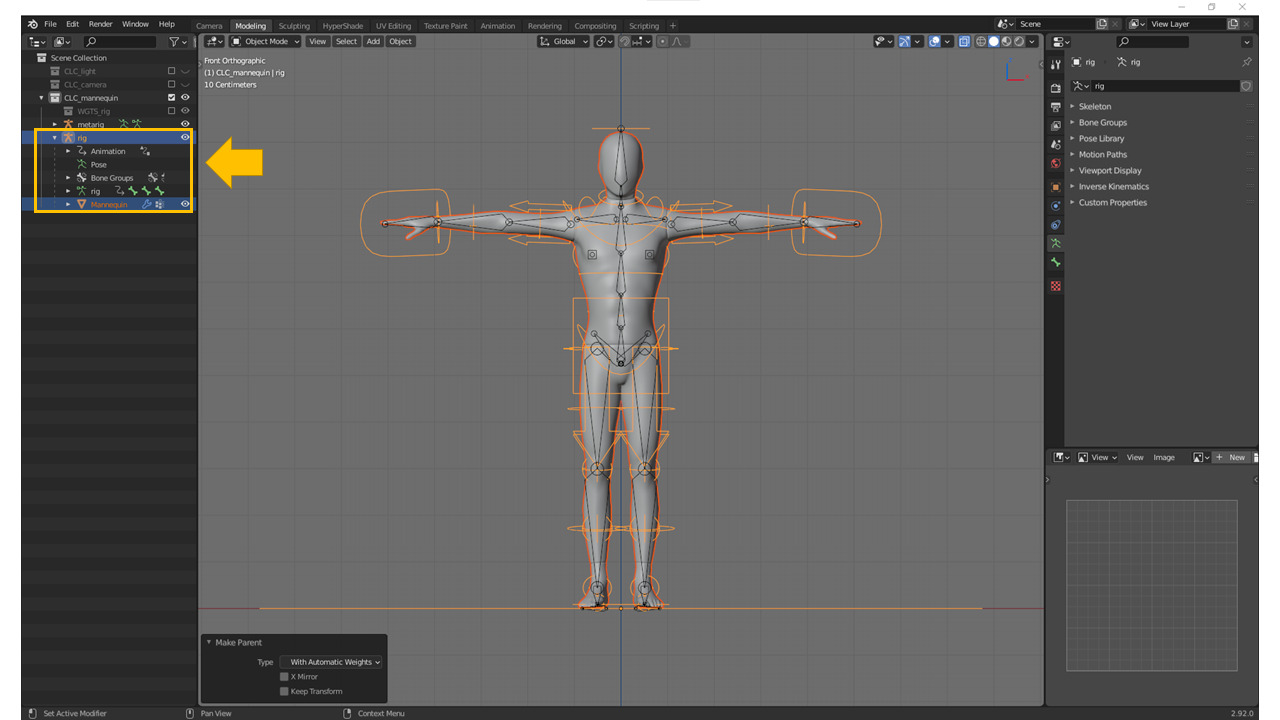
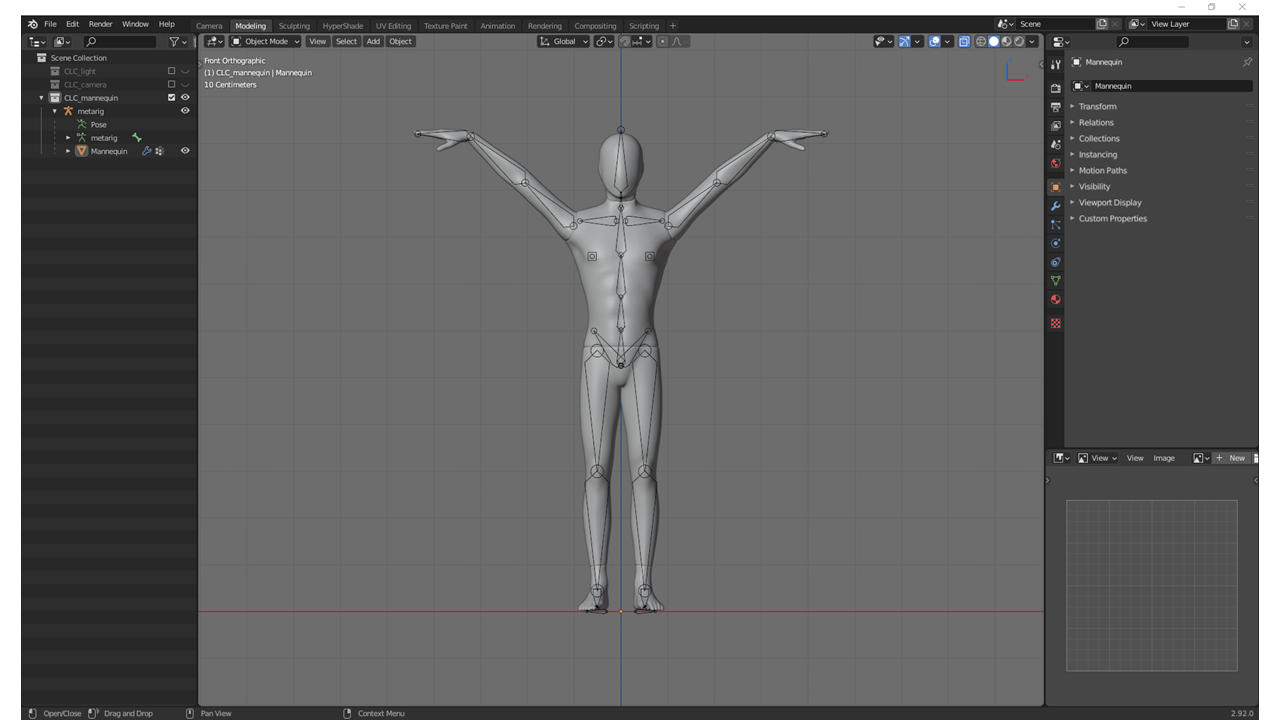
・「Object Mode」の状態で、Rig(Rigifyリグ)を生成する
「metarig」:Select>>「Object Data Properties」>>「Rigify Buttons」>>「Generate Rig」ボタン:Click

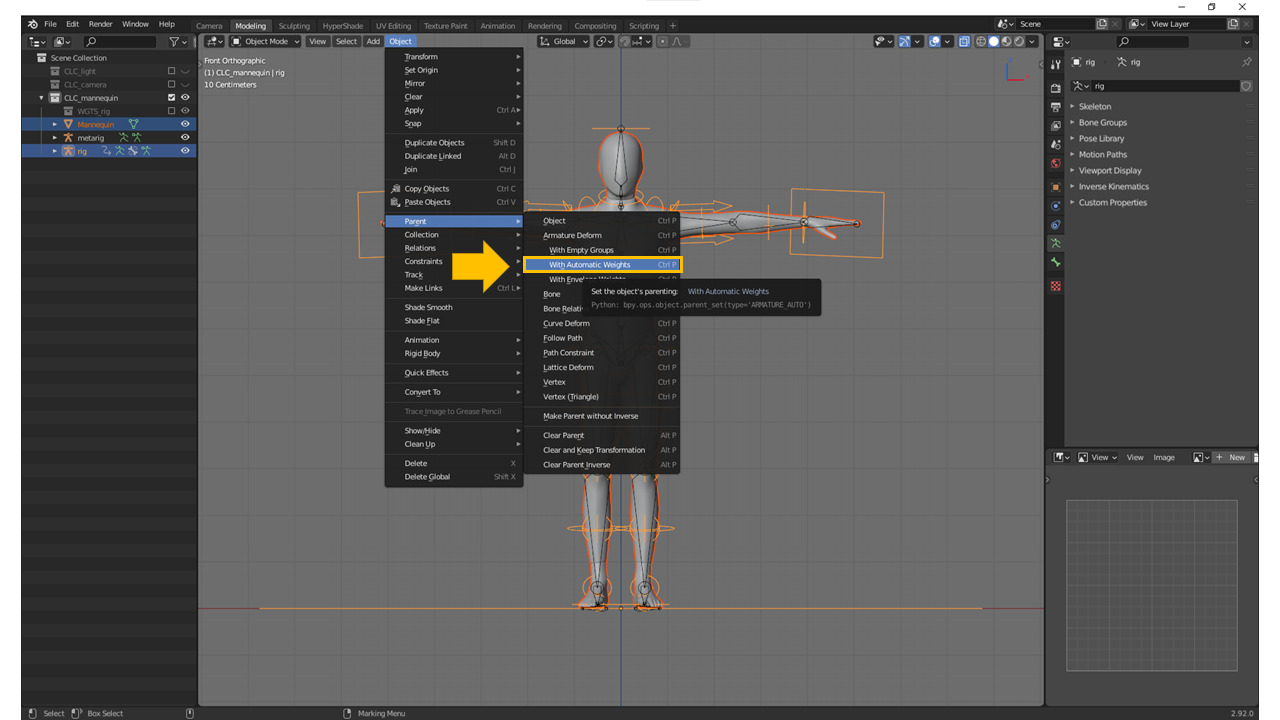
・「Object Mode」の状態で、Rig(Rigifyリグ)をモデルに紐づける
・モデルを選択する
・リグを続けて選択する
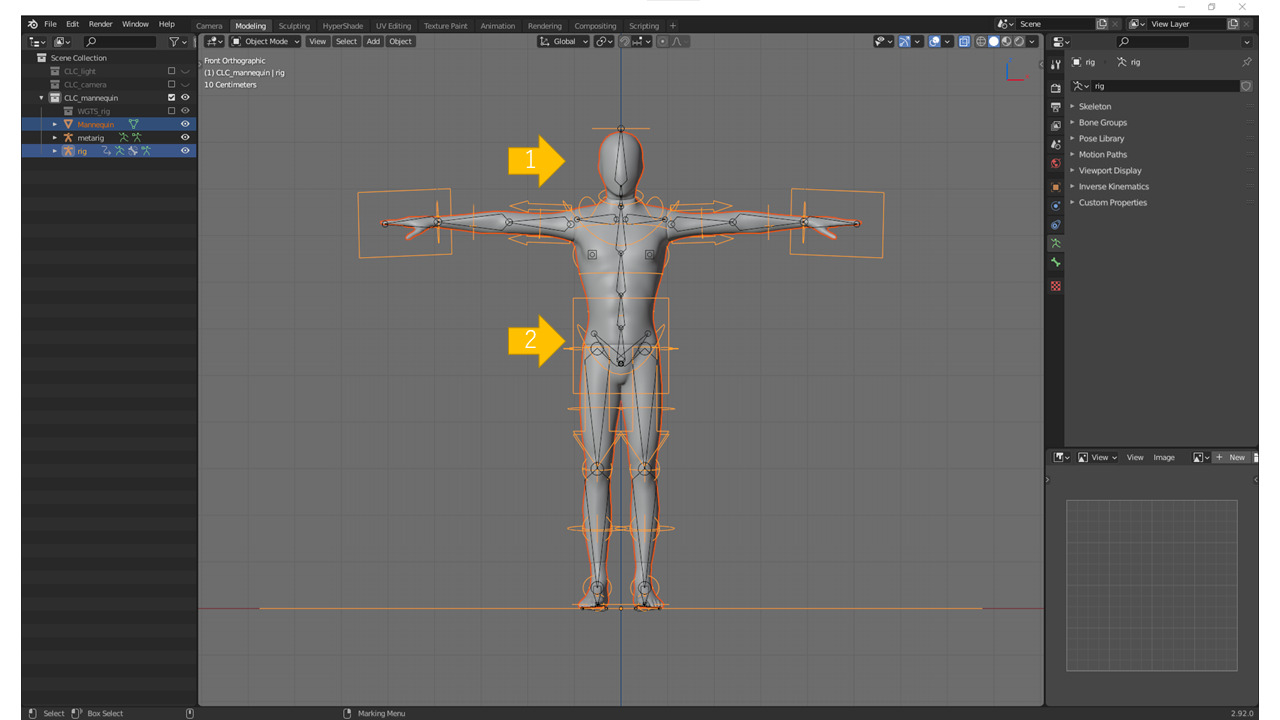
・ペアレント化する(親:リグ, 子:モデル)
「Object」>>「Parent」>>「Armature」>>「With Automatic Weights」
・終わり

「Rigify」でモデルをリギングする方法 … How to Rig the 3D Model with Rigify
検証環境
・Blender:2.92.0
前提
・リギングを行いたいモデルを用意する
・「Rigify」プラグインを有効化する

手順
・Meta-Rig(Rigifyリグ)を追加する
「3D Viewport」>>「Object mode」>>「Add」>>「Armature」>>「Basic」>>「Basic Human (Meta-Rig)」

・「Object Mode」/「Edit mode」の状態で、Meta-Rig(Rigifyリグ)をモデルに合わせて調整する
*メモ:
・リグを最前面表示に変更する
「metarig」>>「Object Data Properties」>>「Viewport Display」>>「Show」>>「In Front」:Check
・Xミラー
「3D Viewport」>>「Edit mode」>>「Tool」タブ >>「Pose Options」>>「X-Axis Mirror」:Check

・「Object Mode」の状態で、Meta-Rig(Rigifyリグ)をモデルに紐づける
・モデルを選択する
・リグを続けて選択する
・ペアレント化する(親:リグ, 子:モデル)
「Object」>>「Parent」>>「Armature」>>「With Automatic Weights」


・終わり
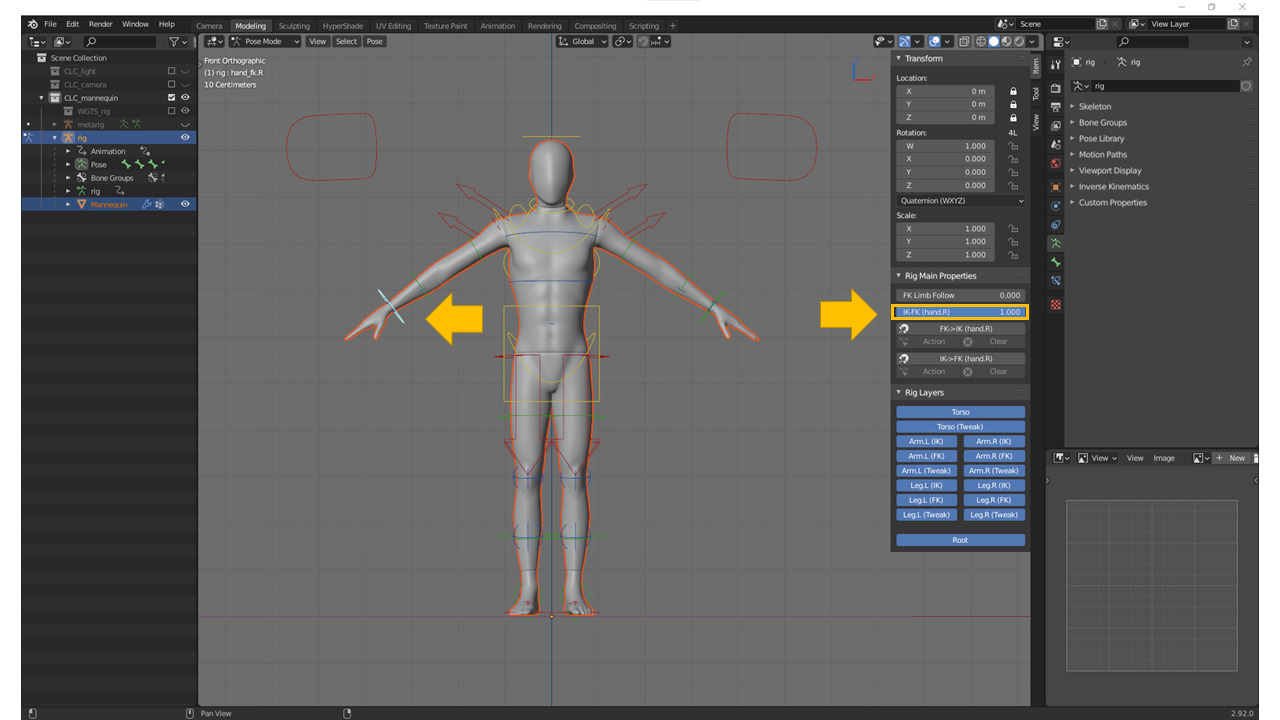
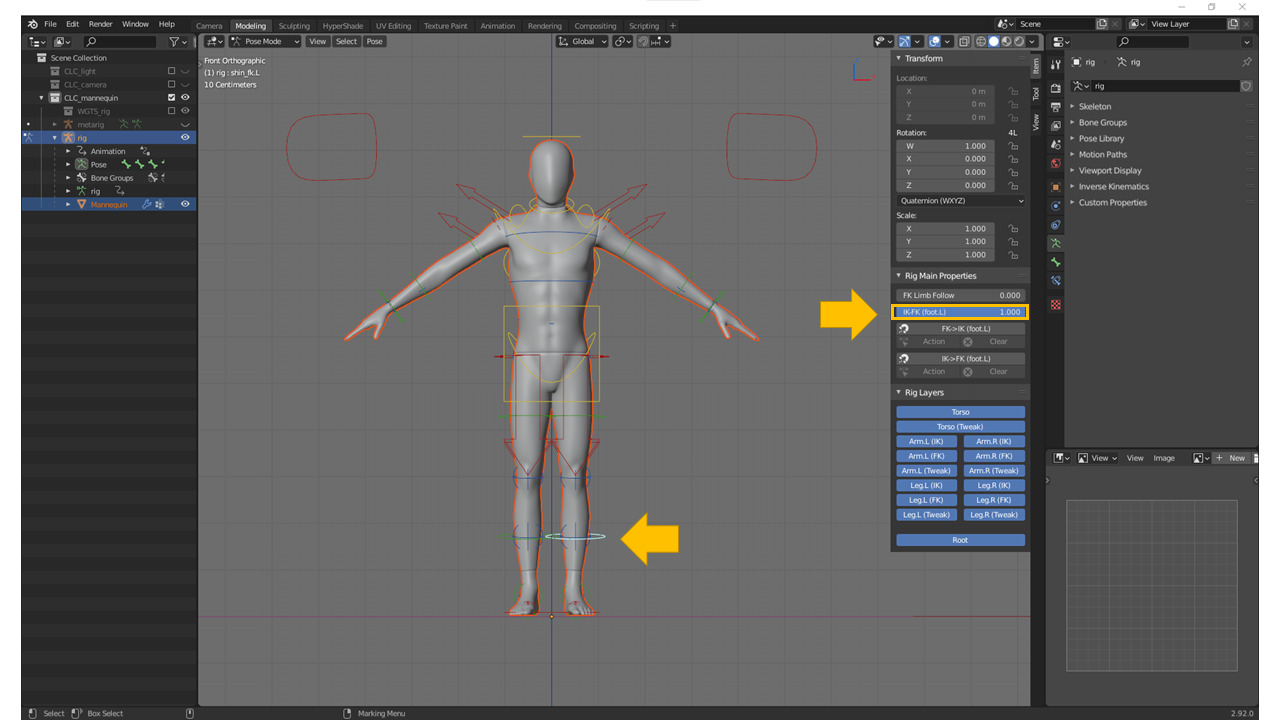
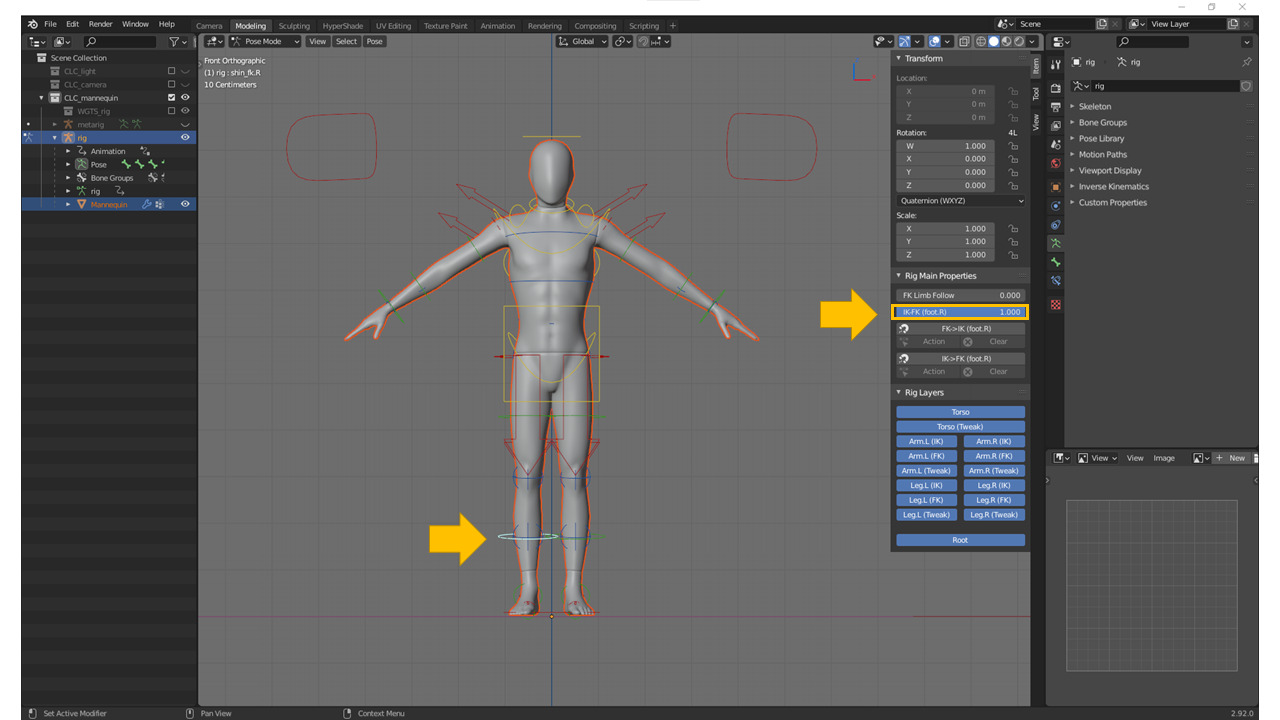
「Rigify」でリグコントローラーをFK/IKを切り替えする方法 … How to Switch FK and IK Setting for the Rig Controller (Rigify)
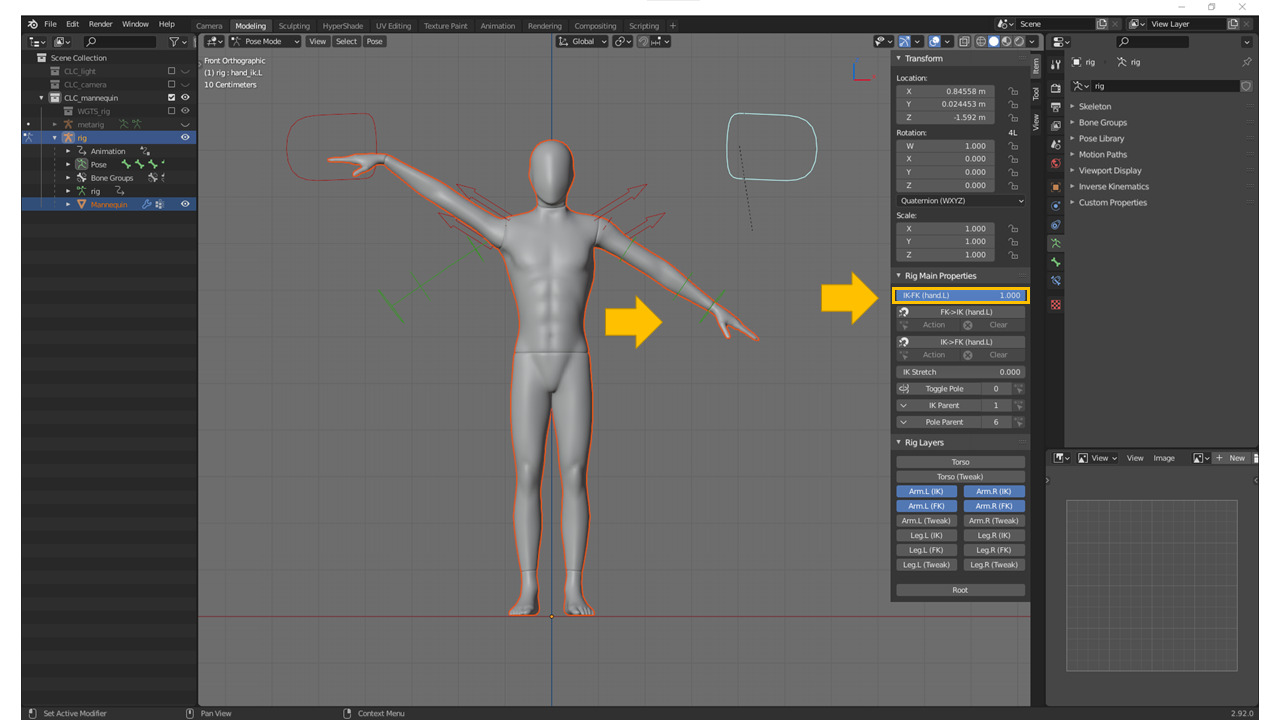
・始め(IKの状態)

・IKからFKへ切り替える
「Pose Mode」>>「Item」タブ >>「Rig Main Properties」>>「IK-FK (hand.L)」:1.000
*作業メモ:
IK →「IK-FK (部位名称)」:1.000
FK →「IK-FK (部位名称)」:0.000
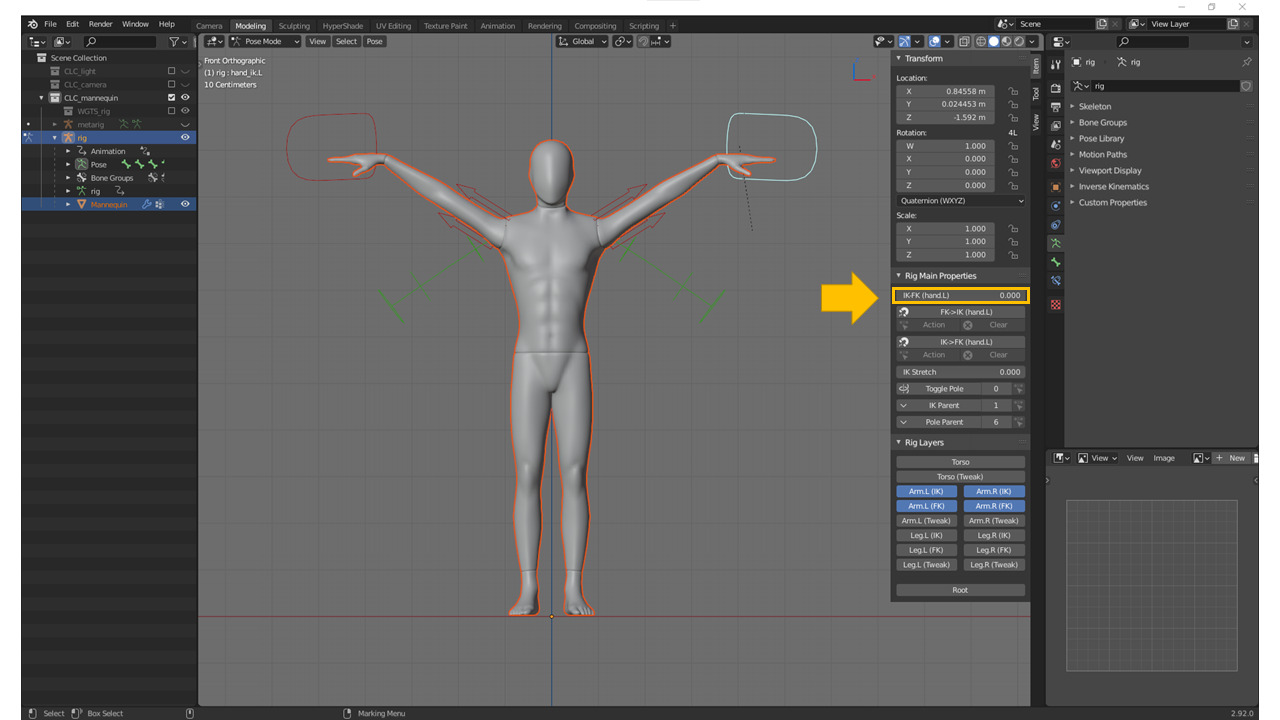
・FKからIKへ切り替える
「Pose Mode」>>「Item」タブ >>「Rig Main Properties」>>「IK-FK (hand.L)」:0.000

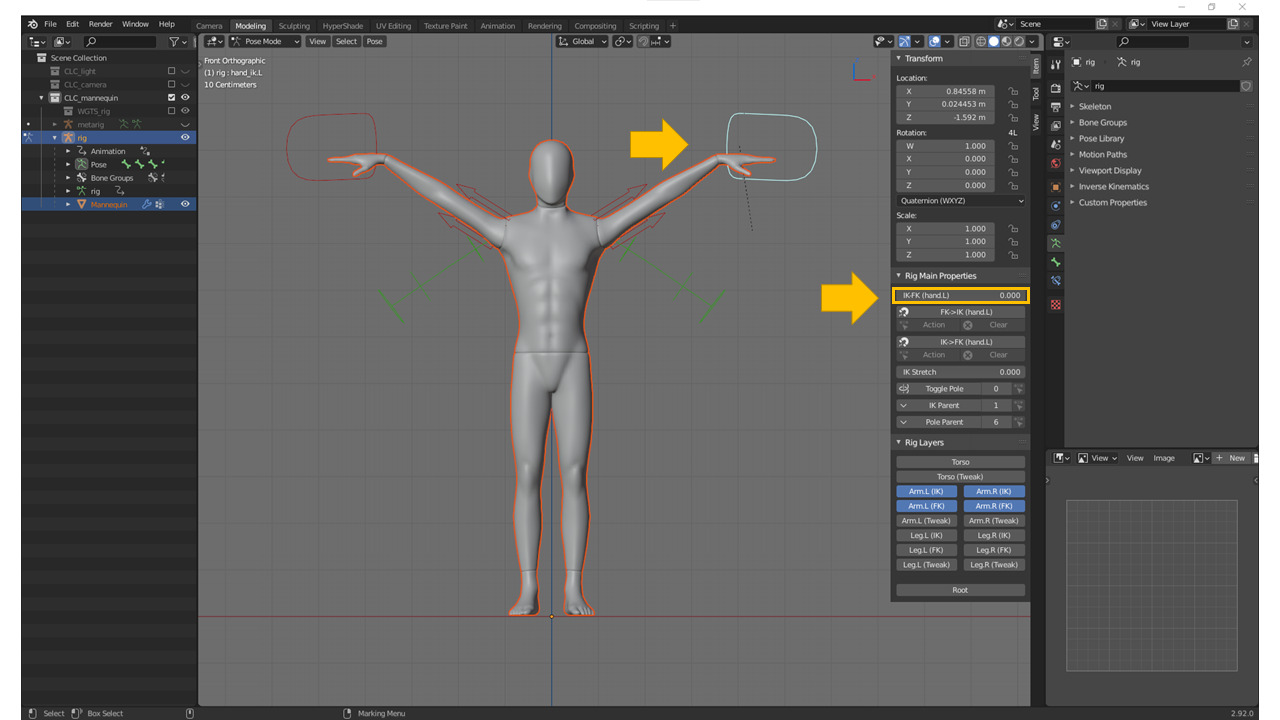
*作業メモ:
FKとIKを切り替え可能な部位名称
・「IK-FK (hand.L)」
・「IK-FK (hand.R)」
・「IK-FK (foot.L)」
・「IK-FK (foot.R)」